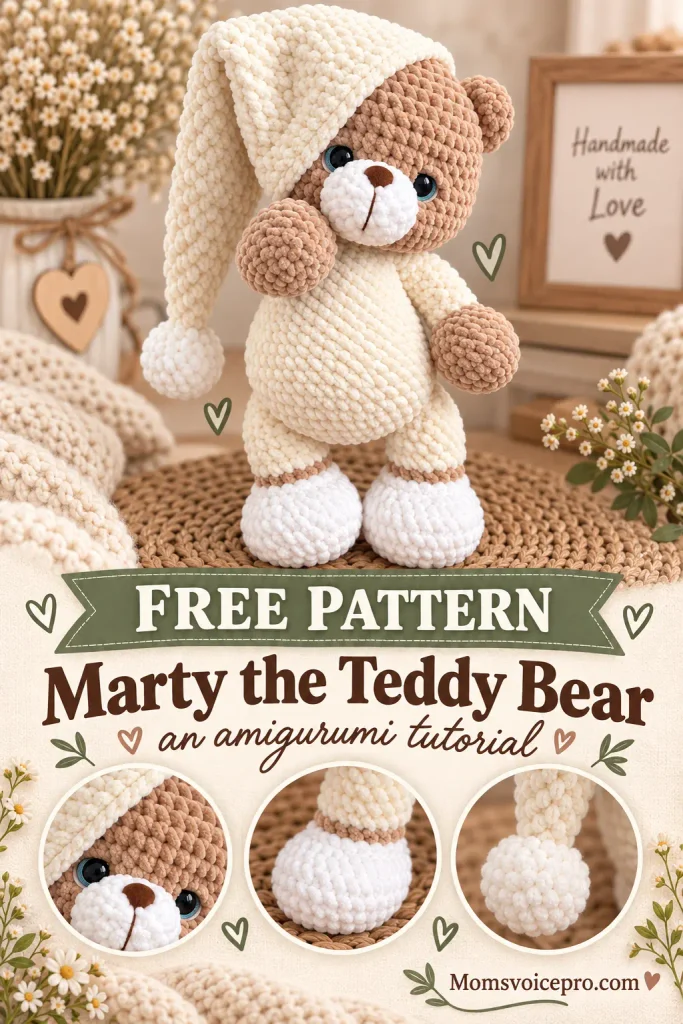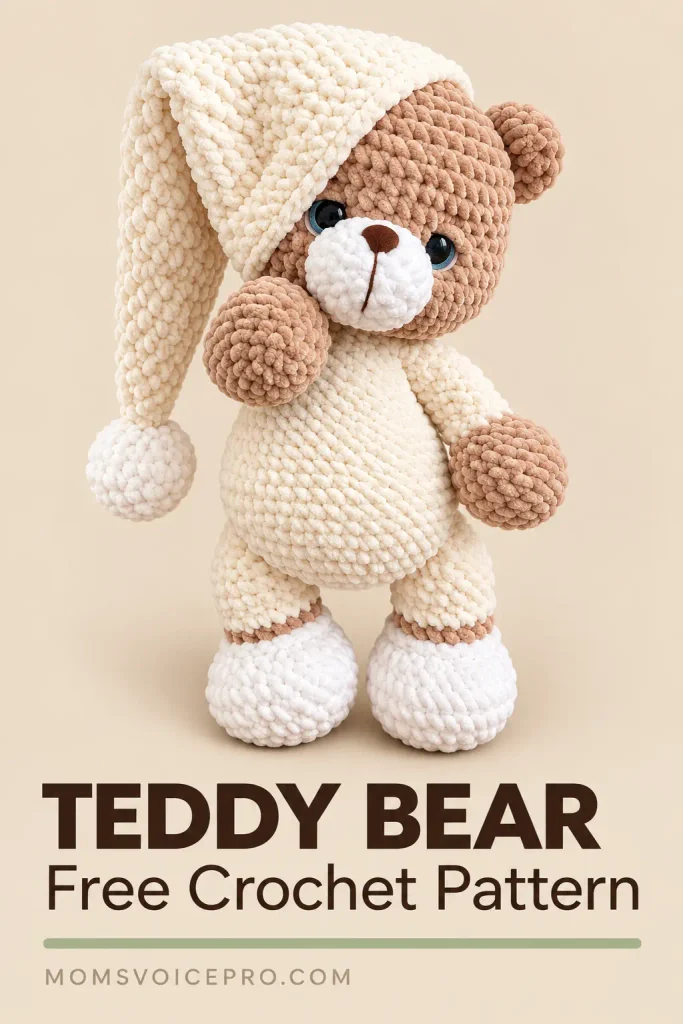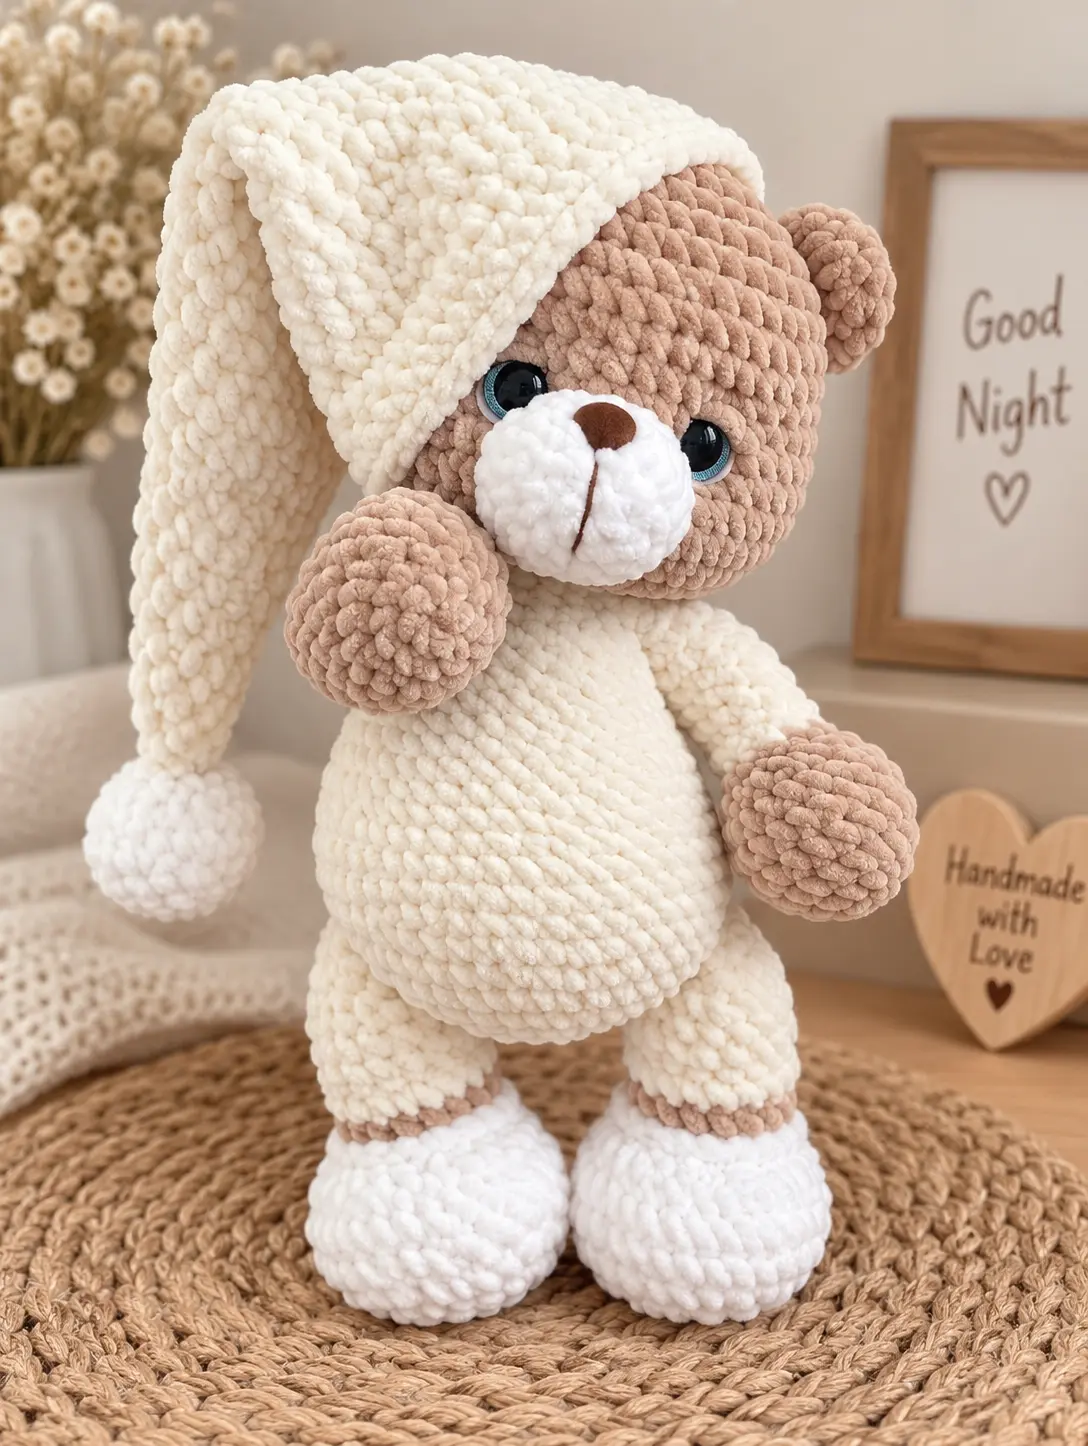
Marty might be the most versatile amigurumi in my whole pattern library – this one pattern actually gives you two bears in one. Make him plain and huggable in a single color, or dress him in a full color-blocked pajama set with slippers, sleeves, a sleepy nightcap and a pompom. The head, ears, snout and face are identical either way, so you’re really just choosing your own adventure at the legs.
This free pattern includes complete instructions for both versions, plus the needle-sculpting technique that gives Marty his soft, rounded muzzle and sleepy eyes – the same trick professional amigurumi designers use to take a toy from “cute” to “irresistible.”
Table of Contents
Materials Needed
- Super Bulky / 14ply chenille yarn, YarnArt Dolce No.747 – for a plain bear without clothes, about 1.5 skeins, plus a little white for the whites of the eyes and cream No.745 for the snout
- For the pajama version: YarnArt Dolce No.747 (half a skein) and No.741 (¼ skein) for the bear itself, Himalaya Dolphin Baby No.347 (1.5 skeins) for the pajamas and cap, plus YarnArt Dolce No.745 and white No.741 for the snout
- Fine / 4ply yarn, YarnArt Jeans No.70 – for attaching the safety nose
- Glitter safety eyes, 16mm
- Velvet brown safety nose, 12x15mm
- Stuffing material
- Needle and scissors
- Crochet hook, 5mm (or whichever size matches your gauge – anywhere from 3.5mm to 5mm works)
- A lighter, for securing the safety eye and nose posts
Abbreviations
- MR – magic ring
- SC – single crochet
- SL ST – slip stitch
- INC – increase (2 sc in one stitch)
- DEC – decrease (2 sc together)
- CH – chain
- DC – double crochet
- HDC – half double crochet
- HDC2TOG – 2 hdc crocheted together
- * – number of repetitions in the round
- (N) – number of stitches in the round
A Quick Note Before You Start
Marty is crocheted in a spiral. At the end of every round, place a stitch marker in a contrasting color – you do NOT need a turning chain, or you'll end up with an unsightly seam. If you're newer to amigurumi, count your stitches at the end of each round as you go; be patient and you'll get there.
A lighter is used throughout to strengthen the safety eye and nose fittings – more on exactly how in the Head and Snout sections below.
First you'll crochet all the pieces for a plain Teddy Bear without clothes. Once those are covered, the pattern moves into the pajama version – the head, ears, snout and face design are identical for both, and the body is worked the same way too, just in different colors. The only real difference between the two bears is in how the legs are crocheted.
Head
- 1. 6sc in a MR
- 2. 6inc (12)
- 3. (1sc, inc)*6 (18)
- 4. (2sc, inc)*6 (24)
- 5. (3sc, inc)*6 (30)
- 6. (4sc, inc)*6 (36)
- 7. 36sc
- 8. (5sc, inc)*6 (42)
- 9–11. 42sc
- 12. 7sc, (1sc, inc)*3, 15sc, (1sc, inc)*3, 8sc (48)
- 13–16. 48sc
- 17. 7sc, (1sc, dec)*3, 15sc, (1sc, dec)*3, 8sc (42)
- 18. (5sc, dec)*6 (36)

Placing the safety eyes into the head between rounds 12 and 13.
Insert the safety eyes between rounds 12 and 13. The distance between the eyes, measured from the edge of the eye (not the leg/post), should be 6sc across the middle. Count 3sc from the third increase in round 12 (right cheek) for one eye, and 3sc to the first increase (left cheek) for the other.
- 19. (4sc, dec)*6 (30) – stuff the head
- 20. (3sc, dec)*6 (24)
- 21. (2sc, dec)*6 (18), then 2sc + 1 sl st to align
Cut the yarn and hide the ends. For sewing the head on later, cut a long thread from your main yarn, fold it in half – but don't sew the head on yet, not until it's fully decorated! Stuff the cheeks well, pushing fiberfill from the center of the head out toward the edges so it's evenly distributed across the increases and decreases.

A well-stuffed head, ready for the snout and ears.
Ears (Make 2)
- 1. 6sc in a MR
- 2. 6inc (12)
- 3–4. 12sc
Fold in half and crochet 6sc through both layers together to close. Leave a long end for sewing. Sew the ears on between rounds 4 and 11.

Folding and closing the ear before sewing it onto the head.
Snout
- 1. 6sc in a MR
- 2. 6inc (12)
- 3. (1sc, inc)*6 (18)
- 4. 18sc + 2 extra sc + 1 sl st
Leave a long end for sewing. Attach the YarnArt Jeans yarn to the safety nose in advance, then insert the nose between rounds 3 and 4 – don't forget to pull the short yarn end through to the wrong side of the snout and hide it inside. Secure the nose with its plug, then use a lighter to briefly heat the post tip and pinch it flat, just as you did for the eyes. Sew the snout onto the head between rounds 12 and 19.
Face Design & Needle Sculpting
Once every piece is sewn on, it's time for needle sculpting – the step that really brings Marty's expression to life. Insert the needle into the opening on the head at point “A,” exit at point “B,” insert again at point “C,” exit at point “D,” then insert back into “D” and pull the needle back out through the original hole at “A.” Gently tighten to shape the snout, tie off in a knot, and secure it to the back loop. Repeat the whole tightening sequence two more times for a well-defined shape.

The needle path for tightening the snout – A to B, C to D, then back through A.
Next, shape the snout further: use a brown thread to form the muzzle line, tighten it, and tie the ends off behind the back loop of the round. Use that same thread to embroider the eyebrows, then fasten off again and hide the ends inside the head. For the eyes, take your main yarn and embroider the upper eyelid, then use white thread to embroider the whites of the eyes underneath.

The eyebrows embroidered and both ears sewn on – Marty's expression comes together here.
Legs for the Bear Without Clothes
Crochet the legs first, since they're joined into the body as you go. This version is worked entirely in a single color.
Hind Legs – Right
- 1. 6sc in a MR
- 2. 6inc (12)
- 3. (1sc, inc)*6 (18)
- 4. (2sc, inc)*6 (24)
- 5. (3sc, inc)*6 (30)
- 6–7. 30sc
- 8. (1sc, dec)*6, 12sc (24)
- 9. 6dec, 10sc – move the round marker here (18). Just move it, don't count stitches again.
- 10–16. 18sc
- 17. (1sc, dec)*6 (12) – crochet 2–4 extra sc if necessary, fold in half and crochet 6sc through both layers.
Stuff the leg tightly up to the middle, and firmly at the very top. Don't stuff it stony-hard – distribute the fiberfill out from the center toward the sides as you gently stuff.
Hind Legs – Left
- 1. 6sc in a MR
- 2. 6inc (12)
- 3. (1sc, inc)*6 (18)
- 4. (2sc, inc)*6 (24)
- 5. (3sc, inc)*6 (30)
- 6–7. 30sc
- 8. 12sc, (1sc, dec)*6 (24)
- 9. 12sc, 6dec (18) – don't compare the two legs stitch-for-stitch; just crochet each exactly as written.
- 10–16. 18sc
- 17. (1sc, dec)*6 (12) – crochet 2–4 extra sc if necessary, fold in half and crochet 6sc through both layers. Stuff tightly to the middle, firmly at the top.


Right and left hind legs – each closes from a different direction on purpose.
Each hind leg closes from a different direction: one leg closes at the toe, the other at the heel. Keep the wrong side of each closure facing inward, toward where the body will be, when you join them.

Outside part vs. inside part – keep this orientation in mind when you join the legs to the body.
Forelegs – Right
- 1. 6sc in a MR
- 2. 6inc (12)
- 3. (1sc, inc)*6 (18)
- 4. (8sc, inc)*2 (20)
- 5–6. 20sc
- 7. (1sc, dec)*4, 8sc (16)
- 8. 4dec, 6sc – move the round marker here! (12)
- 9–15. 12sc
- 16. (2sc, dec)*3 (9) – crochet 2–3 extra sc if necessary, fold in half and crochet 4sc through both layers.
Forelegs – Left
- 1. 6sc in a MR
- 2. 6inc (12)
- 3. (1sc, inc)*6 (18)
- 4. (8sc, inc)*2 (20)
- 5–6. 20sc
- 7. 8sc, (1sc, dec)*4 (16)
- 8. 6sc, 4dec (12)
- 9–15. 12sc
- 16. (2sc, dec)*3 (9) – crochet 2–3 extra sc if necessary, fold in half and crochet 4sc through both layers.
Move the marker so there's a neat closing stitch at the end of each leg when you fold them in half and join them to the body.
Tail
- 1. 6sc in a MR
- 2. 6inc (12)
- 3. 12sc
- 4. (2sc, dec)*3 (9) + 1 sl st
Leave a long end for sewing. Sew the tail on just above the hind legs, securing the thread to the back loop in the body's opening, then hide the end. For the plain (no-clothes) bear, sew the head on with a double thread once everything else is done, and your little bear is ready!

Stuffing and attaching the tail just above the hind legs.

Here's what Marty looks like finished without his pajamas – simple, soft, and just as sweet.
Legs for the Bear in Pajamas
Hind Legs / Slippers – Right (start in white)
- 1. 6sc in a MR
- 2. 6inc (12)
- 3. (1sc, inc)*6 (18)
- 4. (2sc, inc)*6 (24)
- 5. (3sc, inc)*6 (30)
- 6–7. 30sc
- 8. (1sc, dec)*6, 12sc (24)
- 9. 6dec, 10sc – change to the main color on the last stitch. Place a marker here and just move it going forward (18).
- 10. BLO 18sc with the main color (18)
Work around the slipper edge: attach the white yarn to the front loop of round 10 and crochet 18 sl st.
- 11. 18sc, also with the main color – change to the pajama color on the last stitch.
- 12. 18sc with the pajama color!
- 13. BLO 18sc.
Attach the pajama-color yarn to the front loop of round 12 and work 18 sl st.
- 14–16. 18sc
- 17. (1sc, dec)*6 (12) – crochet 2–4 extra sc if necessary, fold in half and crochet 6sc through both layers. Stuff the leg tightly to the middle, firmly at the top.

Changing colors cleanly at the front loop – this is what creates the crisp slipper edge.
Hind Legs / Slippers – Left (start in white)
- 1. 6sc in a MR
- 2. 6inc (12)
- 3. (1sc, inc)*6 (18)
- 4. (2sc, inc)*6 (24)
- 5. (3sc, inc)*6 (30)
- 6–7. 30sc
- 8. 12sc, (1sc, dec)*6 (24)
- 9. 12sc, 6dec (18) – change to the main color on the last stitch.
- 10. BLO 18sc with the main yarn (18)
Attach white yarn to the front loop of round 9 and work 18 sl st.
- 11. 18sc – change to the pajama color on the last stitch.
- 12. 18sc, pajama color!
- 13. BLO 18sc
Attach the pajama-color yarn to the front loop of round 12 and work 18 sl st.
- 14–16. 18sc
- 17. (1sc, dec)*6 (12) – crochet 2–4 extra sc if necessary, fold in half and crochet 6sc through both layers. Stuff tightly to the middle, firmly at the top.
The hind legs close on different sides here too – one at the front, one at the back – with the wrong side of the closure on the inside.


Both slipper legs finished – the three color bands make these read instantly as pajamas.
Forelegs / Sleeves – Right (start with the main yarn)
- 1. 6sc in a MR
- 2. 6inc (12)
- 3. (1sc, inc)*6 (18)
- 4. (8sc, inc)*2 (20)
- 5–6. 20sc
- 7. (1sc, dec)*4, 8sc (16)
- 8. 4dec, 6sc – change to the pajama color on the last stitch and move the marker! (12)
- 9. 12sc
- 10. BLO 12sc
Attach the pajama-color yarn to the front loop of round 9 and crochet 12 sl st.
- 11–15. 12sc
- 16. (2sc, dec)*3 (9) – crochet 2–3 extra sc if necessary, fold in half and crochet 4sc through both layers.
Forelegs / Sleeves – Left (start with the main yarn)
- 1. 6sc in a MR
- 2. 6inc (12)
- 3. (1sc, inc)*6 (18)
- 4. (8sc, inc)*2 (20)
- 5–6. 20sc
- 7. 8sc, (1sc, dec)*4 (16)
- 8. 8sc, 4dec (12) – change to the pajama color on the last decrease!
- 9. 12sc
- 10. BLO 12sc
Attach the pajama-color yarn to the front loop of round 9 and crochet 12 sl st.
- 11–15. 12sc
- 16. (2sc, dec)*3 (9) – crochet 2–3 extra sc if necessary, fold in half and crochet 4sc through both layers.
Stuff the legs well up to round 10, then just a little through round 15 – leave the very top unstuffed.

Keep the inner closures facing the torso when you join the sleeves into the body.

Both pajama sleeves finished, ready to join into the body.
Once you've prepared all the pieces except the body and cap, keep going in the same color if you're making the plain bear, or continue in the pajama color if you're making the dressed version – don't get confused!

All four legs ready – time to crochet the body and join them in.
Body (worked the same way for both bears, just in different colors)
- 1. 6sc in a MR
- 2. 6inc (12)
- 3. (1sc, inc)*6 (18)
- 4. (2sc, inc)*6 (24)
- 5. (3sc, inc)*6 (30)
- 6. (4sc, inc)*6 (36)
- 7. (5sc, inc)*6 (42)
- 8. Join the hind legs: 7sc, 6sc worked with a leg and the body, 16sc, 6sc worked with a leg and the body, 7sc (42). Hide and fasten the ends inside the body.

Joining a hind leg into the body as you crochet round 8.
- 9–11. 42sc (3 rounds)
- 12. (5sc, dec)*6 (36)
- 13–15. 36sc (3 rounds)
- 16. (4sc, dec)*6 (30)
- 17–18. 30sc (2 rounds)
- 19. (3sc, dec)*6 (24)
- 20–21. 24sc (2 rounds)
- 22. (2sc, dec)*6 (18)
- 23. Join the forelegs: 4sc, 4sc worked with a foreleg and the body, 5sc, 4sc worked with a foreleg and the body, 1sc. Hide and fasten the ends inside the body.
- 24. 18sc + 1sc + 1 sl st. Cut the yarn and hide it inside.

Body complete with all four limbs joined – ready for the tail and head.
Sew on the tail just above the hind legs, then sew the head onto the body with a double thread. The cap, if you're making the pajama bear, is best left until now – it's much easier to size once the head is already attached.
Cap
Work the brim with DC or HDC stitches: DC gives a longer cap, HDC a shorter one, and for a very small cap you can even use SC instead.
- 1. Ch48, join into a circle – work in a spiral from here.
- 2. 48sc, then switch to hdc and dc for the rest of the cap.
- 3. 48hdc
- 4. (6hdc, hdc2tog)*6 (42)
- 5–6. 42hdc
- 7. (5hdc, hdc2tog)*6 (36)
- 8–9. 36hdc
- 10. (4hdc, hdc2tog)*6 (30)
- 11–14. 30hdc
- 15. (3hdc, hdc2tog)*6 (24)
- 16–18. 24hdc
- 19. (2hdc, hdc2tog)*6 (18)
- 20–22. 18hdc
- 23. (1hdc, hdc2tog)*6 (12)
- 24–26. 12hdc
- 27. 6hdc2tog (6)
- 28. 6sc + 1 sl st, leave a small end.
Finish by working around the foundation chain: round 1 gets 48 sl st. Weave in all the ends.

The foundation ring for the cap – chain 48 and join before working the brim.
Pompom
- 1. 6sc in a MR
- 2. 6inc (12)
- 3. (1sc, inc)*6 (18)
- 4. 18sc
- 5. (1sc, dec)*6 (12)
- 6. 6dec, leave a long end for sewing.
Sew the pompom onto round 28 of the cap, tie off the ends and hide them inside. Your Marty the Teddy Bear is complete!
Tips for a Polished Finish
- Don't skip the needle sculpting. It's tempting to sew the pieces on and call it done, but the tightening sequence in the Face Design section is what gives Marty his soft, sleepy expression – it's worth the extra ten minutes.
- Watch color changes like a hawk on the pajama legs. Changing color on the last stitch (not after it) keeps the color-block lines crisp instead of jagged – it's the single easiest place to lose track in this pattern.
- Keep the two hind legs' closures oriented correctly. One closes at the front, one at the back, and both wrong sides face the body – mixing this up is an easy mistake that's hard to spot until assembly.
- Don't stuff the tops of the forelegs. Leaving the last few rounds soft is what lets the arm fold and join neatly into the body.
- Size the cap after the head is attached. The pattern is written this way on purpose – it's much easier to check the fit against the actual finished head than to guess beforehand.
FAQ
Should I make the plain bear or the pajama bear first?
Why do the safety eyes and nose need to be heat-secured with a lighter?
Can I skip the needle sculpting step?
What size hook should I actually use?
How much yarn do I need for the pajama version?
Conclusion
Two bears, one pattern – that's what makes Marty such good value for the yarn. Whichever version you make first, the needle-sculpted face is the part readers always ask about, so don't rush through it. Save this pattern for later with the Pinterest button above, and happy stitching!