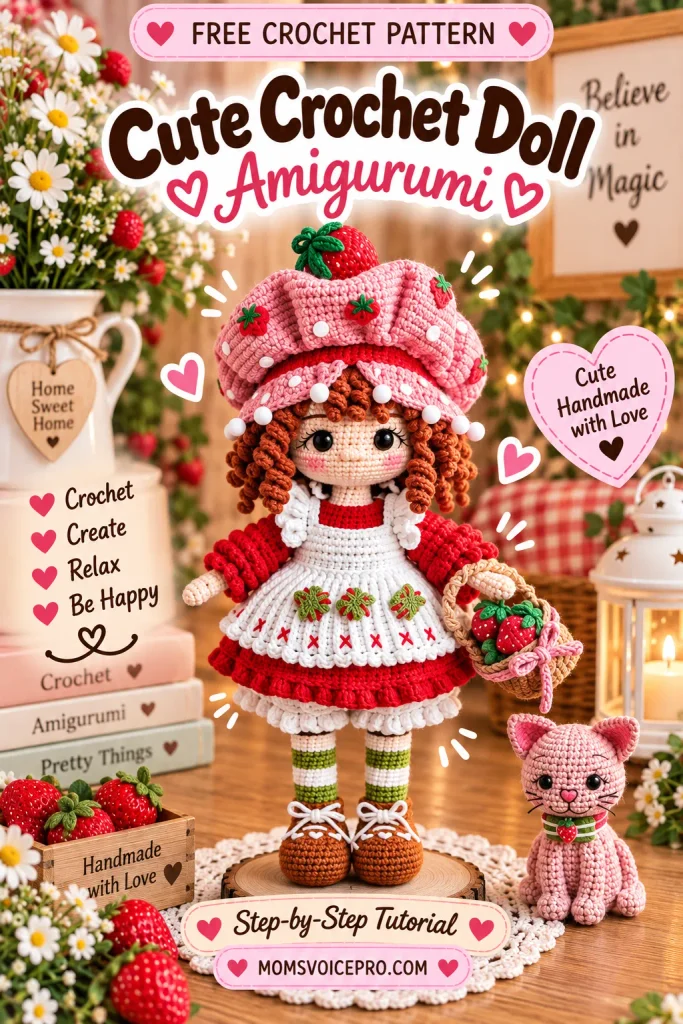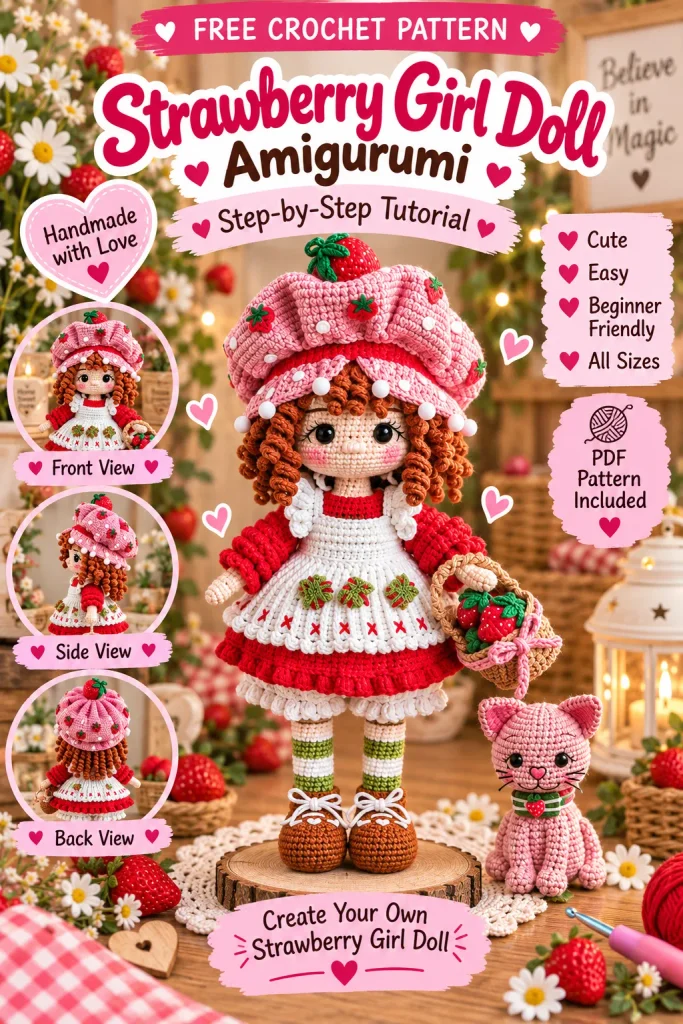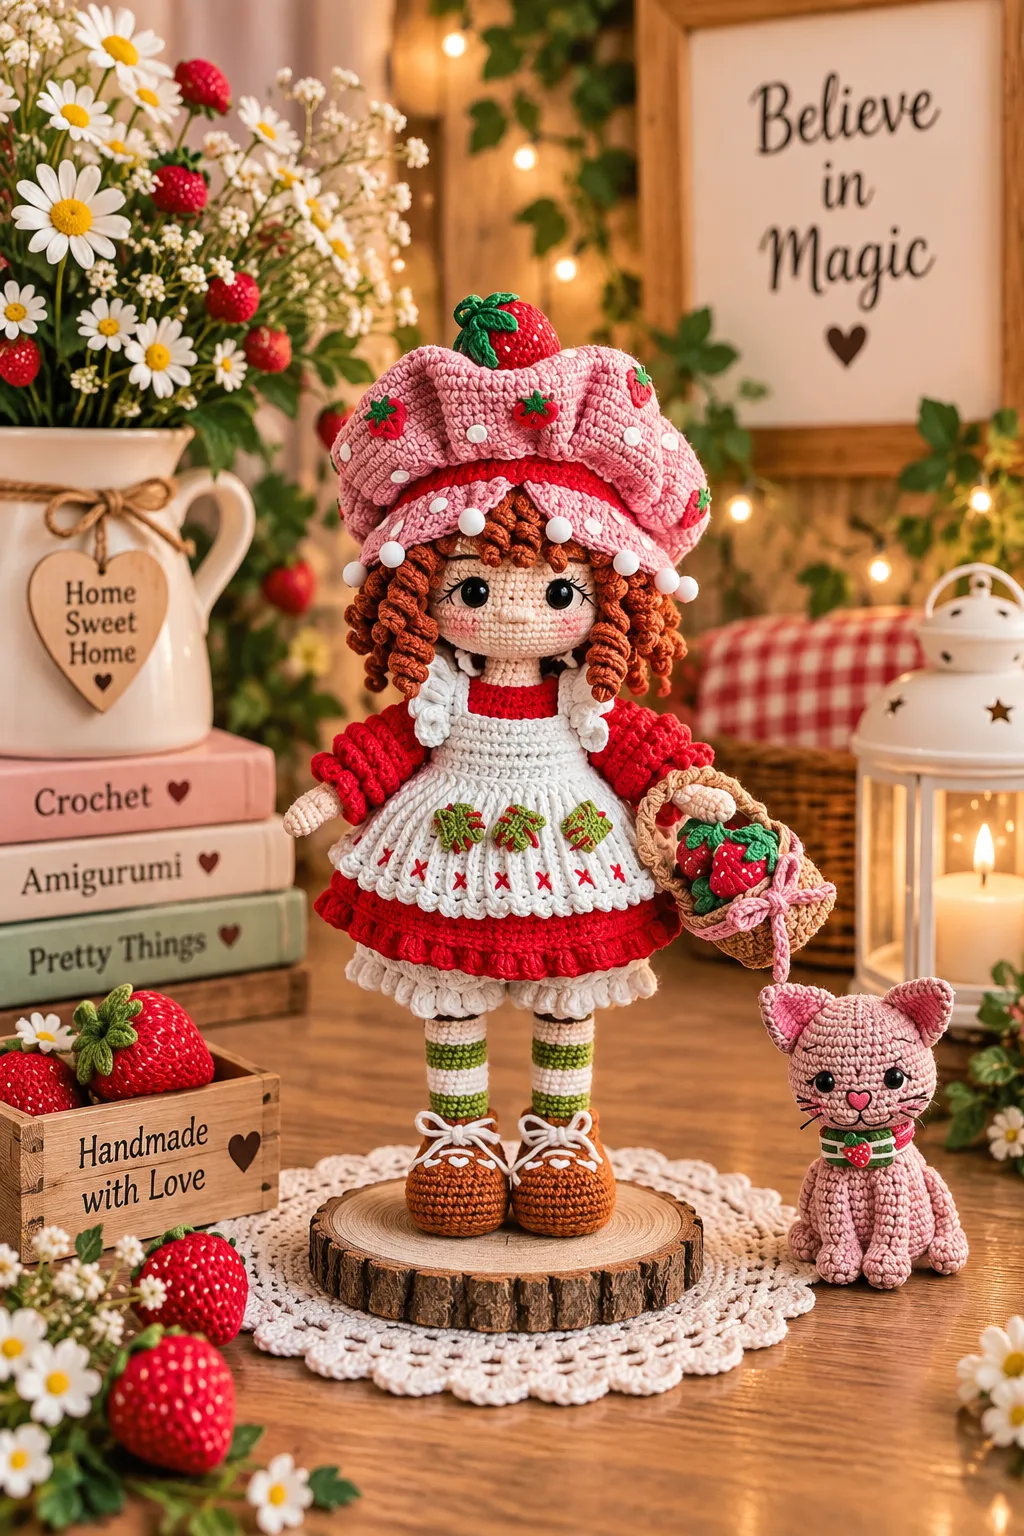
This curly-haired doll and her pink kitten sidekick are a loving, fan-made homage to a beloved 1980s strawberry-print character — right down to the oversized berry beret, the strawberry-embroidered pinafore, and a tiny woven basket of crocheted strawberries. She’s an unofficial design, not affiliated with or endorsed by the original toy or media rights holders, just stitched up as a nostalgic tribute in cotton yarn.
This is a genuinely advanced, very long pattern — 35 pages in the original, with wire body articulation, a three-layer strand wig, felt and embroidery detailing, and a fully separate kitten companion with her own collar and bow. Every round is written out here with the designer’s real process photos grouped at each stage. Set aside real time for this one, and let’s get started!
Table of Contents
Materials Needed
- 2 mm crochet hook (Clover brand, or whatever suits your yarn)
- 9 mm safety eyes for the doll, 6 mm safety eyes for the kitten
- Copper wire, 1.5 mm thick (for body articulation)
- Stitch markers
- Fiberfill
- Scissors and a tapestry needle
- Blush or chalk pastel
- Black tape
- Thin felt or interlining (optional)
- False eyelashes (optional)
- 2 snap fasteners for the dress
- A gold safety pin (optional)
- Red, fuchsia, and green felt
- 10 white pompoms, 8 mm diameter
- A piece of cardboard (for the shoe soles, basket, and body bases)
- A piece of pipe cleaner, any color (for the kitten’s tail)
- Fabric glue or liquid silicone
- Watercolor pencil or fine-tip brown marker (for freckles)
- Light yellow, light brown, and dark brown embroidery thread
- Red sewing thread and a sewing needle
- White acrylic paint and a paintbrush (optional)
- A small pink strawberry charm
- 100% cotton yarn in: salmon (skin), green (socks), leaf green (strawberry leaves), pink (hat & kitten), fuchsia (kitten’s collar), red (dress), cognac (hair), caramel (shoes), brown (soles), camel (basket), and white (apron, socks, underpants) — see the designer’s original color codes if you want an exact match; roughly 1½ skeins each of pink, red, and white (50g), and less than one skein of each other color
Abbreviations
| ch | chain |
| R | Round |
| Rw | Row |
| mr | magic ring |
| sk | skip stitches |
| st, sts | stitch, stitches |
| slst | slip stitch |
| fst | fake stitch — a woven finish that mimics a stitch, used to close a round invisibly |
| sc | single crochet |
| sc-inc | increase of single crochet (2 sc in one st) |
| sc-inc3 | double increase of single crochet (3 sc in one st) |
| sc-inc4 | triple increase of single crochet (4 sc in one st) |
| sc2tog | decrease of single crochet (2 sc together) |
| esc | extended single crochet |
| esc-inc | increase of esc |
| esc2tog | decrease of esc |
| esc3tog | double decrease of esc (3 esc together) |
| hdc | half double crochet |
| hdc-inc | increase of hdc (2 hdc in one st) |
| hdc2tog | decrease of hdc (2 hdc together) |
| hdc3tog | double decrease of hdc (3 hdc together) |
| dc | double crochet |
| dc-inc | increase of double crochet |
| dc2tog | decrease of double crochet (2 dc together) |
| tr | treble crochet |
| BLO | back loops only |
| FLO | front loops only |
| TLO | crochet through the horizontal bar only, aka the 3rd loop |
| bo4 | bobble stitch |
| FO | fasten off |
| FOLLT | fasten off, leaving a long tail |
| JCH1 / JCH2 / JCH3 | join with slst and chain 1 / 2 / 3 |
| JCHT1 / JCHT2 | join with slst, chain 1 or 2, and turn your work |
| CHT1 / CHT2 | chain 1 or 2 and turn |
| { … } | make all the stitches inside the curly brackets in the same stitch |
| sk N | skip that number of stitches from the previous round |
| (…)xN | repeat the stitches inside the round brackets N times |
Rounds written like “R 19.5” are extra slip-stitch rounds used only to shift the working yarn into position for a color change — they don’t count toward the stitch total of the piece. When the pattern says “make a shift sc,” that’s one extra single crochet added to nudge the start of the next round over by one stitch; it also doesn’t count as part of any round.
General Techniques
BLO / FLO / TLO: BLO means inserting your hook under the back loop only; FLO means the front loop only. TLO is the third loop that sits in front of a stitch (easiest to see on a half double crochet) — on turned rows it shows on the front of your work, and on continuous joined rounds it shows on the back.

Extended single crochet (esc): insert your hook in the 2nd chain from the hook, yarn over and draw through the stitch, yarn over and draw through 1 loop, yarn over and draw through the remaining 2 loops.
Bobble stitch (bo4): yarn over, insert the hook, yarn over, draw through the stitch, yarn over, draw through 2 loops — repeat that 3 more times in the same stitch (5 loops on the hook), then yarn over and draw through all 5 loops.
Fake stitch (fst): cut the yarn leaving a long tail, pull the working loop all the way through. Thread a needle and stitch from the inside out into the next stitch, then back into the original stitch the tail comes from, and pull gently until the new “stitch” matches the size of its neighbors — this closes a round invisibly.

Surface slip stitch: worked after the fact on top of finished fabric, inserting the hook front-to-back into a stitch, then front-to-back into the next “hole” and pulling a loop through each time to lay a decorative slip-stitch line on the surface.
Working into the back bumps of a foundation chain: instead of the usual front V of each chain stitch, flip the chain over and work into the little bump on the back of each one instead — this gives a neater, more finished lower edge.

Arms
Make 2, starting with salmon. Stuff a little bit in the hands, but leave the rest of the arm unstuffed.
R1: mr, 6 sc [6]
R2: 6 sc-inc [12]
R3-5: 12 sc (3 rounds) [12]
R6: 6 sc, bo4, 5 sc [12]
R7: (4 sc, sc2tog)x2 [10]
R8-27: 10 sc (20 rounds) [10]
Cut the yarn and fasten off each arm.
Legs
Make 2. Work all around the foundation chain, in joined rounds, starting with caramel.
R1: ch 8, sc-inc, 5 sc, sc-inc4, 5 sc, sc-inc. JCH1 [18]
R2: 2 sc-inc, 5 sc, 4 sc-inc, 5 sc, 2 sc-inc. JCH1 [26]
R3: 3 sc-inc, 7 sc, 6 sc-inc, 7 sc, 3 sc-inc. JCH2 [38]
R4: (3 hdc, 2 hdc-inc, 9 hdc, 2 hdc-inc, 3 hdc)x2 [46]
Cut your yarn leaving a long tail, then join with a fake stitch to the first stitch of round 4 — this adds one extra stitch, so you’ll end up with 47 total (46hdc + 1 fst). Hide the yarn and weave in the ends. Attach a new strand of the same color into the first stitch of round 4 (the stitch right after the fake stitch), picking up the TLO loop, and continue in joined rounds.
R5: TLO 47 sc [47]
R6-9: 47 sc (4 rounds) [47]
Cut a piece of cardboard the size of the sole and glue it inside the shoe base.

Cut a piece of wire about 35 cm (13.7in) long — length depends on your yarn thickness — and fold it as shown in the designer’s photos. The fold should match the size of the shoe sole. Insert the wire into the shoe and stuff with fiberfill. Work crocheting around the wire, and stuff the legs and body as you go from here on.
R10: 15 sc, (hdc2tog, hdc)x5, hdc2tog, 15 sc [41]
Make 1 shift sc.
R11: 12 sc, 3 sc2tog, hdc3tog, 3 sc2tog, 12 sc, sc2tog [32]
R12: 3 sc, sc2tog, 4 sc, sc2tog, 4 hdc2tog, sc2tog, 4 sc, sc2tog, 2 sc, sc2tog, sc [23]

Now you’ll crochet the striped socks. Each time you switch between green and white, carry the unused color up inside the leg rather than cutting it. When changing to green, leave the caramel yarn resting on the outside of the leg — you’ll need it again shortly to finish the shoe.
R13 (change to green): BLO (sc, sc2tog)x7, 2 sc [16]
R14-15: 16 sc (2 rounds) [16]
R16: 4 sc, sc-inc, 6 sc, sc-inc, 4 sc [18]
R17-19: 18 sc (3 rounds) [18]
R19.5 (change to white): 18 slst (does not count as a round) [18]
R20: BLO 18 sc [18]
R21-22: 18 sc (2 rounds) [18]
Make a shift sc whenever you notice the color change starting to slant to the right. Now pause the leg here for a moment to finish off the shoe: take the caramel yarn left resting outside and attach it to the first front loop left from Round 12, and make:
R1 (shoe): 23 slst [23]
R2: BLO (5 sc, sc-inc)x2, 4 sc, sc-inc, 5 sc, sc-inc [27]
R3: 27 sc [27]
R4: 27 slst [27]
Fasten off leaving a long tail. If the decreases left any gaps on the shoe, weave the tail through them to close things up neatly, then secure.

Attach the brown yarn to the first back loop of round 4 and work BLO 47 slst on those loops for the sole edge — fasten off and join with a fake stitch to the first stitch. Pick the white yarn back up and continue the leg.
R22.5 (change to green): 18 slst (does not count as a round) [18]
R23: BLO 18 sc [18]
R24-25: 18 sc (2 rounds) [18]
R25.5 (change to white): 18 slst (does not count as a round) [18]
R26: BLO 18 sc [18]
R27-28: 18 sc (2 rounds) [18]
Make 1 shift sc.
R28.5 (change to green): 18 slst (does not count as a round) [18]
R29: BLO 18 sc [18]
R30-31: 18 sc (2 rounds) [18]
R31.5 (change to white): 18 slst (does not count as a round) [18]
R32: BLO 18 sc [18]
R33-34: 18 sc (2 rounds) [18]
Make 1 shift sc.
R34.5 (change to green): 18 slst (does not count as a round) [18]
R35: BLO 18 sc [18]
R36-37: 18 sc (2 rounds) [18]
Make 1 shift sc.
R37.5 (change to white): 18 slst (does not count as a round) [18]
R38: BLO 18 sc [18]
R39-40: 18 sc (2 rounds) [18]
Fasten off and weave in the yarn on the first leg only. Do not cut the yarn on the second leg. At the end of the second leg’s last round, crochet 6 more sc (or as many as needed) to position the last stitch on the inner side of the thigh, then continue straight into the body.

Body
Legs joining
R41: With your hook on the second leg, ch 8, and join to the first leg with 1 sc in its 15th stitch (or the stitch on the inner side of the thigh). This sc becomes the beginning stitch for every round from here. Continue with 17 sc on that leg, 8 sc across the chain, 18 sc on the other leg, and 8 sc across the base of the chain, for 52 stitches total.
R42-51: 52 sc (10 rounds) [52]
Twist the leg wires together inside the body. Stuff the body firmly as you crochet from here.
R52: 9 sc, (sc2tog, 11 sc)x3, sc2tog, 2 sc [48]
R53: 48 sc [48]
When you change color, leave the white yarn resting at the front of your work rather than cutting it.
R54 (change to salmon): BLO 48 sc [48]
R55: 48 sc [48]
R56: 8 sc, sc2tog, (10 sc, sc2tog)x3, 2 sc [44]
R57-59: 44 sc (3 rounds) [44]
Pause here to finish the sock border. Attach the reserved white yarn to the first front loop from round 53 and work 48 slst on those loops, then join with a slst and fasten off. Continue with the body.
R60: 2 sc, (sc2tog, 9 sc)x2, 1 sc, sc2tog, 9 sc, sc2tog, 6 sc [40]
R61-63: 40 sc (3 rounds) [40]
R64: (18 sc, sc2tog)x2 [38]
R65: 38 sc [38]

Arms joining
When you first insert your hook into an arm, make sure the thumb points forward — this applies to both arms, and you can shift the first joining stitch if needed to make it work with your tension.
R66: Make 7 sc in the body, then 4 sc joining the arm and body at the same time (starting at the 3rd stitch of the arm, hooking into the arm from the inside out, then into the body). Continue with 15 sc in the body, then another 4 sc joining the second arm the same way (starting at the arm’s 8th stitch), and finish with 8 sc in the body [38].
R67: Skip the 4 joining stitches from the previous round on both arm and body. Make 7 sc in the body, 6 sc in the unworked stitches of the arm, 15 sc in the body, 6 sc in the unworked stitches of the other arm, and 8 sc in the body [42].

Cut two pieces of wire the length of the arm plus about 10 cm, fold one end and cover it with black tape. Insert one into each arm and twist the other end to the main body wire, then cover all the wire with tape. Stuff the top of the arms, chest, and shoulders very well, and keep stuffing as you crochet around the wire from here.
R68: 42 sc [42]
R69: 6 sc, (sc2tog, 4 sc)x2, 5 sc, (4 sc, sc2tog)x2, 7 sc [38]
R70: (4 sc, sc2tog)x3, sc, (4 sc, sc2tog)x3, sc [32]
R71: (5 sc, 3 sc2tog, 5 sc)x2 [26]
R72: 3 sc, 3 sc2tog, 8 sc, 3 sc2tog, 3 sc [20]
R73: (8 sc, sc2tog)x2 [18]
R74-76: 18 sc (3 rounds) [18]
R77: (sc, sc2tog)x6 [12]
Continue working around the neck wire from here — this is what will support the head. Trim any excess wire once you’re done.
R78-86: 12 sc (9 rounds) [12]
R87: 6 sc2tog [6]
Cut the yarn and close the hole with a needle, making sure the wire stays well covered, then weave in the ends.

Head
Start with salmon.
R1: ch 16, join the last chain to the first with a slst to form a ring, ch 1, 16 sc over the chains.
R2-6: 16 sc (5 rounds) [16]
R7: BLO (sc, sc-inc)x8 [24]
R8: (sc, sc-inc, sc)x8 [32]
R9: (3 sc, sc-inc)x8 [40]
R10: (2 sc, sc-inc, 2 sc)x8 [48]
R11: (5 sc, sc-inc)x8 [56]
R12: (3 sc, sc-inc, 3 sc)x8 [64]
R13: 8 sc, sc-inc, (15 sc, sc-inc)x3, 7 sc [68]
Using pliers or tweezers, tuck the starting cylinder inward so the first 5 rounds sit inside the head, leaving a hole at the bottom.
R14-17: 68 sc (4 rounds) [68]
R18: 8 sc, sc2tog, (15 sc, sc2tog)x3, 7 sc [64]
R19-28: 64 sc (10 rounds) [64]
Pause here for a moment to make the eyes.
Eyes
You can make the eyes however you like — embroidering just the whites, or skipping extra detail entirely. Either way, count the stitch spacing before placing pins: the designer marked 10 stitches between the pins, though the finished gap looks narrower once the eyes themselves are inserted (roughly 6–7 stitches, depending on eye size).
Method 1 — felt or interlining
Draw the safety-eye outline on non-fraying white fabric, then draw your preferred eye shape around it. Cut two mirror-image pieces and make a small hole in the center for the eye post. Insert the safety eyes, glue them to the fabric pieces, then insert the eyes into the head between rounds 14 and 15 (counting from round 7, since the first 6 rounds are the neck), 10 stitches apart. Glue the white fabric part to the doll’s face.
Method 2 — embroidery
Insert the safety eyes the same way, then embroider the outer white part of the eye with white thread, the upper eyelid with brown thread, and two short outward lines for eyelashes. Fine embroidery thread works best, or unravel your project yarn down to a single strand for a more delicate line.
R29: (7 sc, sc2tog, 7 sc)x4 [60]
R30: (4 sc, sc2tog, 4 sc)x6 [54]
R31: (7 sc, sc2tog)x6 [48]
R32: (3 sc, sc2tog, 3 sc)x6 [42]
R33: (5 sc, sc2tog)x6 [36]
R34: (2 sc, sc2tog, 2 sc)x6 [30]
R35: (3 sc, sc2tog)x6. Start stuffing [24]
R36: (sc, sc2tog, sc)x6 [18]
R37: (sc, sc2tog)x6 [12]
R38: 6 sc2tog [6]
Finish stuffing, cut the yarn, close the hole with a needle, and weave in the ends.
Nose & Eyebrows
For the nose: mark two points with pins one round below the eyes, 4 stitches apart. Pass the needle three times horizontally through those marked stitches, then pass the thread vertically from left to right under the horizontal strands to build up a small raised nose. Hide the yarn inside the head.
For the eyebrows: mark with pins 2 rounds above the eyes, 5 stitches apart, with the outer pin one round lower than the inner one so the brow arches slightly downward. Embroider with light brown thread along the marked stitches, passing the needle three times.
Head Joining
Only join the head after the dress is made and on the doll, since once attached you can only remove clothing from the bottom of the body — this matters if the underwear is already in place. You can also skip joining altogether and simply set the head onto the neck for a removable, interchangeable head.
How to join: free up space inside the head’s hole with a toothpick. Thread a needle with head-colored yarn, insert from the top of the head out through the head hole leaving a long tail, pass it through the neck, then back up through the head hole through a different stitch. Repeat with a second piece of yarn so you have two strands holding the neck, then gently pull all four strands upward while seating the neck into the head. The bottom of the head should land over round 76 of the body. Tie the strands off in pairs with two knots on top of the head, then hide the knots and trim.

Hair
All the hair stitches use the V-style single crochet (yarn over) rather than the tighter X-style (yarn under) — this keeps the curls from coming out too small and tight.
Base
Start with cognac.
R1: mr, 6 sc [6]
R2: 6 sc-inc [12]
R3: FLO (sc, sc-inc)x6 [18]
R4: (2 sc, sc-inc)x6 [24]
R5: FLO (3 sc, sc-inc)x6 [30]
R6: (4 sc, sc-inc)x6 [36]
Without cutting the yarn, continue straight into the strands.
Strands
Legend: S = strand. JNSL = join to the next stitch of the base with slst. JSSL = join to the same stitch as the last strand with slst. SNSL = skip the next available stitch of the base and join to the one after with slst. Mark strand 1 with a stitch marker so you can identify the rest later.
First layer
Attach to the last round of the base (round 6) with slst; every strand starts from the 2nd chain from your hook.
S1: ch 35, sc-inc, 22 hdc-inc, 11 hdc [57]. JNSL
S2: ch 35, sc-inc, 22 hdc-inc, 11 hdc [57]. SNSL
S3: ch 35, sc-inc, 22 hdc-inc, 9 hdc, 2 sc [57]. JNSL
S4-17 (14 strands): repeat strands 2 and 3 in turn.
S18: ch 20, 15 sc-inc, 4 hdc [34]. SNSL
S19-21 (3 strands): ch 15, 10 sc-inc, 4 hdc [24]. SNSL
S22: ch 20, 15 sc-inc, 4 hdc [34]. SNSL
Fasten off.
Second layer
Turn your work, and with the wrong side facing you, attach yarn in the first loop of round 4 of the base.
S1-9: ch 34, sc-inc, 22 hdc-inc, 10 hdc [56]. SNSL
Make 3 slst on the next loops, positioned just above the short strands of the first layer.
S10: ch 34, sc-inc, 22 hdc-inc, 10 hdc [56]. SNSL
Fasten off.
Third layer
Attach yarn in the first loop of round 2 of the base.
S1-6: ch 34, sc-inc, 22 hdc-inc, 10 hdc [56]. SNSL
Fasten off.

Assembly
Center the hair on the head and pin it in place. Tie the second and third layers aside with a small elastic so they’re out of the way while you position the first layer. Distribute the first-layer strands evenly, with strand 1 one stitch from the left eyebrow and strand 17 one stitch from the right eyebrow — these mark the boundary for the rest. Spread strands 2–16 evenly between them, position strand 18 and strand 22 as shown in the designer’s reference photos, and tuck the three shorter strands (19, 20, 21) at the center of the forehead. Glue or sew only the flat (non-curled) half of each strand down, leaving the curls hanging free.
Once the first layer is secure, untie the second and third layers. Glue or sew only the very tips of strand 9 (second layer) with strand 6 (third layer), and strand 10 (second layer) with strand 1 (third layer) — just enough glue to hold. Leave the rest of the second and third layer strands completely unsewn so they fall naturally over the first layer.
Underpants
The underpants, dress, apron, and hat all use the V stitch rather than the X stitch — X stitches crochet up tighter and will make the clothes fit too snugly, so keep everything loose rather than tight.
Work in joined rounds, starting with white.
R1: ch48, join to the first ch with slst, ch2, 48 hdc on the chain. JCH2 [48]
R2: TLO 2 hdc, (ch1, sk1, 3 hdc)x11, ch1, sk1, hdc. JCH1 [48]
R3: TLO 48 sc. JCH2 [48]
R4: ({4 hdc}, sk2)x16. JCH2 [64]
Each group of 4 hdc in the round above is worked into the space of the previous round, between two groups of hdc — refer to the designer’s diagram if you need a visual, and remember that the first group of hdc in a new round always starts in the space the chains came from.
R5-9: {4 hdc}x16 (5 rounds). JCH2 [64]

1st leg
R10: make {5 hdc} in each space, 8 times total (8 groups of 5 hdc), skip the remaining stitches, then slst into the first hdc to close the round. Ch2.
The first hdc group of every following round starts in the previous round’s space, right on top of the joining slst.
R11-13: {5 hdc}x8 (3 rounds). JCH2 [40]
R14: 40 hdc (1 hdc on each st). JCH2 [40]
R15: TLO (2 sc, sc2tog)x10. JCH3 [30]
In the next round, alternate between 3 dc worked in the front loop and 3 dc in the back loop.
R16: (FLO* [{3 dc}], BLO* [{3 dc}])x15 [90]
Join with slst to the first stitch and fasten off.

2nd leg
R10: attach white yarn in the next available space of round 9, leaving a long tail. Ch2, then {5 hdc} in each space, 8 times total, just like the first leg — the first shell lands in the previous space, right on top of the joining slst. Join with slst to close, ch2.
With the long tail left at the start, sew closed the small hole left in the crotch area.
Repeat Rounds 11–16 exactly as for the first leg, then fasten off.
Attach white yarn to the first foundation chain of the underpants and make (slst, ch4, sk1)x24 all the way around — this creates the eyelet holes for the drawstring. Join with slst and fasten off.
Strap: with red yarn, ch 110, then fasten off — no stitches worked back across, this is a plain chain tie.
Weave the strap through the eyelet holes from round 2, with both ends meeting at the front. As an optional detail, add a strawberry charm to each end of the tie.

Put the underpants on the doll’s body — it can be a little fiddly getting them over the shoes, but sliding one foot through at a time works. Tie the drawstring into a bow to finish.
Dress
Work in rows, starting with red. Work the first row into the back side of the foundation chain. Whenever the pattern shows a W, work {hdc, sc, hdc} all in the same stitch — this is what shapes the gored panels. The stitch pattern is a moss-stitch variation alternating sc and hdc; remember to use the V stitch.
Rw1: ch26, (2 sc, sc-inc)x4, sc, (sc-inc, sc)x4. CHT1 [33]
Rw2: (sc, hdc)x16, sc. CHT2 [33]
Rw3: (hdc, sc)x2, W, (sc, hdc)x2, sc, W, (sc, hdc)x5, sc, W, (sc, hdc)x2, sc, W, (sc, hdc)x2. CHT1 [41]
Rw4: (sc, hdc)x2, sc, W, (sc, hdc)x3, sc, W, (sc, hdc)x6, sc, W, (sc, hdc)x3, sc, W, (sc, hdc)x2, sc. CHT2 [49]
Rw5: (hdc, sc)x3, W, (sc, hdc)x4, sc, W, (sc, hdc)x7, sc, W, (sc, hdc)x4, sc, W, (sc, hdc)x3. CHT1 [57]
Rw6: (sc, hdc)x4, ch5, sk11, (hdc, sc)x9, hdc, ch5, sk11, (hdc, sc)x4. CHT2 [45]
Rw7 (the armholes): on the stitches (hdc, sc)x4; on the chains (hdc, sc)x2, hdc; on the stitches (sc, hdc)x9, sc; on the chains (hdc, sc)x2, hdc; on the stitches (sc, hdc)x4. CHT1 [45]

Rw8: (sc, hdc)x22, sc. CHT2 [45]
Rw9: (hdc, sc)x22, hdc. CHT1 [45]
Rw10: (sc, hdc)x3, sc, W, (sc, hdc)x14, sc, W, (sc, hdc)x3, sc. CHT2 [49]
Rw11: (hdc, sc)x24, hdc. CHT1 [49]
In the next row, work the {hdc, sc, hdc} increase in the back loop only, but work the plain sc stitches through both loops.
Rw12: (sc, BLO*[W])x24, sc. CHT2 [97] — mark this side as the right side of the dress.
Rw13: (hdc, sc)x48, hdc. CHT1 [97]
Rw14: (sc, hdc)x48, sc. CHT2 [97]
Rw15: (hdc, sc)x48, {hdc, sc} [98]. Join with a slst to the first stitch of this row and turn — from here, continue in joined turning rounds, turning your work at the end of every round to keep the stitch texture consistent. Ch2 and continue.
R16-22: (hdc, sc)x49 (7 rounds). JCHT2 [98]
R23: (hdc, sc)x49. JCHT1 [98]
R24: (slst, ch2, sk2)x32, slst, ch2, sk1. Join with slst to the first stitch and ch3 — do not turn your work. [99]
R25: BLO 1 dc in the slst of the previous round, {4 dc} in the ch-2 space of the previous round, repeating in every slst and ch-2 space around [165]. Fasten off, join with a slst to the first stitch, and weave in the ends.
Attach red yarn in any stitch of Round 23 and work 1 surface slst into each stitch for a decorative texture line, then fasten off and weave in the yarn.

Sleeves
Left sleeve: work in joined turning rounds, turning at the end of each one so the texture matches the dress. Insert your hook into the first skipped stitch of round 5, starting with red.
R1: (sc, hdc)x5, sc on the skipped sts, 1 hdc on the side, (sc, hdc)x2, sc on the base of the foundation chain, 1 hdc on the side [18]. Join with slst, ch1, turn.
R2-3: (sc, hdc)x9 (2 rounds). JCHT1 [18]
R4: ((sc, hdc)x3, sc, W)x2, sc, hdc. JCHT1 [22]
R5-6: (sc, hdc)x11 (2 rounds). JCHT1 [22]
R7: (sc, hdc)x3, sc, W, (sc, hdc)x4, sc, W, (sc, hdc)x2. JCHT1 [26]
R8-10: (sc, hdc)x13 (3 rounds). JCHT1 [26]
R11: (sc, sc2tog)x8, sc2tog [17]. Join with slst, ch1, do not turn.
R12: BLO 17 slst. JCH3 [17]
In the next round, alternate {3 dc} in the back loop and {3 dc} in the front loop.
R13: (BLO*[{3 dc}], FLO*[{3 dc}])x8, BLO*[{3 dc}]. Join with slst and fasten off. [51]
Right sleeve: work the same way as the left, but insert your hook into the first foundation chain instead, and mirror the stitch placement in the early rounds (see the designer’s rounds 1–7 for the right sleeve, then rounds 8–13 are identical to the left sleeve).

Attach red yarn at the back right edge of the dress, ch3, and work 15 dc across that edge, then ch3 and slst into the base of the last dc, then fasten off. Sew a pair of snaps on each side of the back opening to close the dress (a strip of Velcro works too, if you prefer).
Apron
Work in rows, starting with white. Work the first row into the back side of the foundation chain, starting in the 2nd chain from the hook. Remember to use the V stitch.
Rw1: ch42, 14 sc, sc-inc3, 11 sc, sc-inc3, 14 sc. CHT1 [45]
Rw2: FLO 15 sc, sc-inc3, 13 sc, sc-inc3, 15 sc. Then, without turning, 2 sc on the side. CHT1 [51]
Rw3: FLO 2 sc, ch9, sk16, 17 hdc, ch9, sk16, then 2 hdc on the side of the strip. CHT1 [39]
Rw4: FLO 2 sc, 9 sc on the chains, 17 sc, 9 sc on the chains, 2 sc. CHT1 [39]
Rw5: FLO 39 sc. CHT1 [39]
Rw6: FLO 39 sc, fasten off. [39]
The right side of the apron is the side shown facing you at the end of Row 6 — mark that as the right side.

Bottom part
Attach white yarn to the 9th stitch of the apron, on the wrong side. Work in rows — each row joins to the top part with a slst, and you’ll always skip that joining slst once you turn your work.
Rw1: ch15, 14 slst [14]. Join with slst to the same stitch where you attached the yarn, and turn.
Rw2: BLO slst, 5 sc, 8 hdc. CHT1 [14]
Rw3: BLO 14 slst. Join with slst to the same stitch of the apron, and turn. [14]
Rw4-46: repeat Rows 2 and 3 in turn, ending on a Row-2-style sequence. At the end of Row 46, chain 3 instead of 1.

Border
Work 1 dc along the side of the last row made, and 1 slst along the side of the next hdc. *Ch3, 1 dc in the same place as the previous slst, then slst along the side of the next hdc.* Repeat from * to * 21 more times for 23 shells total, then join with a slst and fasten off.
Strip (waist ties)
Ch17, from the 2nd chain make 16 slst across. Then make 8 slst across the unworked stitches of the apron, keeping the right side facing you. Work 23 surface slst between Row 6 and the bottom of the apron. Continue with 8 slst across the remaining unworked stitches, then ch17 and work 16 slst across that chain from the 2nd chain. Join with a slst to the apron and fasten off.
Sleeve ruffles
Attach white yarn to the first skipped stitch of Row 2, working in the front loop only, then ch4 and work into the skipped stitches: FLO ({3 tr}, {2 tr})x7, {3 tr}, {2 tr, ch3, slst} [41]. Fasten off, and repeat the same sequence on the other sleeve.

Squares (make 3)
Work in rows, starting with green, crocheting the first row into the back side of the foundation chain.
Rw1: ch6, 5 slst. CHT1 [5]
Rw2-6: BLO 5 slst (5 rows). CHT1 [5]
Fasten off. Sew the three squares to the bottom of the apron — one centered, one on each side — then embroider a few lines across each with red yarn to suggest a woven basket-weave pattern.
Bow
Top part: work the first round into the back side of the foundation chain, in joined rounds, starting with green.
R1: ch32, join with slst to form a ring, ch2, 32 hdc on the chain. JCH1 [32]
R2-4: TLO 32 hdc (3 rounds). JCH1 [32]
R5: TLO 32 sc. JCH1 [32]
Fasten off leaving a long tail. Wrap the tail around the center to pinch and shape the bow, then weave in the ends.
Strips: work the first row into the back side of the foundation chain, starting in the 2nd chain from the hook.
Rw1: ch23, 6 sc, (hdc-inc, 3 hdc)x4. CHT1 [26]
Rw2: sk1, 2 slst, 23 sc. [25]
Rw3: ch24, starting in the 3rd chain: (3 hdc, hdc-inc)x4, 6 sc. CHT1 [26]
Rw4: 23 sc, 2 slst, skip the last stitch, fasten off.
With a separate length of green yarn, tie the two strips to the bottom of the bow, wrapping several times around both pieces. Sew a safety pin to the back of the bow with the same yarn (optional — you can also just sew the bow directly onto the apron if you don’t need it removable), then weave in the ends.

Embroider small red X’s along the bottom edge of the apron, leaving a row of plain stitches between each one. Finally, put the apron on the doll, tie the strips at the back into a knot, hide the ends, and set the bow on top.
Hat
Work in joined rounds, starting with pink. Remember to use the V stitch.
R1: mr, 8 esc. JCH1 [8]
R2: 8 esc-inc. JCH1 [16]
R3: (esc, esc-inc)x8. JCH1 [24]
R4: (esc, esc-inc)x12. JCH1 [36]
R5: (esc, esc-inc)x18. JCH1 [54]
R6: (2 esc, esc-inc)x18. JCH1 [72]
R7: (3 esc, esc-inc)x18. JCH1 [90]
R8: (4 esc, esc-inc)x18. JCH1 [108]
R9: 108 esc. JCH1 [108]
R10: (5 esc, esc-inc)x18. JCH1 [126]
R11: 126 esc. JCH1 [126]
R12: (6 esc, esc-inc)x18. JCH1 [144]
R13-23: 144 esc (11 rounds). JCH1 [144]

R24: 6 esc, sk6, (12 esc, sk6)x7, 6 esc [96]. JCH1. The fold created by the skipped stitches should sit inside the hat.
R25: *3 esc2tog, then 3 esc joining the fold — insert your hook first into the next stitch of the hat, then through both layers of the fold from the skipped stitches of the previous round, and continue with 3 esc into the next stitches of the hat.* Repeat from * to * 7 more times for 8 repetitions total [72].
R25.5 (change to red): BLO 72 slst (does not count as a round). JCH1 [72]
R26: BLO 72 sc. JCH1 [72]
R27: 72 sc. JCH1 [72]
R28: 72 sc. JCH1, and turn your work. [72]
R29: 72 sc. [72]
Fasten off.

Attach pink yarn in the 34th stitch, taking the back loop only, then work in rows:
Rw30: BLO 2 esc, (esc-inc, 3 esc)x16, esc-inc, esc. CHT1 [85]
Rw31: sk1, esc2tog, 6 esc, (esc-inc, 12 esc)x5, esc-inc, 7 esc, esc3tog. CHT1 [87]
Rw32: sk1, esc2tog, 81 esc, esc3tog. CHT1 [83]
Rw33: sk1, 7 esc, (esc-inc, 12 esc)x5, esc-inc, 7 esc, esc2tog. [87]
Fasten off — you’ll notice 4 red stitches left unworked at the center of the hat. Attach pink yarn into the 2nd of those red stitches (left to right) and work all the way around the edge: 6 esc along one side, 87 esc across the last row’s stitches, 6 esc along the other side. Cut the yarn, thread a needle, and join with a fake stitch to the 2nd red available stitch, then weave in the ends.

Top strawberry
Start with red.
R1: mr, 6 sc [6]
R2: 6 sc-inc [12]
R3: (sc, sc-inc, sc)x4 [16]
R4: 16 sc [16]
R5: (3 sc, sc-inc)x4 [20]
R6: (2 sc, sc-inc, 2 sc)x4 [24]
R7: (3 sc, sc-inc)x6 [30]
R8: 30 sc [30]
R9: (2 sc, sc-inc, 2 sc)x6 [36]
R10-12: 36 sc (3 rounds) [36]
R13: (2 sc, sc2tog, 2 sc)x6 [30]
R14: (3 sc, sc2tog)x6 [24]
R15: (sc, sc2tog, sc)x6. Stuff. [18]
R16: (sc, sc2tog)x6 [12]
R17: 6 sc2tog [6]
Cut the yarn, close the hole with a needle, and embroider yellow seeds onto the strawberry.
Leaves: with leaf green, mr, 6 sc, join with slst [6]. Then (ch6, slst, sc, hdc, dc, sc on the chain, join with slst to the next stitch)x6. Fasten off leaving a long tail.
Stem: with leaf green, ch5, 2 slst, 2 sc [4]. Fasten off leaving a long tail.
Sew the leaves onto the top of the strawberry, then sew the stem into the center of the leaves.

Hat strawberries (make 12)
Cut small strawberry shapes from fuchsia felt and leaf shapes from green felt (template on the designer’s page 30). Embroider a few small lines on each felt strawberry with red thread, then glue a leaf on top of each one.
Cut about 20 small white felt circles, roughly 6mm across. Glue the felt strawberries evenly across the hat, then glue the white circles around them as well — the brim/visor only gets white circles, no strawberries. Glue 10 white pompoms evenly around the edge of the brim. Glue the large crocheted strawberry topper right in the center of the crown. Save gluing or sewing the finished hat onto the doll’s head for the very last step, once every other detail is complete.
Finishing Details
Everything in this section is optional, but it’s what gives the doll her charm.
With dark brown embroidery thread, embroider a dashed line down each side of the legs.
With white yarn, make a chain about 20cm long and thread it through the shoes as laces, then tie a bow and pull snug to secure.
Cut 6 small hearts (about 8x6mm) from white felt and glue 3 onto each shoe — or embroider them instead, if you prefer. The heart template is the same one used for the kitten’s nose.
With a watercolor pencil, draw a scatter of small freckles on each cheek and a few on the nose.
If using false eyelashes: cut a lash in half and glue each half above the eye, angled to reach toward the outer corner.
Optionally mark the outer edge of the eyes with a black marker for extra definition.
Finish with pink pastel chalk or makeup blush on the cheeks and just above the nose.
Basket
Work all around the foundation chain, starting with camel. Remember to use the V stitch.
R1: ch10, sc-inc, 7 sc, sc-inc4, 7 sc, sc-inc [22]
R2: 2 sc-inc, 7 sc, 4 sc-inc, 7 sc, 2 sc-inc [30]
R3: (sc, sc-inc)x2, 7 sc, (sc, sc-inc)x4, 7 sc, (sc, sc-inc)x2 [38]
R4: (2 sc, sc-inc)x2, 7 sc, (2 sc, sc-inc)x4, 7 sc, (2 sc, sc-inc)x2 [46]
R5: (3 sc, sc-inc)x2, 7 sc, (3 sc, sc-inc)x4, 7 sc, (3 sc, sc-inc)x2 [54]
R6: 2 sc, sc-inc, 51 sc [55]
R7: BLO 55 sc [55]
R8: (sc, ch1, sk1)x27, sc [55]
R9: (ch1, sk1, sc)x27, ch1, sk1 [55]
R10-14: repeat rounds 8 and 9 alternately (single crochets worked over the chains from the previous round).
Cut a piece of cardboard the same size as the basket’s base and glue it inside for support.
R15: 55 sc, worked into both the chain and the sc of the previous round together. Fasten off.
Attach yarn of the same color to the first front loop left from round 6, and work 1 slst in each loop all the way around. Cut the yarn, join with a fake stitch to the first stitch, and weave in the ends.
Cut a piece of felt the same size as the basket’s base. Add a bit of stuffing to the bottom, then glue the felt piece on top to hide it — leaving two small unglued sections where the handle wire will be inserted later. The stuffing gives the basket enough height that the strawberries sit just above the rim.
Cut a piece of wire about 11cm long and bend it into a handle shape. Cover the entire wire with matching yarn, working sc over the wire to cover it, twisting the stitches around as you go. Glue both ends of the finished handle into the unglued felt sections, hiding them well inside.
Small strawberries (make 5)
Start with red.
R1: mr, 6 sc [6]
R2: 6 sc-inc [12]
R3: (sc, sc-inc)x6 [18]
R4-5: 18 sc (2 rounds) [18]
R6: (2 sc, sc2tog, 2 sc)x3 [15]
R7: (3 sc, sc2tog)x3 [12]
R8: (2 sc, sc2tog)x3. Stuff. [9]
R9: (sc, sc2tog)x3 [6]
Cut the yarn, close the hole with a needle, and weave in the ends. Embroider small yellow seed lines onto each strawberry.
Leaves: with leaf green, mr, then *ch4, slst, 2 sc into the chain, join to the ring with a slst.* Repeat from * to * 4 more times for 5 leaves total, close the ring, and fasten off leaving a long tail. Sew a leaf crown to the top of each strawberry.
Place the finished strawberries inside the basket — glue them in place, or leave them loose so they can be taken in and out.
Strap & bow
Strap: with pink yarn, ch54, then work 53 sc across the chain. Fasten off leaving a long tail. Sew or glue the strap to the basket, with both ends meeting at the center.
Bow: with pink yarn, ch47, then work 46 slst across the chain. Fasten off. Shape the strip into a bow and glue it onto the basket, right above where the strap ends meet.
Kitten Companion
The designer’s version of this kitten is named after a custard-yellow color, though this one is worked entirely in pink to match the doll’s palette.
Front legs (make 2)
Stuff just a little in the bottom part of the legs, starting with pink.
R1: mr, 7 sc [7]
R2: 7 sc-inc [14]
R3: 14 sc [14]
R4: 3 sc, 4 sc2tog, 3 sc [10]
R5: 3 sc, 2 sc2tog, 3 sc [8]
R6-12: 8 sc (7 rounds). Fasten off. [8]
Back legs (make 2)
Stuff the legs as you go, but leave the upper part unstuffed. Work the first round all around the foundation chain.
R1: ch5, 3 sc, sc-inc3, 2 sc, sc-inc [10]
R2: sc-inc, 2 sc, 3 sc-inc, 2 sc, 2 sc-inc [16]
R3: 16 sc [16]
R4: 5 sc, 3 sc2tog, 5 sc [13]
R5: 4 sc, 3 sc2tog, sc, sc2tog [9]
R6-10: 9 sc (5 rounds) [9]
R11: (sc, sc2tog)x3 [6]
Fasten off leaving a long tail — use it to close the hole at the end of the leg, and leave it long for sewing on later.
With brown embroidery thread, embroider a dashed line down the center of both the front and back legs.
Body
Start with pink.
R1: mr, 6 sc [6]
R2: 6 sc-inc [12]
R3: (sc, sc-inc)x6 [18]
R4: (sc, sc-inc, sc)x6 [24]
R5: (3 sc, sc-inc)x6 [30]
R6: (2 sc, sc-inc, 2 sc)x6 [36]
Cut a piece of cardboard the size of the body’s base and glue it inside.
R7: (5 sc, sc-inc)x6 [42]
R8-10: 42 sc (3 rounds) [42]
R11: 4 sc, sc2tog, 9 sc, sc2tog, 8 sc, sc2tog, 9 sc, sc2tog, 4 sc [38]
R12-13: 38 sc (2 rounds) [38]
R14: 10 sc, sc2tog, 16 sc, sc2tog, 8 sc [36]
R15: 36 sc [36]
Front legs joining
R16: make 3 sc, sc2tog, 6 sc, sc2tog, sc on the body, then 3 sc joining one leg and the body at the same time — starting at the leg’s 3rd stitch, inserting the hook first into the leg from the inside out, then into the body. Continue with 3 sc on the body, then 3 sc joining the other leg the same way, and finish with sc, sc2tog, 6 sc, sc2tog, 2 sc on the body [32].
R17: skip the 3 joining stitches from the previous round on leg and body. Make 10 sc, sc2tog on the body, 5 sc on the unworked stitches of the leg, 3 sc on the body, 5 sc on the unworked stitches of the other leg, sc2tog, 9 sc on the body [34].
R18: (3 sc, sc2tog)x2, 5 sc, (sc2tog, sc)x2, 4 sc, sc2tog, 3 sc, sc2tog, 2 sc [28]
R19: 28 sc [28]
R20: (sc2tog, 5 sc)x4 [24]
Fasten off leaving a long tail. Thread a needle and pass it horizontally through both legs to bring them a little closer together, then sew a stitch toward the body to pull the legs in snugly. Hide the yarn inside. Stuff the body firmly up to the top.

Head
Start with pink.
R1: mr, 6 sc [6]
R2: 6 sc-inc [12]
R3: (sc, sc-inc)x6 [18]
R4: (sc, sc-inc, sc)x6 [24]
R5: (3 sc, sc-inc)x6 [30]
R6: (2 sc, sc-inc, 2 sc)x6 [36]
R7: (5 sc, sc-inc)x6 [42]
R8-11: 42 sc (4 rounds) [42]
R12: 3 sc, (3 sc, sc-inc)x3, 9 sc, (3 sc, sc-inc)x3, 6 sc [48]
R13-16: 48 sc (4 rounds) [48]
R17: 2 sc, sc2tog, (4 sc, sc2tog)x7, 2 sc [40]
R18: (3 sc, sc2tog)x8. Stuff. [32]
R19: sc, sc2tog, (2 sc, sc2tog)x7, sc [24]
R20: BLO (sc, sc2tog)x8 [16]
R21: 8 sc2tog [8]
Fasten off. Insert 6mm safety eyes between rounds 11 and 12, 6 stitches apart.
Ears (make 2)
Start with pink.
R1: mr, 6 sc [6]
R2: (sc, sc-inc)x3 [9]
R3: (2 sc, sc-inc)x3 [12]
R4: 12 sc [12]
R5: (4 sc, 2 sc-inc)x2 [16]
R6: (7 sc, sc-inc)x2 [18]
R7: 18 sc [18]
Fasten off leaving a long tail. Add a little pink blush to the center of each ear.
Tail
Do not stuff the tail. Start with pink.
R1: mr, 6 sc [6]
R2: 6 sc-inc [12]
R3: (3 sc, sc-inc)x3 [15]
R4-6: 15 sc (3 rounds) [15]
R7: (3 sc, sc2tog)x3 [12]
R8-10: 12 sc (3 rounds) [12]
R11: (2 sc, sc2tog)x3 [9]
R12-22: 9 sc (11 rounds) [9]
R23: 4 sc, 2 hdc, 3 dc [9]
The last few stitches curve the tail tip backward on purpose — that’s correct.
Fasten off leaving a long tail. Embroider a dashed line down the center of the tail with brown thread.
Face & Assembly
Most of the face embroidery in the original design was done with fabric glue — curved shapes like the nose heart and the lips are glued yarn laid directly onto the fabric rather than stitched. Embroider instead if you prefer.
With white yarn, embroider the bottom curve of each eye. With dark brown, embroider a line above each eye, letting the outer end flick outward.
Cut a small heart from pink felt and glue it centered between the eyes for a nose (or embroider a nose instead). Embroider the heart’s outline in brown thread, then embroider the mouth below it in a gentle W curve.
Embroider a dashed line down the center of the face to the magic ring at the top. Embroider eyebrows 3 rounds above the eyes with a slight curve, and whiskers on each side of the face, starting 7 stitches out from the nose. Add a little pink blush to each cheek.
Sew the head onto the body: using the long tail left from the body, join the 24 stitches of the body to the 24 front loops left on the head, stitch by stitch, keeping the seam as invisible as possible.
Pin the ears in place between rounds 3 and 10 of the head, then sew them down between the pinned rounds.
Sew the back legs to the body so the top of each leg sits at round 15, about 4 stitches away from the front legs. Sew firmly from top to bottom of each leg.
Cut a piece of pipe cleaner double the length of the tail plus about 6cm. Fold it in half and insert it into the tail, leaving one end sticking out. Mark the center back of the body between rounds 7 and 8, insert the pipe cleaner there, then sew the tail on with the embroidered side facing up. Trim any excess pipe cleaner and hide the ends, then curve the tail into its final shape.

Collar
Strap: with fuchsia yarn, ch29, then work 28 slst across the chain. Fasten off leaving a long tail.
Bow: with green yarn, ch7, work 6 sc across, ch1, turn, and repeat for 2 more rows (3 rows total). Fasten off.
Embroider 2 white lines across the little green rectangle, then wrap yarn around the center to pinch it into a bow shape. Glue the small strawberry charm onto the front of the bow, then glue the bow onto the center of the fuchsia strap.
Finally, sew the finished collar around the kitten’s neck, joining both ends of the strap at the back.

Tips for a Polished Finish
- This pattern is long — it’s worth working through it in stages (legs and arms one session, body and head another, hair and clothing separately) rather than trying to finish it all at once.
- Wire placement matters more here than in most amigurumi: tape every wire end before inserting it, and twist leg and arm wires securely into the main body wire so nothing can work loose later.
- Hold off joining the head until the dress is on — the pattern’s own note about this is worth taking seriously, since a joined head makes dressing the doll from the bottom up the only option.
- The three-layer wig is genuinely fiddly. Pin everything in place and step back to check the balance before gluing or sewing anything down permanently.
Frequently Asked Questions
Is this an official pattern?
No — this is an unofficial, fan-made design inspired by a classic 1980s strawberry-themed doll character and her kitten friend. It isn’t affiliated with, endorsed by, or licensed from the original rights holders; it’s a handmade tribute shared for personal, non-commercial crafting.
Do I really need to insert wire into the body?
No — the designer notes that body articulation is entirely optional and depends on whether you want the doll to hold poses. If you skip it, stuff the limbs a bit more firmly to compensate, and the doll will stand rather than pose dynamically.
What’s the difference between the V stitch and X stitch the pattern keeps mentioning?
It refers to which direction you cross your working yarn — “yarn over” (V) versus “yarn under” (X). X-style stitches crochet up tighter and smaller, which would make the clothes fit too snugly and the hair strands come out shorter than intended, so the designer specifically calls for the looser V style throughout the hair and clothing sections.
How long does this pattern take to complete?
Quite a while — between the wired body, the three-layer wig, the fully separate kitten, and all the felt and embroidery detailing, this is one of the longer amigurumi patterns you’ll come across. Most makers split it into several sessions: body and limbs, head and hair, the wardrobe, and the kitten as its own project.
Conclusion
Between the wired armature, the layered wig, and a whole second amigurumi tucked inside the pattern in the form of the kitten, this is a serious project — but the payoff is a genuinely display-worthy pair. Take the clothing and hair slowly, lean on the reference photos whenever the written rounds feel dense, and you’ll end up with something really special. If you make your own, I’d love to see the finished pair — share a photo or drop a comment below!