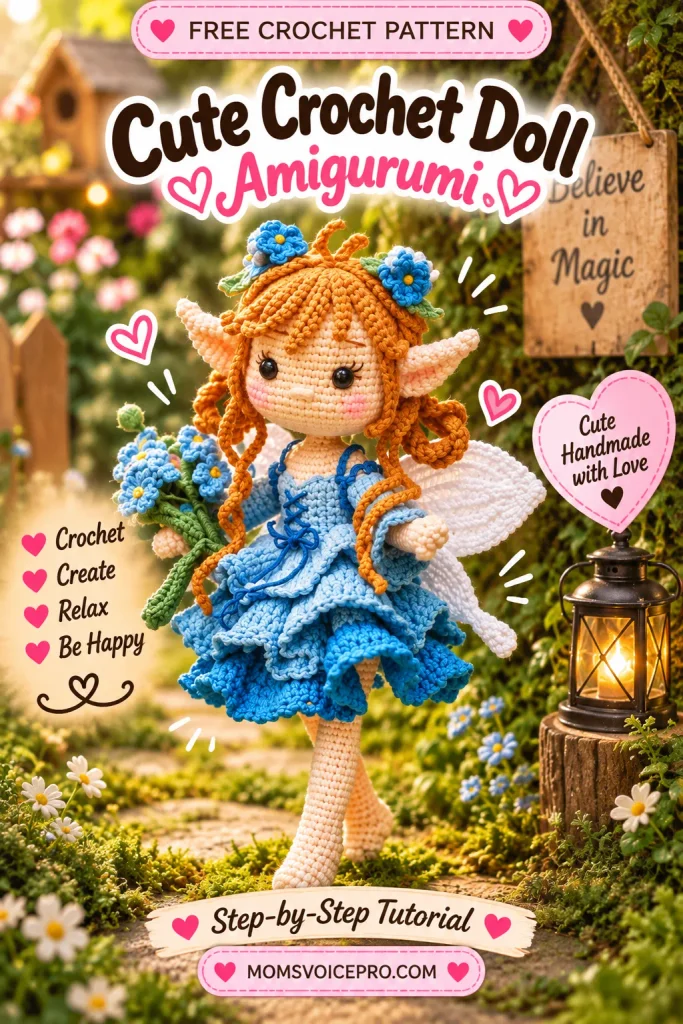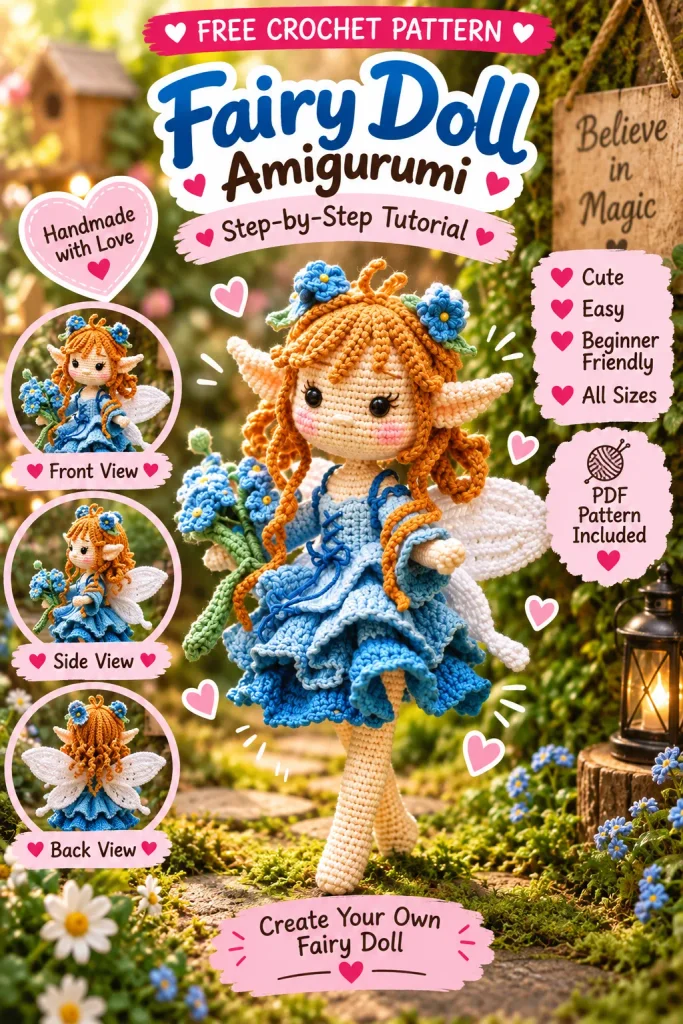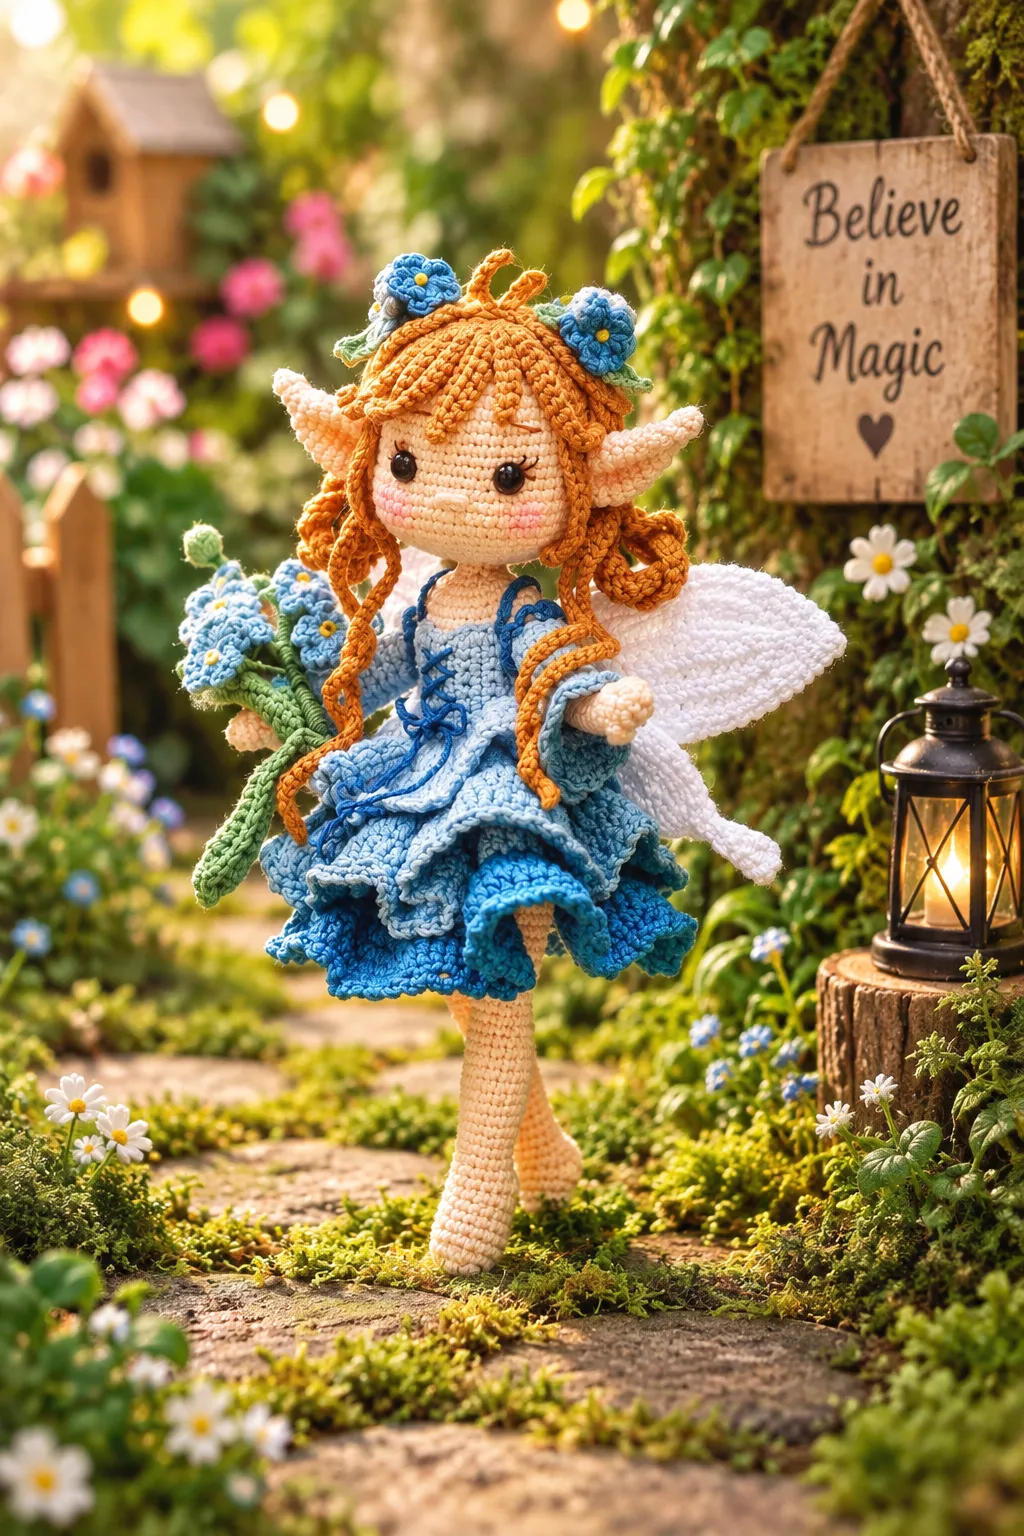
Meet the sweetest little garden fairy you’ll ever hook! With her tumbling cinnamon curls, delicate pointed ears, gauzy white wings, and a ruffled forget-me-not blue dress, this amigurumi fairy doll is the kind of project that turns a few skeins of yarn into pure whimsy. She stands about 25cm (12”) tall on wired, poseable legs and arms, so you can sit her on a shelf, tuck her into a fairy garden, or hand her off as a one-of-a-kind gift.
This free master class walks you through every single piece – body, head, ears, three layers of hair, the corset-laced dress, sleeves, wings, and even a tiny bouquet of crocheted forget-me-nots – with real step-by-step photos at every stage. Grab your 1.75mm and 2.0mm hooks, a bit of fine wire, and let’s bring this little woodland fairy to life together!
Table of Contents
Materials Needed
Yarn (Catania Schachenmayr, 1.5mm weight)
- White: 106
- Green: 212
- Baby Blue: 173
- Denim Blue: 421
- Navy Blue: 164
- Cinnamon: 383
- Yellow: 403
Yarn (Scheepjes Catona, 1.5mm weight)
- Beige: 255
Accessories
- Crochet hooks: 1.75mm & 2mm (or hooks suitable for your yarn)
- Embroidery floss: brown
- Safety eyes: 8mm x 2
- Fiberfill for stuffing
- Stitch markers, ball pins, yarn needle, scissors
- Wire: 1.5mm–2mm for the body, and 0.5mm for the flowers and wings
- Beads: 4mm yellow beads x 6
- Tweezers (or a wooden spoon/chopstick for easy stuffing)
- Hot glue (for securing hair strands) and white glue
- Pink/orange blush for the doll’s face (powder or acrylic)
- Crimping pliers, cutting pliers

Abbreviations
- MR: Magic ring
- R: Round(s)/Row(s)
- (…)* times: Repeat * N times
- Ch: Chain
- SC: Single crochet
- INC: Single crochet increase (work 2 single crochet in one stitch)
- SC DEC: Invisible decrease over 2 single crochet
- HDC: Half double crochet
- HDC DEC: 2 half double crochet decrease (2 HDC in one stitch)
- DC: Double crochet
- DC INC: 2 double crochet increasing in 1 stitch
- TC: Triple crochet
- SL ST: Slip stitch
- SK: Skip
- BLO: Back loop only
- FLO: Front loop only
- RS: Right side
- WS: Wrong side
- <Join color>: Join another color to crochet
- S: Strand/Strands (of hair)
- Finished size is approx. 25cm (12”) tall
- Crochet in spiral rounds (continuous rounds) unless noted otherwise (turn, or sl st)
- For the smoothest finish, use invisible sc/hdc decrease stitches
- Crochet with tight stitches — a 1.75mm hook for the Body, and a 2mm hook for the Head, Hair and Outfit
How to Read This Pattern
The 4dc-Bobble Stitch
You’ll come across this stitch in a few spots in the pattern — for example: 4sc, 4dc-bobble, 4sc. Here’s exactly how to work it:

- Crochet 4sc, then insert the hook into the next stitch where you need to make the 4dc-bobble
- Yarn over and pull up a loop through the first two loops on the hook — 2 loops left on the hook
- Repeat 3 more times: yarn over and pull up a loop, until you have a total of 5 loops on the hook
- Yarn over and pull through all the loops on the hook — you’ve just completed one 4dc-bobble stitch!
Arms
Arms (Make 2) – begin with Beige yarn (255)
- R1: 6sc in MR (6sts)
- R2: (sc, inc)*3 (9)
- R3–4 (2 rounds): 9sc
- R5: 4sc, 4dc-bobble, 4sc (9)
- R6: 9sc
- R7: 7sc, sc dec (8)
- R8–22 (15 rounds): 8sc
Fasten off and cut the yarn. There’s no need to stuff the 2 arms yet — we’ll insert the wire and attach them to the body later.
Legs

The First Leg – begin with Beige yarn (255)
- R1: 5ch, insert the hook into the 2nd chain from the hook, inc, 2sc, 4sc in the last chain, 2sc on the other side of the chain, inc (12)
- R2: 12sc
- R3: 6sc, inc, 5sc (13)
- R4: inc, 12sc (14)
- R5–6 (2 rounds): 14sc
- R7: 10sc, hdc inc, 2dc inc, hdc inc (18)
- R8: 10sc, hdc dec, 2dc dec, hdc dec (14)
- R9: [(FLO) 9sc], 5sc (14)
- R10: (sc dec, 5sc)*2 (12) — start to insert wire and stuff
- R11: 12sc
- R12: 10sc, inc, 1sc (13)
- R13: 13sc
- R14: inc, 8sc, inc, 3sc (15)
- R15–16 (2 rounds): 15sc
- R17: 13sc, inc, 1sc (16)
- R18–21 (4 rounds): 16sc
- R22: 13sc, sc dec, 1sc (15)
- R23: 15sc
- R24: sc dec, 3sc, (inc)*3, 4sc, sc dec, sc (16)
- R25: 16sc
- R26: 14sc, inc, 1sc (17)
- R27: 17sc
- R28: 1sc, inc, 15sc (18)
- R29: 18sc
- R30: inc, 17sc (19)
- R31–36 (6 rounds): 19sc

The Second Leg
Make the second leg following R1–R35 exactly as above, but do NOT cut the yarn.
- R36: 17sc, <switch to White yarn> 2sc (19)
Connect the 2 Legs to Make the Body
Starting from the 2nd leg:
- R37: <from the 2nd leg> 17sc, (2sts left unworked), ch3, <the first leg> 19sc, 3sc worked on the side of the 3ch. Place a stitch marker to note the joined stitch in the next stitch (42sts + 2sts unworked)

Body
- R38–43 (6 rounds): 44sc
- R44: 9sc, sc dec, 20sc, sc dec, 11sc (42)
- R45: (5sc, sc dec)*6 (36)
- R46: <Join Beige color (255)> (4sc, sc dec)*6 (30)
- R47: 6sc, sc dec, 14sc, sc dec, 6sc (28)
- R48–57 (10 rounds): 28sc

Body Continued – Joining the Arms
- R58: <join arms with the body> From the back of the body: <Left Body> 8sc, <Left arm> 8sc, <Front Body> 14sc, <Right arm> 8sc, <Right Body> 6sc (44)
- R59: (9sc, sc dec)*4 (40) — insert wire inside the 2 arms (cut the wire ~19cm / 7.5in)
- R60: 40sc
- R61: (8sc, sc dec)*4 (36)
- R62: (4sc, sc dec)*6 (30)
- R63: (3sc, sc dec)*6 (24)
- R64: (2sc, sc dec)*6 (18)
- R65: (sc, sc dec)*6 (12)
- R66: (4sc, sc dec)*2 (10)
- R67–73 (8 rounds): 10sc — stuff the neck as you go
- R74: (sc dec)*5 (5)
Fasten off, leaving a long tail. Close and finish off the hole.

Front & back body, arm wire insertion, the full wire diagram, and adding a soft blush makeup to the body
Head
Head – begin with Beige yarn (255), 2.0mm hook
- R1: 6sc in MR (6sts)
- R2: 6inc (12)
- R3: (sc, inc)*6 (18)
- R4: (2sc, inc)*6 (24)
- R5: (3sc, inc)*6 (30)
- R6: (2sc, inc, 2sc)*6 (36)
- R7: (5sc, inc)*4 (42)
- R8: (3sc, inc, 3sc)*6 (48)
- R9–16 (8 rounds): 48sc
- R17: 13sc, (sc, inc)*4, 6sc, (inc, sc)*4, 13sc (56)
- R18–21 (4 rounds): 56sc
- R22: 17sc, (sc dec)*4, 6sc, (sc dec)*4, 17sc (48)
- R23: (3sc, sc dec, 3sc)*6 (42)
- R24: (5sc, sc dec)*6 (36)
- R25: (2sc, sc dec, 2sc)*6 (30)
- R26: (3sc, sc dec)*6 (24)
- R27: (2sc, sc dec)*6 (18) — begin stuffing at this step
- R28: (sc, sc dec)*6 (12)
- R29: (BLO) 12sc
- R30–34 (5 rounds): 12sc
Fasten off, cut the yarn, and weave in the ends.

Pushing the eye posts through, then embroidering eyelashes and eyebrows with brown floss
Ears & Face Details
Ears (Make 2) – begin with Beige yarn (255), 1.75mm hook
- R1: 4sc in MR (4sts)
- R2: (sc, inc)*2 (6)
- R3: 6sc
- R4: (sc, inc)*3 (9)
- R5: (2sc, inc)*3 (12)
- R6: 12sc
- R7: (3sc, inc)*3 (15)
- R8–10 (3 rounds): 15sc
- R11: (3sc, sc dec)*3 (12)
- R12: (2sc, sc dec)*3 (9)
Fasten off, cut the yarn, and leave a long tail for sewing later.
Attaching the ears: cut a 2” (~5cm) length of wire and fold it in half; slip it inside each ear before sewing it to the head. Position the ears 5 stitches away from the eyes, spanning rounds R16–R18.

Sewing the nose, wiring and positioning the pointed ears, then finishing the face with a soft blush
Hair
The hair is built in three crocheted layers of loose chain-and-stitch “strands,” then styled and glued into place for volume. Work all three layers in Cinnamon yarn (383) with a 2.0mm hook.
First Layer (24 Strands)
- R1: 6sc in MR (6sts)
- R2: (FLO) 6inc (12)
- R3: (sc, inc)*6 (18)
- R4: (FLO) (2sc, inc)*6 (24)
- R5: now crochet every single strand to make the hair (24 strands total, 1 stitch = 1 strand):
- S1: 11ch, (insert the hook into the 2nd ch from the hook) 10sc along the chain, sl st in the next stitch
- S2: 21ch, (insert the hook into the 2nd ch from the hook) 2sc, 17hdc, 1sc along the chain, sl st in the next stitch
- S3: 16ch, (insert the hook into the 2nd ch from the hook) 15sc along the chain, sl st in the next stitch
- S4: 9ch, (insert the hook into the 2nd ch from the hook) 8sc along the chain, sl st in the next stitch
- S5: 12ch, (insert the hook into the 2nd ch from the hook) 2sc, 8hdc, 1sc along the chain, sl st in the next stitch
- S6: 13ch, (insert the hook into the 2nd ch from the hook) 12sc along the chain, sl st in the next stitch
- S7: 14ch, (insert the hook into the 2nd ch from the hook) 13sc along the chain, sl st in the next stitch
- S8: 16ch, (insert the hook into the 2nd ch from the hook) 15sc along the chain, sl st in the next stitch
- S9: 21ch, (insert the hook into the 2nd ch from the hook) 2sc, 17hdc, 1sc along the chain, sl st in the next stitch
- S10: 11ch, (insert the hook into the 2nd ch from the hook) 10sc along the chain, sl st in the next stitch
- S11: 61ch, (insert the hook into the 2nd ch from the hook) 60 sl st along the chain, sl st in the next stitch
- S12–23 (12 strands): 18ch, (insert the hook into the 3rd ch from the hook) 15hdc, 1sc along the chain, sl st in the next stitch
- S24: 61ch, (insert the hook into the 2nd ch from the hook) 60 sl st along the chain, sl st in the next stitch
Fasten off, cut the yarn, and weave in the ends.

Second Layer (4 Strand Groups)
Turn the piece to the wrong side. Insert the hook into the front loops of R4 to crochet this layer — strand S25 sits parallel to S21, as pictured.
- S25–27 (3 strands): 45ch, (insert the hook into the 2nd ch from the hook) 5 sl st, 39sc along the chain, sl st in the next stitch
- S28: 37ch, (insert the hook into the 2nd ch from the hook) 36 sl st along the chain, sl st in the next stitch
- S29: 6ch, (insert the hook into the 2nd ch from the hook) 5 sl st along the chain, sl st in the next stitch
- S30: 7ch, (insert the hook into the 2nd ch from the hook) 6 sl st along the chain, sl st in the next stitch
- S31: 37ch, (insert the hook into the 2nd ch from the hook) 36 sl st along the chain, sl st in the next stitch
- S32–34 (3 strands): 45ch, (insert the hook into the 2nd ch from the hook) 5 sl st, 39sc along the chain, sl st in the next stitch
Fasten off, cut the yarn, and weave in the ends.

Third Layer (2 Strands)
Turn to the wrong side again. Insert the hook into the front loops of R2 — strand S35 sits opposite S29 and S30, as pictured.
- S35–36 (2 strands): 65ch, (insert the hook into the 2nd ch from the hook) 64 sl st along the chain, sl st in the next stitch
Fasten off, cut the yarn, and weave in the ends.

Attaching & Styling the Hair
Fit the finished hair cap onto the head and secure the shorter strands (S1–S10, S12–S23) around the hairline and crown with small dabs of hot glue, working front to back for natural volume and face-framing pieces.


Finishing the Hair
Braid strands S25 + S26 + S27 together on one side. Thread a yarn needle with matching yarn and stitch through the 3 braided strands, then tie them off so the braid doesn’t come loose. Sew the tail of the second-layer hair down close to the ear. Tie the finished braid together with strands S36 and S24, hide the yarn tails inside the hair, and trim. Gently pull strand S36 out and to the side for a soft, wind-blown look, then secure it in place with a small dot of hot glue.

Flowers, Leaves & Bow Tie
With the body, head, and hair complete, it’s time for the pretty details — the little forget-me-not hair flowers, leaves, and the light blue bow tie.

Flowers (Make 6) – 2.0mm hook
Make 3 flowers in Light Blue yarn (173) and 3 flowers in Navy Blue yarn (164).
- Make a MR, then work (2ch, 2dc, 2ch, sl st)*5 into the ring
Fasten off, cut the yarn, and weave in the ends.
Leaves (Make 2) – begin with Green yarn (212)
- 9ch, insert the hook into the 2nd ch from the hook: sc, hdc, 3dc, hdc, sc, 3sc in the last chain, sc on the other side of the chain, hdc, 3dc, hdc, sc
Fasten off, cut the yarn, and weave in the ends.
The Bow Tie – 2.0mm hook, begin with Light Blue yarn (173)
Part A (the bow):
- 28ch, insert the hook in the 2nd ch from the hook, inc, hdc, 9dc, hdc, sc, sl st, sc, hdc, 9dc, hdc, 3sc in the last chain, hdc on the other side of the chain, 9dc, hdc, sc, sl st, sc, hdc, 9dc, hdc, sc, sl st to the end
Cut the yarn, leaving a long tail for sewing later.
Part B (the center wrap):
- R1: 28ch, insert the hook in the 3rd ch from the hook, 12hdc, 2sc, 12hdc, ch2 and turn (26)
- R2: (FLO) 12hdc, sc dec, 12hdc (25)
Fasten off, cut the yarn, and weave in the ends. Fold part A into a bow shape, then wrap part B tightly around the center and sew it in place on the back.

Fold the bow, wrap the center piece around it, then attach the flowers, leaves, and bow to the hair
Top & Dress
Top – begin with Light Blue yarn (173)
- R1 (RS): 7ch, insert the hook into the 2nd ch from the hook, 6sc along the chain, ch1 and turn
- R2–3 (2 rounds): 6sc, ch1 and turn
- R4 (WS): inc, 5sc, ch1 and turn (7)
- R5 (RS): 7sc, ch1 and turn
- R6 (WS): inc, 6sc, ch1 and turn (8)
- R7 (RS): 8sc, ch1 and turn
- R8 (WS): inc, 7sc, ch1 and turn (9)
- R9 (RS): 7sc, sc dec, ch1 and turn (8)
- R10 (WS): sc dec, 6sc, ch1 and turn (7)
- R11 (RS): 5sc, sc dec, ch1 and turn (6)
- R12 (WS): inc, 5sc, ch1 and turn (7)
- R13 (RS): 6sc, inc, ch1 and turn (8)
- R14 (WS): inc, 7sc, ch1 and turn (9)
- R15 (RS): 7sc, sc dec, ch1 and turn (8)
- R16 (WS): 8sc, ch1 and turn
- R17 (RS): 6sc, sc dec, ch1 and turn (7)
- R18 (WS): 7sc, ch1 and turn
- R19 (RS): 5sc, sc dec, ch1 and turn (6)
- R20–21 (2 rounds): 6sc, ch1 and turn
- R22 (WS): 6sc — do not cut the yarn, ch1 and turn to the right side, then crochet all the way around the edges of the top: 5sc, inc, 22sc, inc, 5sc, 22sc, ch3 and turn

Dress Skirt – worked on from the Top
- R1 (WS): (FLO) (dc inc)*22, ch2 and turn (44)
Continue working in joined rounds from here:
- R2 (RS): 44hdc, sl st and ch3
- R3: (dc, dc inc)*22, sl st and ch3 (66)
- R4: (BLO) 66dc, sl st and ch2
- R5: 66hdc, sl st and ch3
- R6: 66dc, sl st and ch1
- R7: <change to Navy Blue yarn (164)> 66sc, sl st and ch3
- R8: (FLO) (dc inc)*66, sl st and ch2 (132)
- R9: 132hdc, sl st and ch3
- R10: 132dc, sl st
- R11: (ch3, sk 1st, sc in the next st)*, repeat until the end
Fasten off, cut the yarn, and weave in the ends.

The First Ruffle Layer
Working from R1, insert the hook into the back side of the dress and join Light Blue yarn (173):
- R1 (RS): (FLO) (ch3) (dc inc)*22, sl st and ch3 (44)
- R2: (dc inc)*44, sl st and ch3 (88)
- R3: 88dc, sl st
- R4: (ch3, sk 1st, sc in the next st)*, repeat until the end
Fasten off, cut the yarn, and weave in the ends.
The Second Ruffle Layer
Working from R4, insert the hook into the back side of the dress and join Denim Blue yarn (421):
- R4 (RS): (FLO) (ch3) (dc inc)*66, sl st and ch3 (132)
- R5–6 (2 rounds): 132dc, sl st and ch3
- R7: (ch3, sk 1st, sc in the next st)*, repeat until the end
Fasten off, cut the yarn, and weave in the ends. Finally, lace a length of Denim Blue yarn crosswise up the front bodice like a corset and tie in a bow to finish the dress.

Lace the ribbon crosswise up the bodice, then tie it off at the top — front and back view of the finished dress
Sleeves
Sleeves (Make 2) – begin with Light Blue yarn
- R1: 14ch, insert the hook into the first chain and sl st to form a ring, ch1, 14sc around the chain, sl st and ch1
- R2: (5sc, sc dec)*2, sl st and ch1 (12)
- R3–5 (3 rounds): 12sc, sl st and ch1
- R6: (5sc, inc)*2, sl st and ch1 (14)
- R7–8 (2 rounds): 14sc, sl st and ch1
- R9: (3sc, inc, 3sc)*2, sl st and ch1 (16)
- R10: 16sc, sl st and ch1
- R11: <change to Denim Blue yarn (421)> (sc, inc)*8, sl st (24)
- R12: (FLO) (sk 1st, 4hdc in the next st, sk 1st, sc in the next st)*6
Fasten off, cut the yarn, and weave in the ends.
The Ruffles of the Sleeves
- From R1 of the sleeve, join Navy Blue yarn (164): (ch3, sk 1st, sc in the next st)*7
Fasten off, cut the yarn, and weave in the ends.

Wings
Big Wings (Make 2) – begin with White yarn (106)
- R1: 20ch, insert the hook into the 2nd ch from the hook, sc, hdc, 15dc, hdc, 3sc in the last chain, hdc on the other side of the chain, 15dc, hdc, sc, sl st and ch1 (37)
- R2: inc, hdc, 15dc, hdc, inc, 3sc in 1 stitch (on the top point), inc, hdc, 15dc, hdc, inc, sl st and ch1 (45)
- R3: sc, inc, hdc, dc inc, 14dc, hdc, 4sc, ch3, (insert the hook into the 2nd ch from the hook) 2sc on the chain, 3sc, hdc, 14dc, dc inc, hdc, inc, sc, sl st and ch1 (49sts + 4sts on the top)
- R4: 25sc, 2sc on the top point, ch2 picot, 2sc on the other side of the top, 24sc, sl st
Fasten off, cut the yarn, and weave in the ends.

Small Wings (Make 2) – begin with White yarn (106)
- R1: 13ch, insert the hook into the 2nd ch from the hook, sc, hdc, 8dc, hdc, 3sc in the last chain, hdc on the other side of the chain, 8dc, hdc, sc, sl st and ch1 (25)
- R2: inc, hdc, 8dc, hdc, inc, 3sc in 1 stitch (on the top point), inc, hdc, 8dc, hdc, inc, sl st and ch1 (31)
- R3: (sc, inc)*2, 6hdc, hdc inc, hdc, 4sc, ch2, (insert the hook into the 2nd ch from the hook) 1sc on the chain, 3sc, hdc, hdc inc, 6hdc, (inc, sc)*2, sl st and ch1 (37sts + 2sts on the top)
- R4: 20sc, ch10, (insert the hook into the 4th ch from the hook) 1tc, 2dc, 2hdc, 1sc, 1sl st along the chain, 19sc down the other side of the wing, sl st
Fasten off, cut the yarn, and weave in the ends. Attach the wings to the back of the dress with fabric glue, or sew them on through the dress fabric.

Forget-Me-Not Flowers
Finish your garden fairy with a tiny crocheted bouquet of forget-me-nots to carry in her hand — the perfect whimsical final touch.
Leaves (Make 2) – begin with Green yarn (212)
- R1: 16ch, insert the hook into the 2nd ch from the hook, sc, hdc, 11dc, hdc, 3sc in the last chain, hdc on the side of the chain, 11dc, hdc, sc, sl st and ch1 (31)
- R3: 16sc, ch2, (insert the hook into the 2nd ch from the hook) 1sc on the chain, 15sc, sl st
Fasten off, cut the yarn, and leave a long tail for wrapping later.
Flowers (Make 6)
Make 3 flowers in Light Blue yarn (173) and 3 flowers in Denim Blue yarn (421).
- Make a MR, then work (2ch, 2dc, 2ch, sl st)*5 into the ring
Fasten off, cut the yarn, and weave in the ends.

Sepals (Make 6) – begin with Green yarn (212)
- Make a MR, (ch2, insert the hook into the 2nd ch from the hook, 1sc on the chain, sl st on the MR)*5
Fasten off, cut the yarn, and leave a long tail for wrapping later. Wrap the pistil tightly with a length of Yellow yarn through the middle of the wire stem, and secure with a small drop of glue.

Pistil & Final Assembly
Pistil (make 1) – begin with Green yarn (212): make a MR, ch2, then work a 10hdc-bobble. No need to cut the yarn — leave a long tail for wrapping (you’ll need quite a long one).
- Fold a 12½in (~32cm) length of wire in half and tuck it inside the pistil; secure with a drop of hot glue
- Wrap the stem tightly with Green yarn, applying a small drop of white glue partway down to hold it
- Attach the first flower to the stem, followed by the remaining flowers — light blue flowers first, then denim blue
- Finally, attach the wired leaf to the stem
And that’s it — your tiny Forget-Me-Not bouquet is finished!

Tips for a Polished Finish
- Switch hooks for each piece. Use the smaller 1.75mm hook for the body, legs, and arms so the stuffing and wire stay fully hidden, and the 2mm hook for the head, hair, and outfit so those pieces stay soft and drapey.
- Use invisible decreases throughout. Working invisible sc/hdc decreases (through the front loops only) instead of standard decreases keeps every shaping round smooth and bump-free — especially important on the visible head and body.
- Don’t skip the wire armature. The wire through the legs, arms, and wings is what lets your finished fairy stand, sit, and pose naturally. If you prefer a wire-free doll for safety around small children, simply stuff every piece extra firmly instead.
- Build the face gradually. Place the safety eyes first, step back and check they’re level, then add the embroidered eyelashes, brows, and nose before you glue on the ears — it’s much easier to adjust the face before the hair goes on.
- Layer the hair front to back. Glue the shorter first-layer strands down first for volume at the crown, then style the longer second and third layers over the top so every layer peeks through naturally.
- Add blush last. A soft dusting of pink or orange blush on the cheeks, ears, and finger/toe tips after the doll is fully assembled brings a warm, lifelike glow to the finished piece.
Frequently Asked Questions
What size hook and yarn do I need for this pattern?
Do I really need to insert wire into the doll?
Can I use different yarn colors than the pattern?
How long does this pattern take to complete?
Is this pattern suitable for beginners?
Conclusion
And there she is — your very own Garden Fairy, from her curling cinnamon hair right down to her tiny bouquet of forget-me-nots! This is the kind of pattern worth taking slow, piece by piece, and she makes an absolutely magical gift once she’s finished. I’d love to see your version, so be sure to tag your finished fairy and share her with the community.
Happy hooking, and enjoy every stitch of this one!