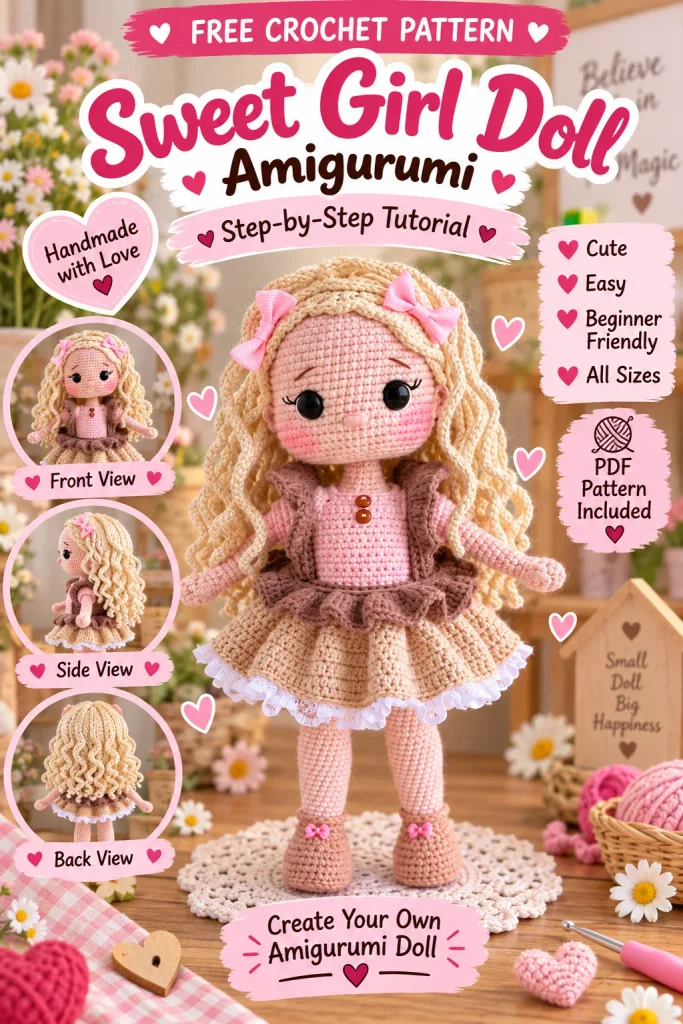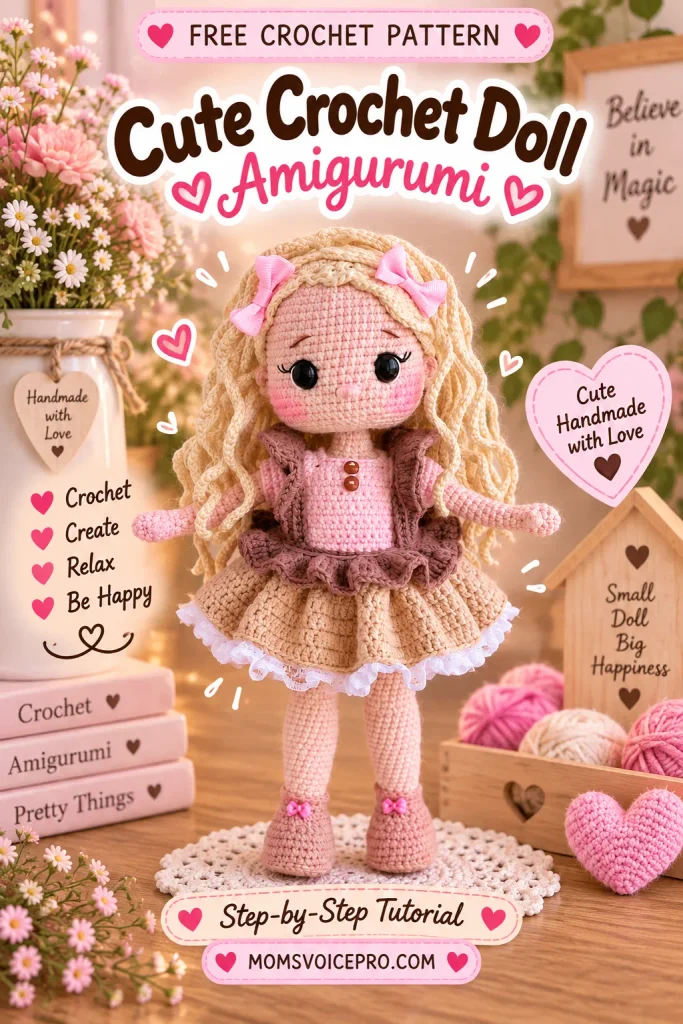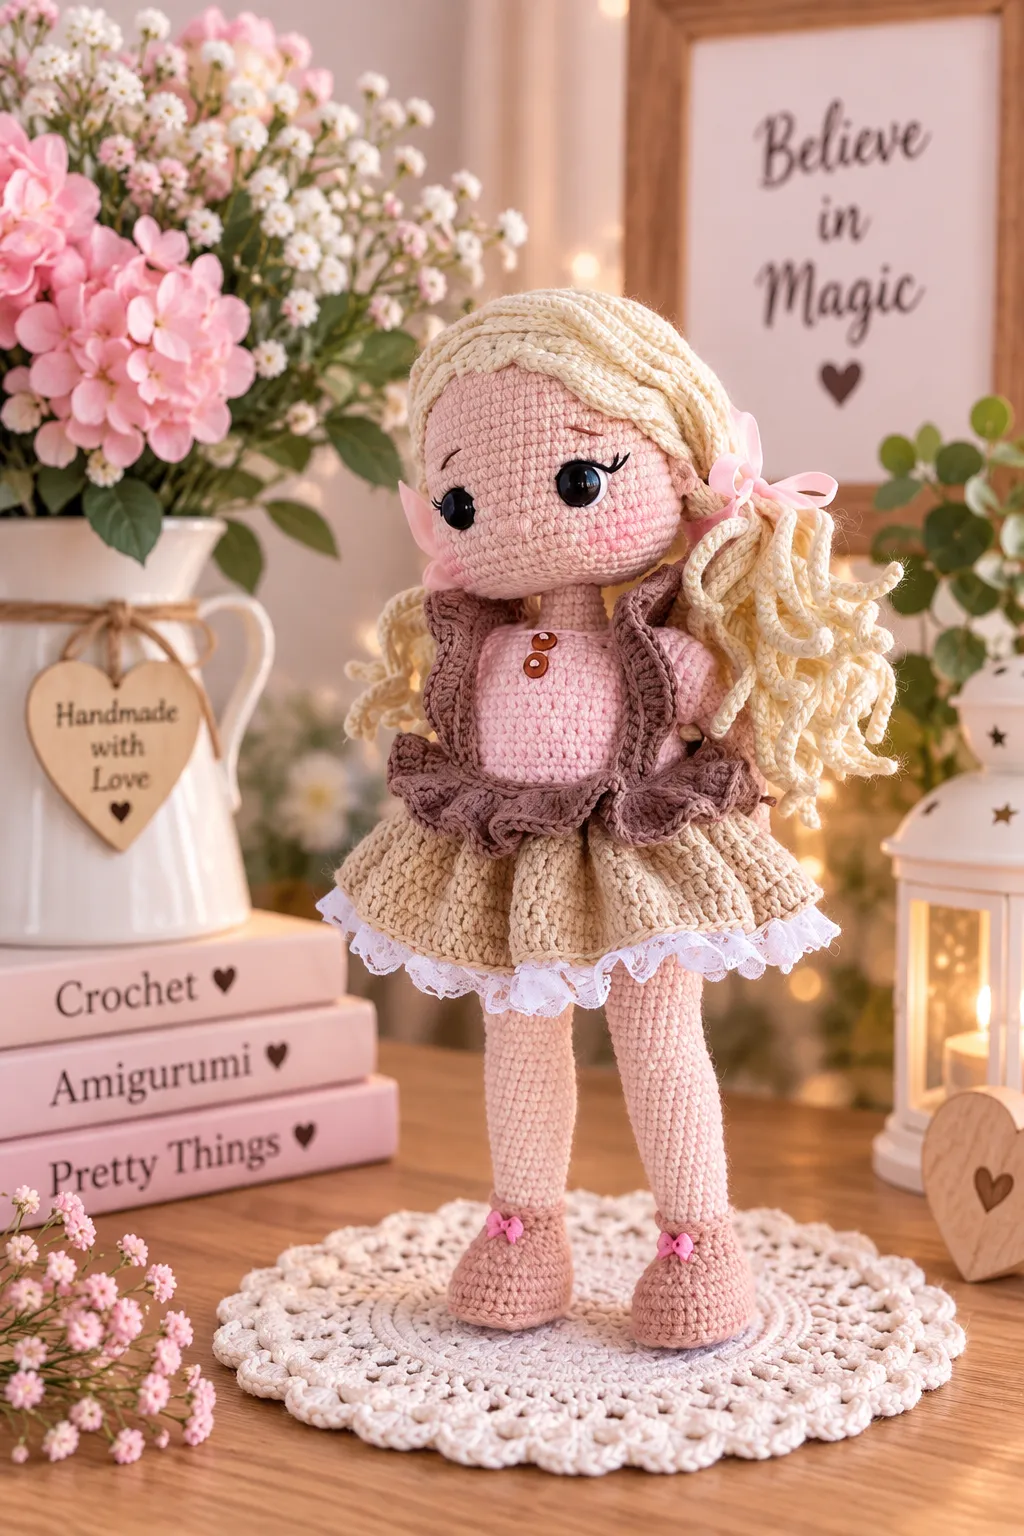
Martha is a sweet curly-haired amigurumi doll dressed in a pink and honey-beige dress with a ruffled brown apron, finished off with pink hair ribbons and tiny bow shoes. Standing about 24 cm tall, she’s built on a wire armature so she can sit, stand, and hold a pose — perfect as a keepsake doll or a special handmade gift.
This is a detailed, photo-heavy pattern with every round written out and real process photos at each tricky step — from inserting the plastic-board insoles into her shoes to needle-sculpting her eyes and crocheting her long wavy wig strand by strand. Grab your 1.75mm hook and let’s bring Martha to life!
Table of Contents
Materials Needed
- Alize Cotton Gold 100g/330m, color 401 (body color) — for the body
- Alize Cotton Gold 100g/330m, color 446 (pink beige) — for the shoes
- Alize Cotton Gold 100g/330m, color 62 (cream) — for the panties and bra
- YarnArt Baby Cotton 50g/165m, color 402 (cream) — for the hair wig
- YarnArt Baby Cotton 50g/165m, color 410 (pink) — for the dress
- YarnArt Baby Cotton 50g/165m, color 404 (honey beige) — for the dress
- YarnArt Baby Cotton 50g/165m, color 407 (brown) — for the apron
- Hook size 1.75 mm
- Polyester toy filling (fiberfill)
- Safety eyes, 10 mm
- Thick yarn needle, sewing pins, scissors, stitch marker
- Black, white, and brown thread to embroider the face
- Blush or dry pastel for toning cheeks
- Wire, 6 mm diameter (11 cm) — for the neck
- Wire, 1.5 mm diameter (25 cm) — for the arms
- Plastic cutting board (for the shoe soles)
- Adhesive plaster (to isolate wire ends)
- Lace trim
- Buttons
- Decorative pieces of your choice
Abbreviations
- MR — magic ring
- ch — chain
- t-ch — turning chain
- sc — single crochet
- inc — increase (2 sc in one stitch)
- dec — decrease (2 sc together)
- sl st — slip stitch
- hdc — half double crochet
- dc — double crochet
- dcinc — double crochet increase (2 dc in one stitch)
- tr — treble crochet
- trinc — treble crochet increase (2 tr in one stitch)
- Bobble st — crochet unfinished DC stitches in one stitch with a common top
- (…) — the number in brackets means the stitch count in the round/row
- (…)*N — repeat the indicated stitches in brackets N times
This toy is crocheted in semi-crosses stitches — if you crochet in checkmarks (X-stitch), you’ll need to work out any extra stitches yourself. The shoes are also worked in semi-crosses, while the dress and apron are worked in checkmarks. Crochet tightly so there are no gaps for the stuffing to show through, and all pieces are worked in a continuous spiral unless the pattern says otherwise. The finished doll measures about 24 cm with the materials listed above.
Arms
Make 2. Crochet in body color.
Stuff the palm tightly, then do not stuff the rest of the arm.
1Rnd: 6sc in a MR (6)
2Rnd: 6inc (12)
3-4Rnds: 12sc (2 rounds)
5Rnd: 3-dc Bobble st, 11sc (12)
6Rnd: (dec, 4sc)*2 (10)
7Rnd: (dec, 3sc)*2 (8)
8Rnd: 8sc
9Rnd: (inc, 3sc)*2 (10)
10-25Rnds: 10sc (16 rounds)
Cut the yarn, fasten off.

Legs & Body — Right Leg
Start in pink beige color.
Stuff the legs and body tightly as you go.
1Rnd: ch7, start on the second chain from the hook: 5sc, 3sc in the last chain, on the other side of the chain – 4sc, inc (14)
2Rnd: inc, 4sc, 3inc, 4sc, 2inc (20)
3Rnd: 1sc, inc, 4sc, (1sc, inc)*3, 4sc, (1sc, inc)*2 (26)
4Rnd: 2sc, inc, 4sc, (2sc, inc)*3, 4sc, (2sc, inc)*2 (32)
Prepare your insoles now. I use soft plastic cutting boards — trace around the crocheted sole piece and cut it out. Make 2 pieces, one for each foot.

5Rnd: in back loops: 32sc (32)
6-8Rnds: 32sc (3 rounds) — marker sits in the center of the heel.
9Rnd: 10sc, 6dec, 10sc (26)
Insert the insole now.
10Rnd: 7sc, 6dec, 7sc (20)
11Rnd: 7sc, 3dec, 7sc (17)
12Rnd: 3sc, dec (on the side), 7sc, dec (on the side), 3sc (15)
13Rnd: 15sc
Change to body color. Do not cut the pink beige yarn — bring it to the front, you’ll need it again shortly.
14Rnd: in back loops: 15sc (15)
15-16Rnds: 15sc (2 rounds)
17Rnd: (4sc, inc)*3 (18)
At this stage it’s easier to crochet around the top of the shoe. Using the pink beige yarn left at the front, work 1 round of 15sc into the front loops of round 13. Fasten off with a sl st, cut the yarn, and hide the ends inside. Hold the leg as shown in the photo while you work this round.

Attach the pink beige yarn to the front loops of round 4 and work 32 sl st around. Fasten off, cut the yarn, and hide the ends inside. Hold the leg as shown in the photo.
18-22Rnds: 18sc (5 rounds)
23Rnd: (inc, 5sc)*3 (21)
24-29Rnds: 21sc (6 rounds)
In the next round, the decreases need to sit in specific spots as noted in brackets. If necessary, work a couple of extra stitches, or skip a couple, in round 29 to make the placement come out right.
30Rnd: 3sc, dec (in the middle of the back), 4sc, dec (on the side), 8sc, dec (on the side) (18)
31Rnd: 12sc, 3inc, 3sc (21) — increases go strictly in the middle.
32Rnd: 21sc
33Rnd: 15sc, dec (in the middle front), 4sc (20)
34Rnd: 20sc
35Rnd: (inc, 9sc)*2 (22) — increases on the sides
36-41Rnds: 22sc (6 rounds)
Crochet a few extra sc (I worked 6sc) so the marker ends up at the back in the middle — see photo. Then change to cream and cut the body-color yarn.

42Rnd: 22sc
43Rnd: in back loops: 22sc
Crochet a few extra sc (I worked 7sc) so the marker ends up on the side — see photo. Fasten off and cut the yarn.
Attach the cream yarn to the front loops of round 42: (ch3, sl st)*22 all the way around, to form the little scalloped waistband trim. Hold the leg as shown in the photo. Fasten off, cut the yarn, and hide the ends inside.
Legs & Body — Joining & Torso
Crochet the left leg exactly the same as the right one, but this time don’t cut the yarn — continue straight into the body. Place a marker.
44Rnd: 11sc on the left leg, ch3 and join to the right leg. 22sc on the right leg, 3sc on the chain, 11sc on the left leg (50)

45-50Rnds: 50sc (6 rounds)
51Rnd: 4sc, dec, (8sc, dec)*4, 4sc (45)
52Rnd: 45sc
53Rnd: 35sc — a short round (your stitch count may differ slightly). Move the marker to the middle of the back. Change to body color and cut the cream yarn.
54Rnd: in back loops: 10sc, dec, 21sc, dec, 10sc (43) — decreases on the sides
55Rnd: dec, 41sc (42) — decrease in the middle
56-61Rnds: 42sc (6 rounds)
Crochet a couple of extra sc (I worked 1sc) so the marker sits at the back-middle — see photo. Change to cream and cut the body-color yarn.
62-65Rnds: 42sc (4 rounds)
Again crochet a couple of extra sc (I worked 1sc) to keep the marker at the back-middle. Change to body color and cut the cream yarn.
66Rnd: in back loops: 42sc

Arm Assembly
In the next round, join the arms. Make sure they sit symmetrically on either side of the body, with the thumbs facing towards you.
67Rnd: 8sc, 5sc on the inner side of the arm and body, 16sc, 5sc on the inner side of the arm and body, 8sc (42)
68Rnd: 8sc, 5sc on the remaining stitches of the arm, 16sc, 5sc on the remaining stitches of the arm, 8sc (42)
Prepare a 1.5mm-diameter wire, 25cm long. Fold the edges as shown in the photo, then try the frame against the arms for fit (your length may vary). Isolate the wire ends with adhesive plaster, insert into the arms, and add fiberfill around it.

69Rnd: (5sc, dec)*6 (36)
70Rnd: 2sc, dec, (4sc, dec)*5, 2sc (30)
71Rnd: (3sc, dec)*6 (24)
72Rnd: (2sc, dec)*6 (18)
73Rnd: (4sc, dec)*3 (15)
74-77Rnds: 15sc (4 rounds)
Fasten off with a sl st, cut the yarn, and leave a long end for sewing the pieces together later.
Head
Crochet in body color.
Stuff tightly as you go.
1Rnd: 6sc in a MR (6)
2Rnd: 6inc (12)
3Rnd: (1sc, inc)*6 (18)
4Rnd: 1sc, inc, (2sc, inc)*5, 1sc (24)
5Rnd: (3sc, inc)*6 (30)
6Rnd: 2sc, inc, (4sc, inc)*5, 2sc (36)
7Rnd: (5sc, inc)*6 (42)
8Rnd: 3sc, inc, (6sc, inc)*5, 3sc (48)
9Rnd: (7sc, inc)*6 (54)
10Rnd: 4sc, inc, (8sc, inc)*5, 4sc (60)
11-19Rnds: 60sc (9 rounds)
Leave holes for the safety eyes in the next round.
20Rnd: 24sc, ch1, skip 1 stitch, 10sc, ch1, skip 1 stitch, 24sc (60)
21Rnd: 60sc
22Rnd: 15sc, (1sc, inc)*5, 10sc, (inc, 1sc)*5, 15sc (70)
23-24Rnds: 70sc (2 rounds)
Insert the safety eyes into the holes now and fasten with the washers from the wrong side.
25Rnd: 15sc, (1sc, dec)*5, 10sc, (dec, 1sc)*5, 15sc (60)
26Rnd: 4sc, dec, (8sc, dec)*5, 4sc (54)
27Rnd: (7sc, dec)*6 (48)
28Rnd: 3sc, dec, (6sc, dec)*5, 3sc (42)
29Rnd: (5sc, dec)*6 (36)
30Rnd: 2sc, dec, (4sc, dec)*5, 2sc (30)
31Rnd: (3sc, dec)*6 (24)
32Rnd: 1sc, dec, (2sc, dec)*5, 1sc (18)
33Rnd: (3sc, dec)*3, 2sc, sl st (15)
Fasten off and cut the yarn, hiding the ends inside the head.

Ears
Make 2. Crochet in body color.
Leave the starting yarn end long for sewing the pieces on later.
1Rnd: 5sc in MR (5)
Cut the yarn, leaving a long end for sewing.
Face Needle Sculpting
Focus on the numbered photo for this part. Take a long, strong thread — I use the same yarn as the doll itself — and insert the needle as close to the eyes as possible.
Points 5 and 6 sit in the last round of the head, at the front in the middle. Insert the needle at point 5 and bring it out through point 1. Then insert at point 2 and bring it out through point 6 — this tightens the first eye indent. Insert the needle at point 5 again and bring it out through point 3, then insert at point 4 and bring it out through point 6. Pull the ends very gently, trying to tighten both eyes evenly and not too much. Tie a knot and hide it inside the head.

Embroidering the Face
Embroider the nose. Mark 2 points with pins between rounds 22 and 23 of the head, 3sc apart. Make two stitches in body-color thread from one pin to the other, then wrap those stitches with the same thread using a needle to build up a small raised nose.
Sew on the ears. Mark 2 points with pins: the upper edge sits between rounds 19 and 20 of the head, and the lower point between rounds 21 and 22, counting 8sc out from the edge of the eye. Sew the ears on at these points.
Using white thread, make a couple of stitches from the outer corner of each eye. Embroider the eyelashes above the eyes in black thread, and the eyebrows in brown thread. Bring all the thread ends (white, black, and brown) into the opening in the head, tie them off in a knot, and hide the ends inside.
Finish by lightly tinting the cheeks and nose with blush or a dry pastel, and softly tint the eyebrows with a brown eyeshadow or dry pastel.

Hair Wig
Crochet in cream color.
1Rnd: 6sc in a MR (6)
2Rnd: in back loops: 6inc (12)
3Rnd: (1sc, inc)*6 (18)
4Rnd: in back loops: (2sc, inc)*6 (24)
5Rnd: (3sc, inc)*6 (30)
6Rnd: in back loops: (4sc, inc)*6 (36)
7Rnd: (5sc, inc)*6 (42)
8Rnd: in back loops: (6sc, inc)*6 (48)
9Rnd: (7sc, inc)*6 (54)
10Rnd: strands — (ch60, from the 2nd chain on the hook: 59sl st, skip 1 stitch on the wig, sc)*27
With 2 sl st, move to the next round. Work into the front loops of Rnd 7: (ch60, from the 2nd chain on the hook: 59sl st, skip 1 stitch on the wig, sc)*20

With 2 sl st, move to the next round. Work into the front loops of Rnd 5: (ch60, from the 2nd chain on the hook: 59sl st, skip 1 stitch on the wig, sc)*14
With 2 sl st, move to the next round. Work into the front loops of Rnd 3: (ch60, from the 2nd chain on the hook: 59sl st, skip 1 stitch on the wig, sc)*8
With 2 sl st, move to the next round. Work into the front loops of Rnd 1: (ch60, from the 2nd chain on the hook: 59sl st, skip 1 stitch on the wig, sc)*3
Fasten off, cut the yarn, and weave in the ends.

Attaching the Wig
Take the 11cm wire, isolate both ends with adhesive plaster, and insert it into the doll’s body first. Add fiberfill firmly around the neck — it should be stuffed tightly. Put the head onto the neck, fix it in place with pins, and sew firmly all the way around the join.
Try the wig on the head. At the front, leave 6 strands from the bottom row free for the bangs, and pin the rest of the strands out of the way. Twist two strands of the bangs together and lay them toward one ear (4 strands total), then 2 strands toward the other ear. Sew the bangs down. Next, close any gaps between the strands using a few strands from the next row at the back of the head, and sew those down too.

Dress
Start in pink color.
The top of the dress is worked in rows with sc — since everyone’s gauge differs slightly, you may need to size your hook up or down.
Ch30 + 1 t-ch.
1Row: from the second chain on the hook: 4sc, 3sc inc, 5sc, 3sc inc, 8sc, 3sc inc, 5sc, 3sc inc, 4sc (38)
2Row: 1 t-ch, 5sc, 3sc inc, 7sc, 3sc inc, 10sc, 3sc inc, 7sc, 3sc inc, 5sc (46)
3Row: 1 t-ch, 6sc, 3sc inc, 9sc, 3sc inc, 12sc, 3sc inc, 9sc, 3sc inc, 6sc (52)
4Row: 1 t-ch, 7sc, 3sc inc, 11sc, 3sc inc, 14sc, 3sc inc, 11sc, 3sc inc, 7sc (60)
5Row: 1 t-ch, 9sc, ch6, skip 13sc of the previous row (see photo), 18sc, ch6, skip 13sc of the previous row, 9sc (48)

6-14Rows: 1 t-ch, 48sc (9 rows)
Change color to honey beige and cut the pink yarn. From here you’ll work with DC.
15Row: in front loops: 2 t-ch, (3 dc in one stitch)*48 (144)
16-17Rows: 2 t-ch, 144 dc (2 rows)
Join into the round with a sl st, then continue working in rounds — start each round with 2 t-ch and close it with a sl st.
18-20Rnds: 144dc (3 rounds)
Fasten off, cut the yarn, and weave in the ends.
Sleeves
Attach the yarn as shown in the photo.
1Rnd: 3sc on the bottom of the sleeve, 13sc on the top of the sleeve, 3sc on the bottom (19)
Work in a spiral from here.
2-3Rnds: 19sc (2 rounds)
4Rnd: 3sc, dec, 4sc, dec, 3sc, dec, 3sc (16)
Fasten off, cut the yarn, weave in the ends, and crochet the second sleeve the same way.
Crochet the sides and neck with sc. At the same time, make 3 button loops from ch6 (your chain count may vary) along one edge of the dress. Fasten off, cut the yarn, and weave in the ends. Sew 3 buttons onto the back, and decorate the front with buttons or decorative pieces of your choice. Optionally, sew a strip of lace along the bottom of the dress.

Apron
Crochet in brown color.
Ch52 + 1 t-ch.
1Row: from the second chain on the hook, 52sc (52) — turn
2Row: 52sl st — turn
3Row: 2 t-ch, insert the hook as shown in the photo: dcinc in each stitch (104)
Fasten off, cut the yarn, and weave in the ends. Attach the brown yarn to the beginning of row 3 (see photo).
4Row: 2 t-ch, (dc, dcinc)*52 (156)
Fasten off, cut the yarn, and weave in the ends.

Ruffles & Ties
Make 2 with brown yarn.
Ch30 + 1 t-ch.
1Row: from the second chain on the hook, 30sc (30) — turn
2Row: 30sl st — turn
3Row: 1 t-ch, insert the hook as shown in the photo: 4sc, hdc, dcinc*5, trinc*10, dcinc*5, hdc, 4sc.
Fasten off and cut the yarn, leaving the end for sewing the pieces together.
Mark the top of the main apron piece where the ruffles attach — I used stitches 5, 21, 31, and 48 along the edge. Sew the ruffles to the main piece as shown in the photo.
For the ties, attach the brown yarn as shown in the photo and chain 50. Fasten off and cut the yarn, then repeat on the other side.


Tips for a Polished Finish
- Keep your stitch marker moving with you every round it’s mentioned — this pattern shifts the marker position several times to keep decreases and color changes lined up at the back seam, and it’s easy to lose track.
- Don’t skip the plastic-board insoles in the shoes — they’re what gives Martha’s feet that flat, stable stance instead of a rounded amigurumi foot.
- Take the needle sculpting slowly and pull gently. Over-tightening the thread when shaping the eyes can pull the safety eyes crooked or pucker the fabric around them.
- When attaching the wig, pin the whole thing in place first and step back to check it’s even before you start sewing — wig placement is much easier to adjust with pins than with stitches.
Frequently Asked Questions
What size hook and yarn does this pattern use?
Martha is worked with a small 1.75mm hook, mainly in Alize Cotton Gold (100g/330m) for the body and shoes, and YarnArt Baby Cotton (50g/165m) for the hair, dress, and apron. Keep your tension tight and even so the stuffing doesn’t peek through the stitches.
Why does the pattern use plastic cutting boards for the shoes?
A thin slice of soft plastic cutting board, cut to match the crocheted sole, gives the shoe a flat, semi-rigid base so the doll can stand on her own. Craft foam or a similarly stiff-but-cuttable plastic sheet works as a substitute if you don’t have a cutting board on hand.
Can I skip the wire armature?
You can, but Martha’s arms and neck are designed around the wire to hold a pose — without it she’ll be much floppier and won’t sit or gesture the same way. If you do skip it, stuff the arms and neck a little more firmly to compensate.
How long does the hair wig take to make?
The wig is one of the most time-intensive parts of this pattern — it’s built from dozens of individual long-chain strands crocheted directly onto a base disc, then styled and sewn onto the head by hand. Set aside a separate, unhurried session just for the wig and styling.
Conclusion
Martha is a real labor of love — between the needle-sculpted eyes, the hand-strand wig, and the layered dress and apron, every part of her adds a bit more personality. She’s well worth the extra time the finishing touches take. If you make your own Martha, I’d love to see her — share a photo or drop a comment below with how yours turned out!