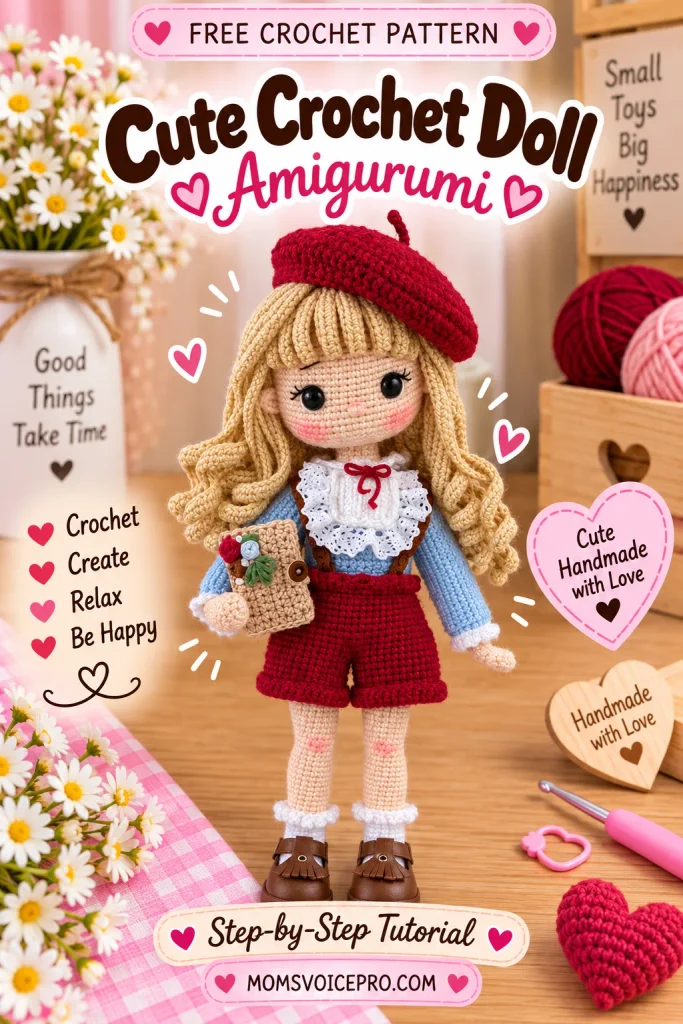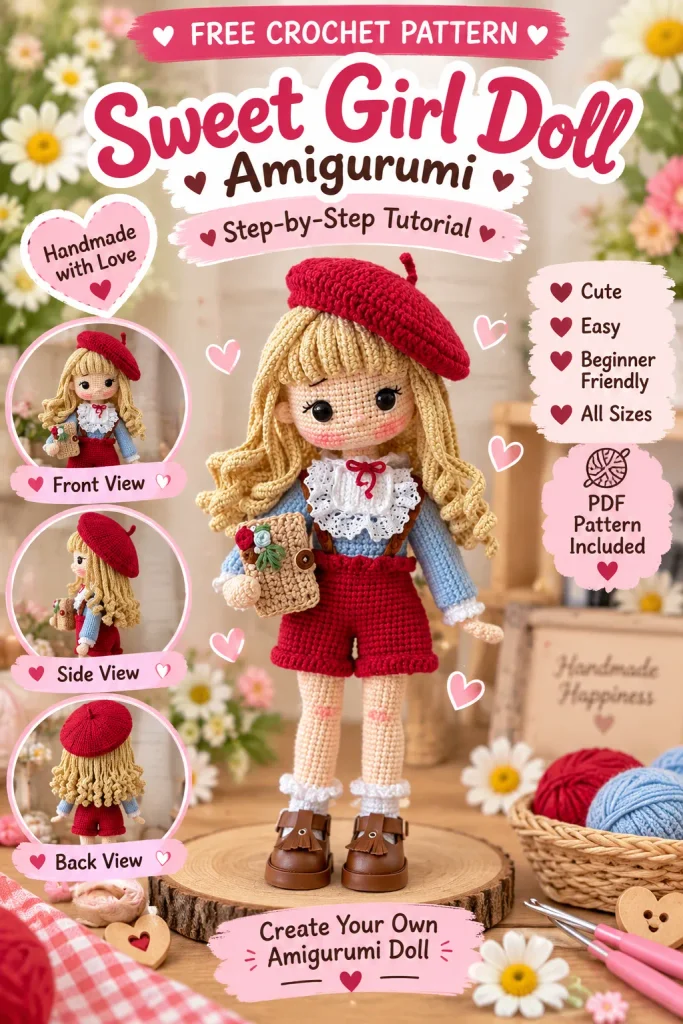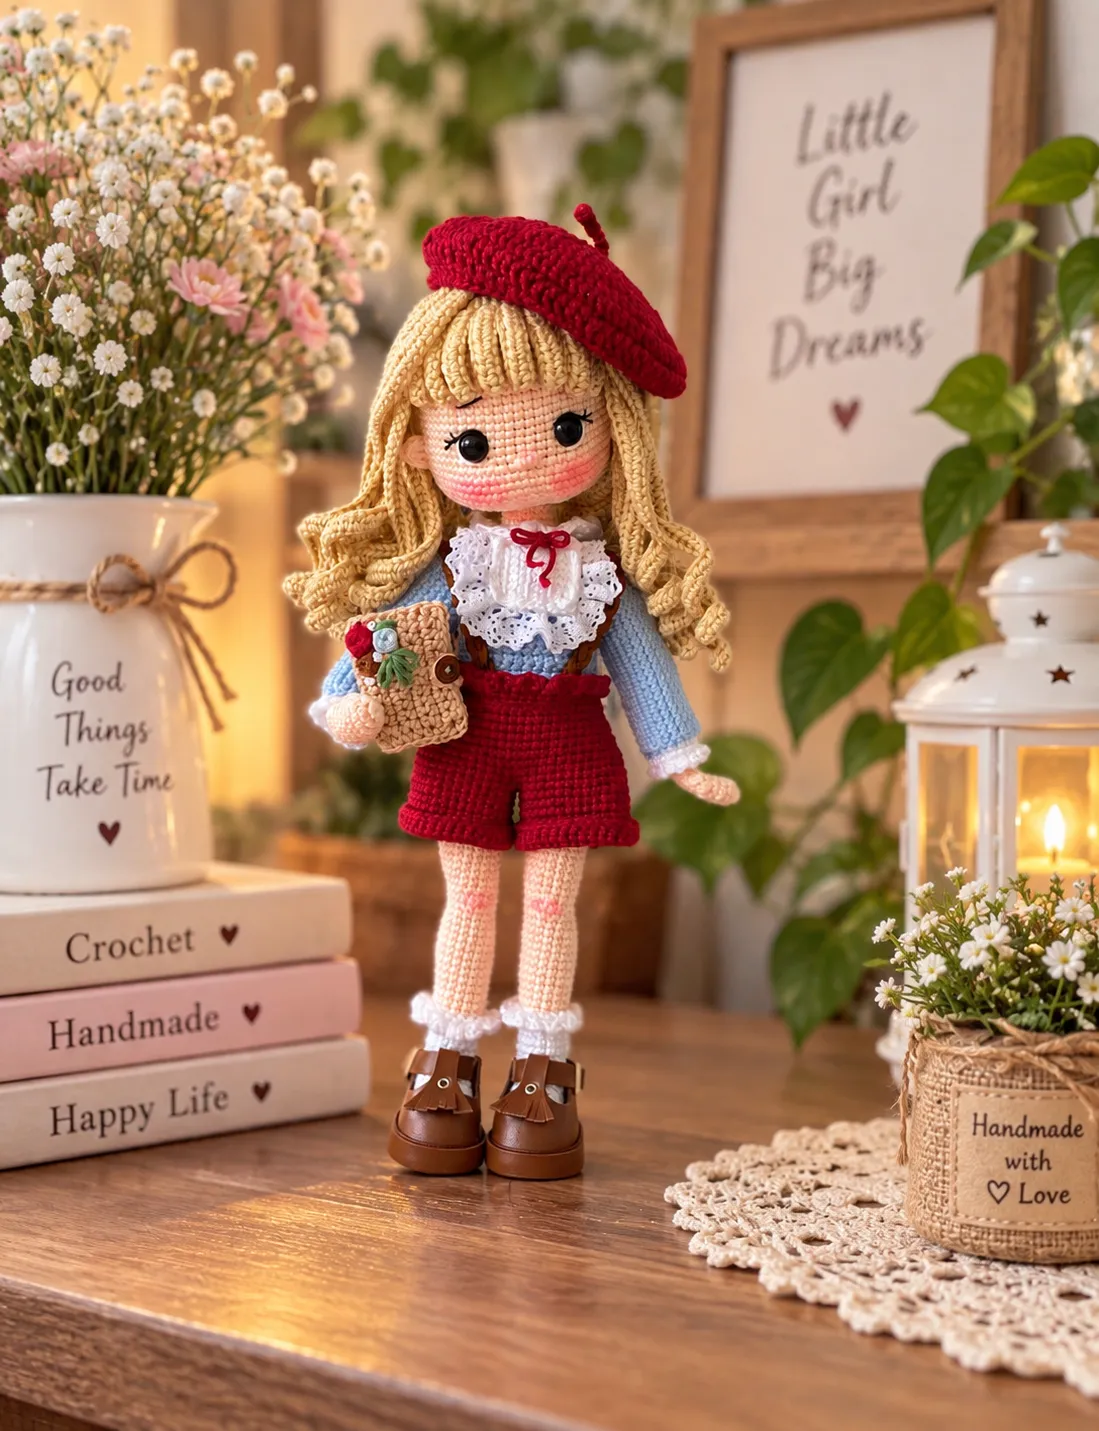
Meet Kaylin — a curly-haired amigurumi doll in a red beret, a ruffled lace-collar blouse, and a pair of red shorts with suede straps. She even carries her own tiny storybook, complete with a crocheted cover and floral embroidery on the front. This is one of those patterns where every little accessory adds up to something really special, from her lace-trimmed socks down to her buckled mary-jane shoes.
Below you’ll find the complete free pattern, written row by row exactly as I worked it, with process photos at every stage so nothing gets lost in translation. Grab your hooks and let’s get her stitched up from the toes to the beret!
Table of Contents
Materials Needed
- Catania tr263 (skin colour) — 1 skein
- Catania 106 (white) — 1 skein
- Catania 192 (burgundy) — 1 skein
- Catania 173 (blue) — 1 skein
- Catania 404 (hair colour) — 1 skein
- Catania 438 (brown) — 1 skein
- 10 mm safety eyes (black)
- 3 small buttons (for the blouse)
- 2 small buttons (for the shoes)
- A little bit of milky-brown yarn
- 1 meter of armature/floral wire
- 2 mm crochet hook
- 1.25 mm crochet hook
- 50 cm knit suede yarn (for the shorts straps)
- 50 cm white lace trim
Abbreviations
- mr — magic ring
- sc — single crochet
- inc — increase
- dec — decrease
- * — repeat
- hdc — half double crochet
- hdcinc — increase with hdc
- hdcdec — decrease with hdc
- dc — double crochet
- dcinc — increase with dc
- dcdec — decrease with dc
- ch — chain
- blo — back loop only
- flo — front loop only
- slst — slip stitch
- bpsc — back post single crochet
- M — decrease 3 stitches together
Notes written with *** are assembly instructions or special notes rather than stitch counts — read these carefully as you go, they cover things like wire placement, color changes, and where to attach the stitch marker.
Arms
Row 1: mr 5sc
Place stitch marker here.
Row 2: 5inc = 10sc
Row 3: (4sc, 1inc)*2 = 12sc
Row 4-5: 2 Rows 12sc
Row 6: in same stitch 3dc, 11sc
Row 7: M, 11sc = 12sc
Row 8: (1dec, 4sc)*2 = 10sc
Row 9: 1dec, 8sc = 9sc
Row 10-33: 24 Rows 9sc
Cut 15cm of wire and fold its ends. Do not fill the arms with fiberfill — the wire does the shaping.

Left Foot
Start with white yarn.
Row 1: mr, 6sc, close the ring and join with slst. Make 5ch and from the 2nd;
Row 2: 4sc, to the stitches on mr make 3sc, 1inc, 2sc in order, to the other side of ch 3sc, 1inc = 16sc
Place the stitch marker here.
Row 3-8: 6 Rows 16sc
Row 9: Make 6ch and skip 6sc, 10sc
Row 10: 6sc on ch, 10sc = 16sc
Row 11: (2sc, 1dec)*4 = 12sc
Row 12: 6dec, leave the yarn long and gather the stitches with a needle to close it. (This completes the heel.)

Attach the yarn on the first chain of the 6ch made in Row 9.
Row 13: 6sc, 1sc in the part between, 6sc, 1sc in the part between = 14sc
Place the stitch marker here.
Row 14: 2sc, 1dec, 10sc = 13sc
Row 15-16: 2 Rows 13sc
Place the wire in the feet and fill with fiberfill. (Cut 32cm of wire.)

Row 17: 1inc, 12sc = 14sc (the increase should sit at the back)
Row 18-19: 2 Rows 14sc
Row 20: 1inc, 13sc = 15sc
Switch to skin colour and leave the white yarn attached but resting — you’ll use it again for the sock detail.
Row 21: blo 15sc
Row 22: 15sc
Row 23: 1sc, 1inc, 13sc = 16sc
Row 24: 16sc
With the white yarn you left resting, work (1sc, 3ch, 1sc) as flo into every stitch of Row 20 to form the sock/ruffle detail.
Row 25: 1sc, 1inc, 14sc = 17sc
Row 26: 17sc

Row 27: 2sc, 1inc, 14sc = 18sc
Row 28-32: 5 Rows 18sc (crochet 2 more sc and attach the stitch marker there.)
Row 33: 2dec, 14sc = 16sc
Row 34: 1dec, 5sc, 3inc (increase for the knee), 6sc = 18sc
Row 35: 18sc
Row 36: 1sc, 1inc, 4sc, 3dec, 4sc, 1inc, 1sc = 17sc
Row 37: 17sc
Row 38: 1inc, 16sc = 18sc
Row 39-40: 2 Rows 18sc
Row 41: 1sc, 1inc, 16sc = 19sc
Row 42-43: 2 Rows 19sc
Row 44: 2sc, 1inc, 16sc = 20sc
Row 45-48: 4 Rows 20sc (in Row 48 leave the last 4sc unworked — this opening should sit right at the side of the leg.)
Right Foot
Crochet the same as the Left Foot through Row 8.
Row 9: 9sc, make 6ch, skip 6sc, 1sc
Row 10: 9sc, 6sc on ch, 1sc = 16sc
Row 11: (2sc, 1dec)*4 = 12sc
Row 12: 6dec, leave the yarn long and gather the stitches closed with a needle. (Heel complete.) Crochet the rest of the leg exactly as the left one.
When you reach Row 48, crochet 10 more sc and switch to white yarn at the side of the leg.

Body Assembly
Hold the legs so the backs of the feet face towards you. Attach white yarn at the side of the right foot and make 3ch, then join it at the side of the left foot.
Row 1: 20sc (3sc on ch) 20sc (3sc on ch) = 46sc
Attach the stitch marker here.
Row 2: 10sc, 1inc, 19sc, 1inc, 15sc = 48sc
Row 3-10: 8 Rows 48sc
Row 11: 11sc, 1dec, 21sc, 1dec, 12sc = 46sc (decreases should align with the sides)
Row 12: 10sc, 1dec, 20sc, 1dec, 12sc = 42sc
Row 13: 9sc, 1dec, 19sc, 1dec, 12sc = 40sc
Row 14: 8sc, 1dec, 18sc, 1dec, 12sc = 38sc
Row 15: 7sc, 1dec, 17sc, 1dec, 12sc = 36sc
Row 16: 6sc, 1dec, 16sc, 1dec, 12sc = 34sc
Row 17-28: 12 Rows 34sc

Arm Assembly
Switch to skin-coloured yarn.
Row 1: 6sc, 4sc with arm, 15sc, 4sc with arm, 7sc
Row 2: 6sc, 5sc from arm, 15sc, 5sc from arm, 7sc = 38sc
Row 3: 5sc, 1dec, 3sc, 1dec, 13sc, 1dec, 3sc, 1dec, 6sc = 34sc
Place the wires from the arms inside the body and join them with the neck wire so the whole armature is connected.
Row 4: 4sc, 1dec, 3sc, 1dec, 11sc, 1dec, 3sc, 1dec, 5sc = 30sc
Row 5: (3sc, 1dec)*6 = 24sc
Row 6: (2sc, 1dec)*6 = 18sc
Row 7-10: 4 Rows 18sc

Head
Row 1: mr 6sc
Row 2: 6inc = 12sc
Row 3: (1sc, 1inc)*6 = 18sc
Row 4: (2sc, 1inc)*6 = 24sc
Row 5: (3sc, 1inc)*6 = 30sc
Row 6: 2sc, 1inc, (4sc, 1inc)*5, 2sc = 36sc
Row 7: (5sc, 1inc)*6 = 42sc
Row 8: 3sc, 1inc, (6sc, 1inc)*5, 3sc = 48sc
Row 9: (7sc, 1inc)*6 = 54sc
Row 10: 4sc, 1inc, (8sc, 1inc)*5, 4sc = 60sc
Row 11-20: 10 Rows 60sc
Row 21: 24sc, (2ch, skip 2sc) 8sc, (2ch, skip 2sc) 24sc (the eyes will attach into the chain spaces you just skipped)
Row 22: 24sc, (2sc in ch), 8sc, (2sc in ch), 24sc = 60sc
Row 23: 60sc
Row 24: 22sc, (1sc, 1inc)*3, 4sc, (1inc, 1sc)*3, 22sc = 66sc
Row 25-28: 4 Rows 66sc
Row 29: 22sc, (1sc, 1dec)*3, 4sc, (1dec, 1sc)*3, 22sc = 60sc
Row 30: 4sc, 1dec, (8sc, 1dec)*5, 4sc = 54sc
Row 31: (7sc, 1dec)*6 = 48sc
Row 32: (2sc, 1dec)*12 = 36sc
Row 33: (4sc, 1dec)*6 = 30sc
Row 34: (3sc, 1dec)*6 = 24sc
Row 35: (2sc, 1dec)*6 = 18sc
Work the whites of the eyes with a scrap of Catania yarn, keeping the strands together (not split).
Use two strands of embroidery (Peria) thread for the shading above the eyes.
Embroider the nose between two stitches, keeping the yarn strands together.
Embroider the eyelashes using a single strand of embroidery thread.

Ear
Make 6sc into a magic ring and close it. Count 7sc from the edge of the eye and sew the ear on at that point. Repeat for the second ear.
Blouse
Make 33ch, skipping 7ch for the buttonhole placement.
Row 1: 4sc, 2ch, 5sc, 2ch, 8sc, 2ch, 5sc, 2ch, 4sc = 26sc
Make 1ch and turn.
Row 2: 4sc, 2sc in ch, 5sc, 2sc in ch, 8sc, 2sc in ch, 5sc, 2sc in ch, 4sc = 34sc
Make 1ch and turn.
Row 3: 5sc, 2ch, 7sc, 2ch, 10sc, 2ch, 7sc, 2ch, 5sc = 34sc
Make 1ch and turn.
Row 4: 5sc, 2sc in ch, 7sc, 2sc in ch, 10sc, 2sc in ch, 7sc, 2sc in ch, 5sc = 42sc
Make 1ch and turn.
Row 5: 7sc, make 6ch and skip 8sc, 12sc, make 6ch and skip 8sc, 7sc
Make 1ch and turn.
Row 6: 7sc (6sc on ch) 12sc (6sc on ch) 7sc = 38sc
Make 1ch and turn.
Row 7-8: 2 Rows 38sc
Make 7ch and turn (this forms a buttonhole).
Row 9-16: 8 Rows 38sc

Blouse Sleeves
Insert the hook into the middle stitch from the underside of the arm opening — you’ll be working from the reverse side.
Row 1: 3sc, 1sc between arm and body, 8sc, 1sc between arm and body, 3sc, slst, 1ch = 16sc
Row 2: (2sc, 1inc)*5, 1sc = 21sc
Row 3-22: 20 Rows 21sc
Row 23: (2sc, 1dec)*5, 1sc = 16sc
Switch to white yarn, make 1ch and turn.
Row 24-25: 2 Rows 16sc
Row 26: Crochet with 2 strands of Catania yarn on a 1.25mm hook: (3ch, slst to next stitch), repeat this all the way around to finish the cuff.

Collar
Start with white yarn.
Row 1: Turn the front of the blouse toward you and insert the hook into the first stitch. Make slst all along the row.
Make 1ch and turn.
Row 2: 12dcinc, 1slst, 13dcinc, slst, 1ch, cut the yarn.
Blouse Front Part
Start with white yarn.
Row 1: Make 9ch and, from the 2nd chain, 8sc
Make 1ch and turn.
Row 2-7: 6 Rows 8sc (make 1ch, turn, and continue working in the flo each row. At the end, frame the edges with slst and sew lace trim along it. Center the collar over the front piece and sew it in place. With a 1.25mm hook, make a 40ch length and tie it into a little bow.)
Shorts
Row 1: Make 35ch and join with slst. (Continue working in a spiral.)
Row 2: 35sc
Place the stitch marker here.
Row 3-8: 6 Rows 35sc, slst, 1ch, cut the yarn. (Make 2 pieces this way — one for each leg.)
Shorts’ Cuff
Attach the yarn to the first row of the crocheted leg piece.
Row 1: 35sc
Row 2: 35sc, make 1ch and turn.
Row 3: 35sc, slst, make 1ch and cut the yarn.

Shorts Assembly
When you reach the end of Row 8 on the second piece, crochet 7 more sc, then join it to the other piece’s 7th stitch, counted back from the slst (including the slst).
Row 1: 29sc, switch to the other cuff without crocheting 6sc. Skip 6sc on the other cuff too, then 29sc = 58sc. (There will be 6 unworked sc left in between on both sides — sew these closed.)
Row 2: 14sc, 1dec, 27sc, 1dec, 13sc = 56sc
Row 3: 56sc
Row 4: 13sc, 1dec, 26sc, 1dec, 13sc = 54sc
Row 5: 54sc
Row 6: 12sc, 1dec, 25sc, 1dec, 13sc = 52sc
Row 7: 52sc
Row 8: 11sc, 1dec, 24sc, 1dec, 13sc = 50sc
Row 9: 50sc
Row 10: blo 50sc
Row 11: 50sc
Row 12: Work (3ch, slst to next stitch) all the way around the row.
For the shorts straps, glue lengths of knit suede yarn to the inside of the waistband. (You can sew them in place instead, if you prefer.)
Right Shoe
Start with milky-brown yarn. Make 7ch. From the 2nd chain:
Row 1: 1inc, 4sc, in the same stitch work 4sc, 4sc, 1inc, slst, 1ch = 16sc
Row 2: 2inc, 4sc, 4inc, 4sc, 2inc, slst, 1ch = 24sc
Row 3: (1hdc, 1hdcinc)*2, 4hdc, (1hdc, 1hdcinc)*4, 4hdc, (1hdc, 1hdcinc)*2, slst, 1ch = 32hdc
Switch to brown yarn.
Row 4: bpsc 32sc, slst, 1ch
Row 5-7: 3 Rows 32sc
Row 8: 7sc, (1sc, 1dec)*6, 7sc, slst, 1ch = 26sc
Row 9: 5slst, make 15ch and skip 6sc (this forms the buttonhole strap), 9slst on the ch, continue with 7slst on the shoe, make 8ch and skip 2ch, 1dc, skip 2 more ch, 3sc, continue with 13slst on the shoe, make 1ch and cut the yarn.
Attach brown yarn to Row 4 and work slst all along the row to finish the sole edge.

Left Shoe
Crochet the same as the Right Shoe through Row 8.
Row 9: 13slst, make 8ch and skip 2ch, 1dc, skip 2 more ch, 3sc, continue with 7slst on the shoe, make 15ch and skip 6sc (buttonhole), 9slst on the ch, and continue with 6slst on the shoe.

Wig
Row 1: mr 6sc
Row 2: 6inc = 12sc
Row 3: (1sc, 1inc)*6 = 18sc
Row 4: (2sc, 1inc)*6 = 24sc
Row 5: flo (3sc, 1inc)*6 = 30sc
Row 6: (4sc, 1inc)*6 = 36sc
Row 7: (5sc, 1inc)*6 = 42sc
Row 8: (6sc, 1inc)*6 = 48sc
Without cutting the yarn, start making the hair strands:
51ch, then from the 2nd chain 50hdc, skip 1sc, slst (the reverse side of the strand will show — that’s correct, it gives a nice ribbed texture).
Crochet 16 hair strands this way.
Continue with 11ch, from the 2nd chain 10hdc, skip 1sc, slst. Make 8 bangs this way, then cut the yarn.
Insert into the flo stitches left open from Row 5, working outward from the end of the bangs. Make 61ch, then from the 2nd chain work 60hdc. When you reach the middle of the bangs, slst twice and continue crocheting hair strands. You should end up with 11 hair strands total.

Place the wig on the head and sew down any hair strands that fall underneath, so they lie flat against the head.
Hat / Beanie
Row 1: mr 12dc
Row 2: 12dcinc = 24dc
Row 3: (1dc, 1dcinc)*12 = 36dc, slst, 2ch
Row 4: (2dc, 1dcinc)*12 = 48dc, slst, 2ch
Row 5: (3dc, 1dcinc)*12 = 60dc, slst, 2ch
Row 6: (4dc, 1dcinc)*12 = 72dc, slst, 2ch
Row 7: (5dc, 1dcinc)*12 = 84dc, slst, 2ch
Row 8: (5dc, 1dcdec)*12 = 72dc, slst, 2ch
Row 9: (4dc, 1dcdec)*12 = 60dc, slst, 2ch
Row 10-11: 2 Rows 60sc, slst, 2ch
For the little stem on top, make 8ch and 7slst back along it.
Storybook Accessory
Make 11ch, from the 2nd chain:
Row 1: 10sc
Make 1ch and turn.
Row 2-17: 16 Rows 10sc
At the end of Row 17, work sc’s all the way around the piece. After 20sc, make 15ch and skip 3sc to form a buttonhole, then continue the frame in sc.

Fold the crocheted piece in half and work 9slst right down the middle to form the spine.
Attach white yarn to the blo of the slst you just made and work 9sc. Crochet 5 rows straight, then cut the yarn — this makes one page.
Attach white yarn to the flo of the same slst row and work 9sc again. Crochet 5 rows straight, then add a frame of sc before cutting the yarn. Sew the white “pages” in so they don’t show from the back of the book, then finish with a bit of embroidery on the cover.
Tips for a Polished Finish
- Take your gathering stitches slow — a loose gather at the heel or toe is the easiest place for a doll’s foot to look lumpy, so pull snug and weave the tail through twice before trimming.
- Use a stitch marker on every row it’s mentioned. With this many increases and decreases stacked close together, it’s very easy to lose track of where a round starts.
- When placing the wire armature, leave a little slack at the joints (neck, shoulders, hips) so the finished doll can still be posed once she’s fully assembled and dressed.
- Block the beret lightly over a small bowl or cup while it’s still slightly damp from blocking spray — it holds that rounded shape so much better than crocheting it flat and hoping.
Frequently Asked Questions
Can I make this doll without wire?
You can, but the arms and legs will be much floppier and won’t hold a pose. If you skip the wire, stuff the limbs a little more firmly than usual to compensate, and expect the doll to stand rather than sit or hold props well.
What size hook and yarn weight does this pattern use?
The main pieces use Catania (a fine 4-ply mercerized cotton) with a small hook — a 2mm hook for the body pieces and a 1.25mm hook for fine details like the cuff picots and the bow. Keep your tension tight since a looser gauge will let the stuffing show through.
Can I substitute the Catania yarn for something else?
Yes — any fine mercerized cotton amigurumi yarn will work as long as you match your hook size to keep a tight, stuffing-proof fabric. Just be aware that swapping yarn weights will change the finished doll’s size.
How long does this pattern take to complete?
Between the body, wig, and all the little accessories (blouse, shorts, shoes, beret, and book), this is a multi-session project. Most makers split it across the body/limbs, the outfit, and the finishing accessories as three separate sittings.
Conclusion
Kaylin is one of those dolls that keeps giving you new little things to fall in love with — the ruffled socks, the lace collar, that tiny embroidered book tucked under her arm. Take your time on the accessories especially; they’re what turn a simple amigurumi doll into a real character. If you make your own Kaylin, I’d love to see her — tag your finished doll or drop a comment below with how she turned out!