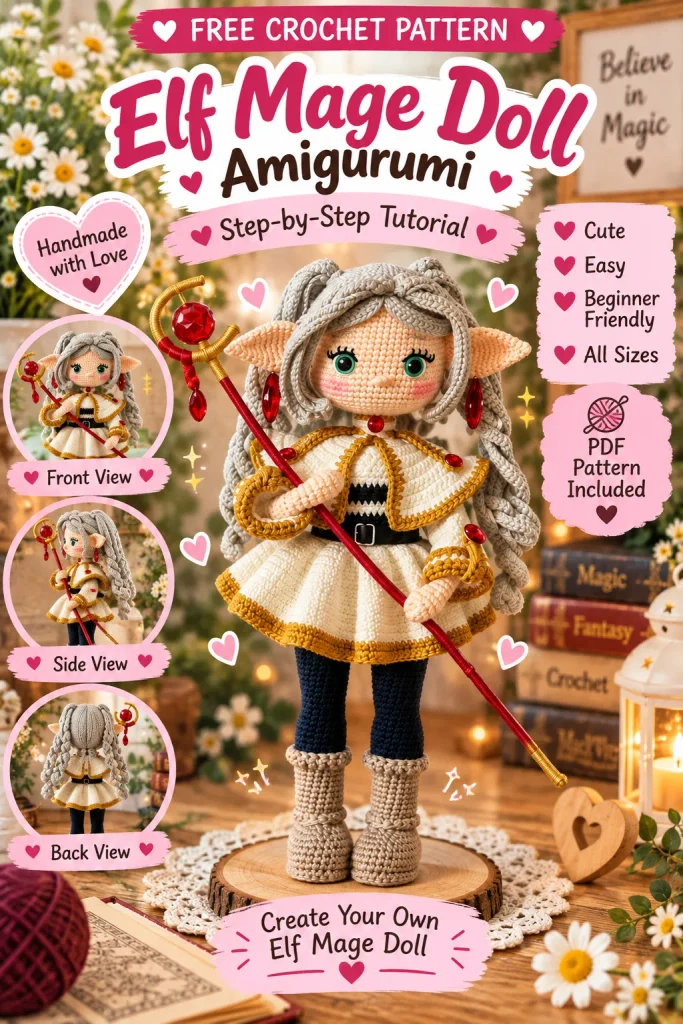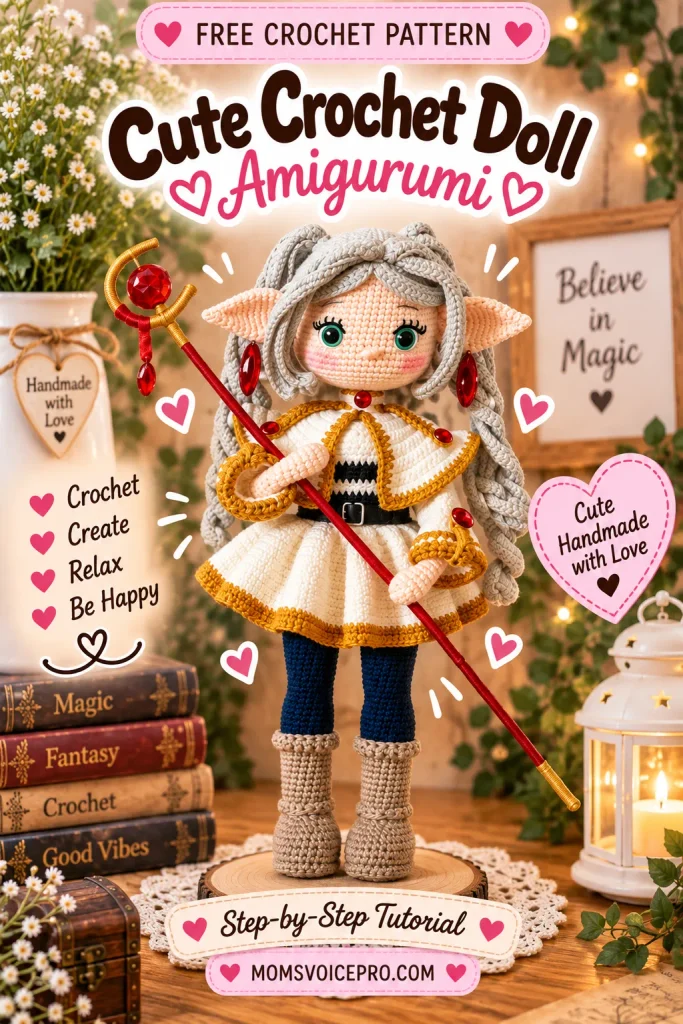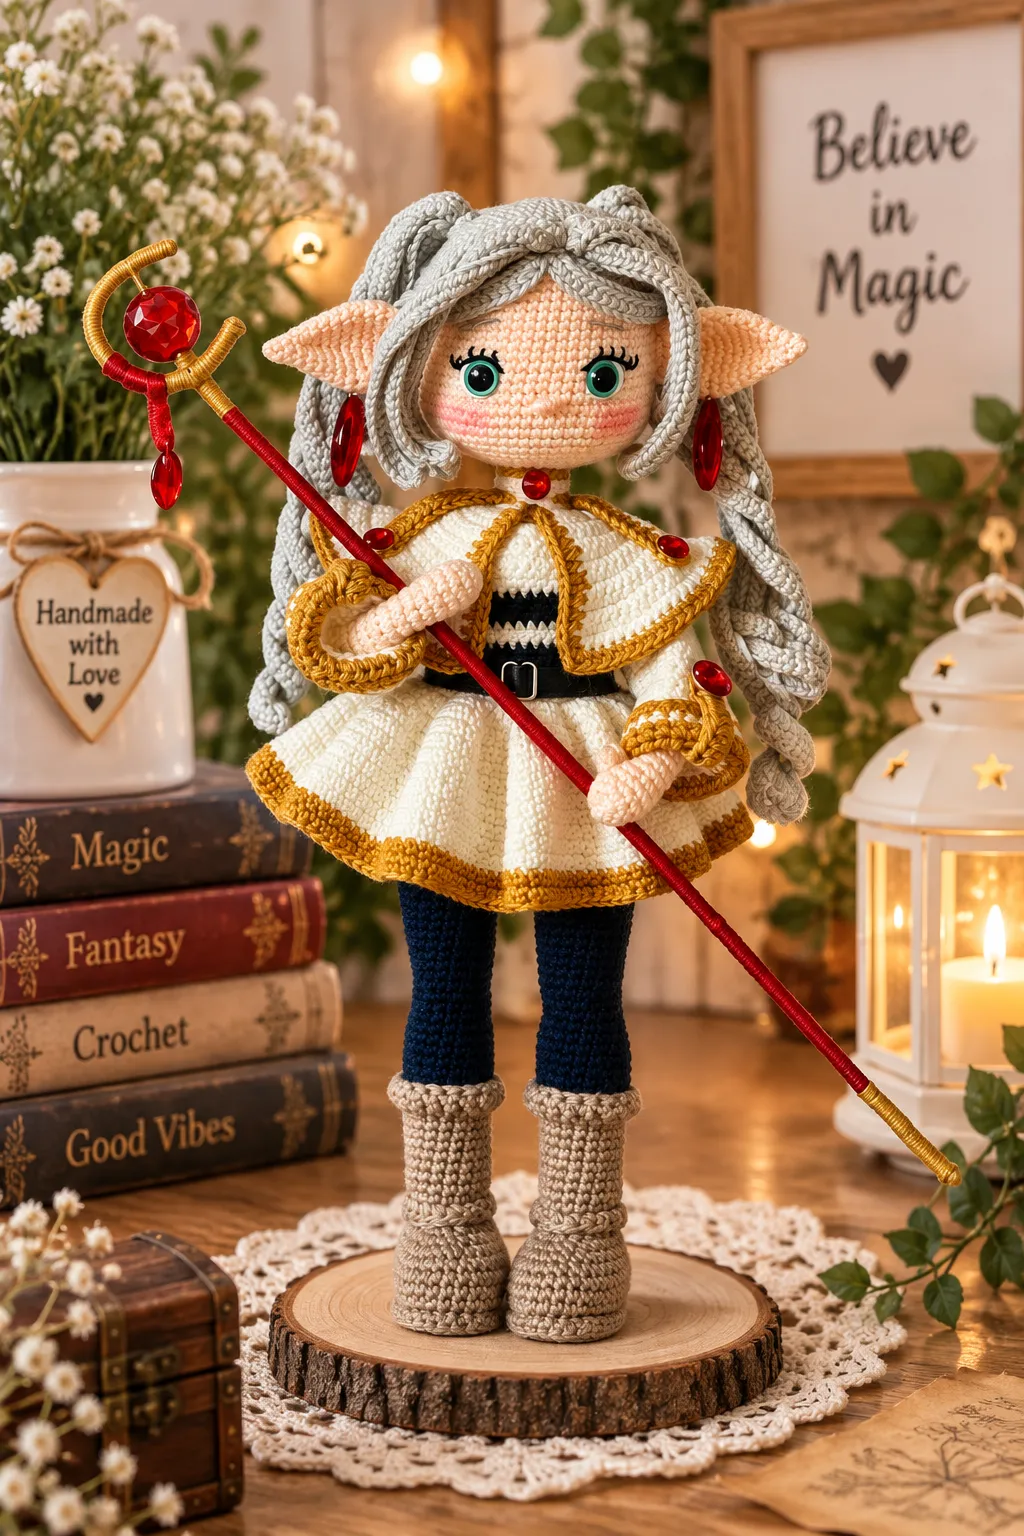
This wistful little elf mage doll is inspired by a beloved silver-haired sorceress from fantasy anime — long braided hair, pointed ears, aqua-green eyes, and a cream-and-gold mage’s cape belted over a pleated dress, finished with tall suede-look boots and her own tiny crystal-topped staff. She’s an unofficial fan-made design, not affiliated with or endorsed by the original rights holders — just a loving homage stitched up in Catania cotton.
This is a fairly advanced pattern with a lot of small accessory work — the staff alone involves wire-wrapping two bead sizes — so it’s best suited to makers who’ve built an amigurumi doll or two already. Every round is written out with real process photos at each tricky step. Let’s get stitching!
Table of Contents
Materials Needed
- Catania TR 263 (skin colored yarn)
- Catania 124 (navy — leggings, dress lines)
- Catania 105 (white — dress, cape)
- Catania 254 (brown — boots)
- Catania 431 (mustard yellow — dress edge details, staff wrap, cape trim)
- Catania 172 (gray — hair)
- 10 mm locked safety eyes, aqua green
- 1 meter of craft/electrical wire (for the arm and leg armature)
- Navy blue leather cord or strip, 15 cm long x 8 mm wide (belt)
- Belt buckle, 1 cm diameter
- Red glass bead, 2 cm long (earring)
- Red glass crystal buttons, 12 mm diameter, 2 pieces (dress sleeves)
- Red glass crystal buttons, 7 mm diameter, 3 pieces (cape)
- Two more lengths of electrical wire, cut to 30 cm and 10 cm (staff)
- Crystal bead, 2 cm diameter (staff topper)
- Glass bead, 1.5 cm diameter (staff accent)
- 2.00 mm crochet hook
Abbreviations
- mr — magic ring
- ch — chain
- sc — single crochet
- inc — increase (2 sc in one stitch)
- dec — decrease (2 sc together)
- slst — slip stitch
- hdc — half double crochet
- dc — double crochet
- tr — treble crochet
- blo — back loop only
- flo — front loop only
- esc — extended single crochet — pull the loop through in two steps instead of one
- popcorn st — 4 dc worked in the same stitch, then pulled together at the top
- (…) — the number in brackets is the stitch count for that round/row
- (…)*N — repeat the indicated stitches in brackets N times
A couple of shorthand marks in the original pattern notes aren’t formally defined by the designer: “w” appears a few times while shaping the dress bodice (rows 1 and 3), and “1m” appears twice in the arm-assembly shoulder decreases. Both consistently count as a single stitch in the row totals, so treat each as “1 sc” at that position unless you’re working from the designer’s reference photos and can match the exact detail shown there.
Head
Crochet in skin colored yarn with a 2.00 mm hook.
Row 1:Into mr 6sc=6sc
Row 2:1inc into each stitch=12sc
Row 3:(1sc,1inc)*6=18sc
Row 4:1sc,1inc,(2sc,1inc)*5,1sc=24sc
Row 5:(3sc,1inc)*6=30sc
Row 6:2sc,1inc,(4sc,1inc)*5,2sc=36sc
Row 7:(5sc,1inc)*6=42sc
Row 8:3sc,1inc,(6sc,1inc)*5,3sc=48sc
Row 9:(7sc,1inc)*6=54sc
Row 10:4sc,1inc,(8sc,1inc)*5,4sc=60sc
Row 11-20:(10 rows)=60sc
Row 21:25sc,1ch skip 1sc,9sc,1ch skip 1sc,24sc=60sc
Row 22:25sc,1sc on 1ch,9sc,1sc on 1ch,24sc=60sc
Row 23:17sc,(2sc,1inc)*3,9sc,(1inc,2sc)*3,16sc=66sc
Row 24-27:(4 rows)=66sc
Row 28:17sc,(2sc,1dec)*3,9sc,(1dec,2sc)*3,16sc=60sc
Row 29:4sc,1dec,(8sc,1dec)*5,4sc=54sc
Row 30:(7sc,1dec)*6=48sc
Row 31:3sc,1dec,(6sc,1dec)*5,3sc=42sc
Row 32:(5sc,1dec)*6=36sc
Row 33:2sc,1dec,(4sc,1dec)*5,2sc=30sc
Row 34:(3sc,1dec)*6=24sc
Row 35:(2sc,1dec)*6=18sc
Row 36:(1sc,1dec)*6=12sc done, cut the yarn.
Attach the 10 mm aqua green safety eyes into the spaces left by the ch1’s you made in round 21.

Ears
Make 2, in skin colored yarn with a 2.00 mm hook.
Row 1:5sc into mr=5sc
Row 2:4sc,1inc=6sc
Row 3:(2sc,1inc)*2=8sc
Row 4:(1sc,1inc)*4=12sc
Row 5:(5sc,1inc)*2=14sc
Row 6:(6sc,1inc)*2=16sc
Row 7:(7sc,1inc)*2=18sc
Row 8:(8sc,1inc)*2=20sc
Row 9:(9sc,1inc)*2=22sc
Row 10-11:(2 rows)=22sc
Row 12:(9sc,1dec)*2=20sc
Row 13:(3sc,1dec)*4=16sc
Row 14:(6sc,1dec)*2=14sc — fold flat and join the two ends together with a single crochet seam to shape the pointed tip.
Row 15:7sc, done, cut the yarn long for sewing. Sew the earrings onto the ears as shown in the photos.
Face Shaping
Embroider the eye whites with 4 strands of white yarn.
Embroider the eyelashes with 2 strands of black yarn.
Embroider the eyebrows on top of the eyes with 2 strands of the hair-colored yarn, about 4sc long.
Embroider the nose by wrapping — 1 row under the eyes, between 2sc — using skin colored yarn.
Sew the ears on at an 8sc distance from the outer ending point of the eyes.

Hair
Crochet in gray yarn with a 2.00 mm hook.
Row 1:Into mr 6sc=6sc
Row 2:1inc into each stitch=12sc
Row 3:(1sc,1inc)*6=18sc
Row 4:(2sc,1inc)*6=24sc
Row 5:(3sc,1inc)*6=30sc
Row 6:2sc,1inc,(4sc,1inc)*5,2sc=36sc
Row 7:(5sc,1inc)*6=42sc
Row 8:3sc,1inc,(6sc,1inc)*5,3sc=48sc
Row 9:(7sc,1inc)*6=54sc
Row 10:4sc,1inc,(8sc,1inc)*5,4sc=60sc
Row 11:(9sc,1inc)*6=66sc
Row 12-17:(6 rows)=66sc
Row 18:30sc, blo:6sc, 30sc
Row 19:32sc, (25ch, from the 2nd ch 24hdc, slst to the side stitch)*2, 32sc — done, cut the yarn.
Now work into the flo stitches of the 6 back-loop-only stitches from round 18. Attach the yarn to the first flo stitch.
Row 1:(36ch, from the 2nd ch 35hdc)*6, slst — done, cut the yarn.

Rest of the Hair
PONYTAIL: crochet 2 pieces.
Row 1:8ch, from the 2nd 7sc,
(61ch, from the yarn 60sc)*6, slst — done, cut the yarn long and join the two ends together.

HAIR DESIGNING: Sew the wig to the head at the pinned marker points, or attach it using fabric glue instead.
Sew the ponytail pieces onto the wig using the reference photos as a guide for placement.

Arms
Make 2. Do not put fiberfill in the arms — place only wire inside.
Row 1:6sc into mr=6sc
Row 2:(1sc,1inc)*3=9sc
Row 3:(2sc,1inc)*3=12sc
Row 4:12sc
Row 5:6sc, 1 popcorn st (4dc in the same stitch, pulled together at the top), 5sc=12sc
Row 6:(2sc,1dec)*3=9sc
Row 7-28:(22 rows)=9sc, done, cut the yarn.

Boots
Crochet in Catania 254 brown yarn with a 2.00 mm hook.
Row 1:8ch, from the 2nd chain: 1inc, 5sc, 3sc in the last chain, then on the other side of the chain: 5sc, 1inc=17sc
Row 2:1inc,6sc,4inc,5sc,1inc=23sc
Row 3:1sc,1inc,7sc,(1sc,1inc)*3,7sc,1inc=28sc
Row 4:blo:28sc
Row 5-7:(3 rows)=28sc — crochet one extra sc here if needed (this can vary with your tension) so you land at the back center. Place the plastic sole piece into the boot at this point.
Row 8:8sc,(1dec,2sc)*3,8sc=25sc
Row 9:8sc,(1dec,1sc)*3,8sc=22sc
Row 10:1dec,6sc,3dec,6sc,1dec=17sc — at this stage, insert the 30 cm wire into the leg and add fiberfill every 2–3 rounds as you go.
Row 11:6sc,2dec,7sc=15sc
Row 12:1inc,13sc,1inc=17sc

Rest of the Boots
Row 13:blo:17sc (after crocheting 2–3 rounds, come back and work 17hdc into the flo stitches left behind for the boot cuff detail)
Row 14-15:(2 rows)=17sc
Row 16:1inc,16sc=18sc (increase should sit at the back center)
Row 17-18:(2 rows)=18sc
Row 19:1inc,17sc=19sc (increase should sit at the back center)
Row 20-21:(2 rows)=19sc
Continue with navy yarn from here, and set the brown yarn aside outside the work (don’t cut it — you won’t need it again on this piece).
Row 22:blo:19sc (after crocheting 2–3 rounds, come back and work 19tr into the flo stitches)
Row 23:1sc,1inc,17sc=20sc (increase should sit at the back center)
Row 24-29:(6 rows)=20sc
Row 30:1dec,1sc,1dec,15sc=18sc (decreases should sit at the back center)
Row 31:1sc,1dec,15sc=17sc (decrease at the back center)
Row 32:9sc,3inc,5sc=20sc (the 3-stitch knee increase should sit at the front)

Rest of the Leg & Leg Assembly
Row 33:7sc,1dec,6sc,1dec,3sc=18sc (decreases on the sides)
Row 34:18sc
Row 35:1sc,1inc,16sc=19sc (increase at the back center)
Row 36-37:(2 rows)=19sc
Row 38:2sc,1inc,16sc=20sc
Row 39-40:(2 rows)=20sc
Row 41:3sc,1inc,16sc=21sc
Row 42-48:(7 rows)=21sc — fasten off at the inner-center part of the leg.
Work 28sc into the flo stitches of round 4 to finish that detail.
Crochet the second leg the same way, but work 12 extra sc at the end (this number may vary slightly with your tension) to bring you round to the inner-center section, ready for assembly.

LEG ASSEMBLY: Hold the two legs with the backs facing you and join them with 3ch.
Row 1:21sc, 3sc on the 3ch, 21sc, 3sc on the 3ch=48sc
Row 2-7:(6 rows)=48sc
Row 8:(6sc,1dec)*6=42sc
Row 9:42sc
Row 10:6sc,1dec,4sc,1dec,13sc,1dec,4sc,1dec,7sc=38sc
Row 11:5sc,1dec,4sc,1dec,12sc,1dec,4sc,1dec,5sc=34sc
REST OF THE LEGS: continue with the skin colored yarn from here.
Row 12-24:(13 rows)=34sc
Arm Assembly
Row 25:7sc, 4sc with arm, 13sc, 4sc with arm, 6sc=34sc
Row 26:7sc, 5sc left from the arm, 13sc, 5sc left from the arm, 6sc=36sc
Row 27:36sc
Place the 25 cm wire into the arms at this section, running it through into the body.

Row 28:7sc,1dec,3sc,1dec,13sc,(1dec,3sc)*2=32sc — decreases should sit at the shoulders
Row 29:6sc,1dec,1sc(at the marker),1dec,10sc,1dec,1sc(at the marker),1dec,2sc=24sc — decreases should sit at the shoulders
Row 30:(4sc,4dec)*2=16sc
Row 31:(4sc,2dec)*2=12sc
Row 32-36:(5 rows)=12sc, done, cut the yarn long for sewing.
Dress
Crochet in Catania 105 white yarn and Catania 124 navy yarn with a 2.00 mm hook.
Row 1:38ch, skip 6ch (this forms a buttonhole), from the 7th chain: 5sc, w, 4sc, w, 10sc, w, 4sc, w, 5sc=40sc, 1ch turn
Row 2:40sc, 1ch turn
Row 3:(6sc,w)*2, 12sc, w, 6sc, w, 6sc=48sc, 1ch turn
Row 4:48sc, 1ch turn
Row 5:8sc,1inc,7sc,1inc,14sc,1inc,8sc,1inc,7sc=52sc, 1ch turn
Row 6:52sc, 6ch turn (buttonhole)
Row 7:8sc, 5ch skip 9sc, (with navy yarn 17sc), with white yarn: 5ch, skip 9sc, 9sc=44sc, 1ch turn
Row 8:14sc, (with navy yarn 17sc), with white yarn 13sc=44sc
Row 9-10:with white yarn: (2 rows)=44sc, 1ch turn
Row 11:with white yarn: 13sc, (with navy yarn 17sc), with white yarn 14sc=44sc, 1ch turn
Row 12:with white yarn: 14sc, (with navy yarn 17sc), with white yarn 13sc=44sc, 6ch turn (buttonhole)
Row 13-15:(3 rows)=44sc, 1ch turn
Row 16:44inc=88sc, 1ch turn
Row 17:(1sc,1inc)*44=132sc — join the two ends with a slst, 2ch.
From this round onward, continue in “esc” (extended single crochet) — pull the loop through the stitch in two steps instead of the usual single motion — to give the skirt a slightly firmer, more textured drape.
Row 18:132esc, slst, 2ch
Row 19-26:(8 rows)=132esc, slst, 2ch
Continue with mustard color;
Row 27-28:(2 rows)=132esc, done, cut the yarn.

Dress Sleeve
Attach the yarn at the sleeve armhole opening, starting from the inner center.
Row 1:Pull up 18sc, slst, 1ch turn to the opposite side. (To keep both sleeves looking the same, turn in the opposite direction at the end of every row.)
Row 2:1inc,16sc,1inc=20sc, slst, 1ch turn to the other side
Row 3-20:(13 rows)=20sc, slst, 1ch turn to the other side
With mustard color;
Row 21:flo:(4hdc,1hdcinc)*4=24hdc, slst, 1ch
Row 22:24hdc, slst, 1ch
Continue with white yarn;
Row 23:24sc, slst, 1ch
With mustard colored yarn;
Row 24:24hdc, done, cut the yarn.
Center the sleeve and attach the yarn to the flo stitches of round 21: 14ch, skip 6ch (buttonhole), 8hdc, done, cut the yarn. Sew the 1 cm red glass buttons onto the sleeves.

Glue the 15 cm navy blue leather belt onto the dress using fabric adhesive.
Cape
Crochet in Catania 105 white yarn with a 2.00 mm hook.
Row 1:19ch, from the 2nd chain 18sc, 1ch turn
Row 2:18inc=36sc, 1ch turn
Row 3-6:(4 rows)=36sc, 1ch turn
Row 7:(5sc,1inc)*6=42sc, 1ch turn
Row 8:(6sc,1inc)*6=48sc, 1ch turn
Row 9:(7sc,1inc)*6=54sc, 1ch turn
Row 10:(2sc,1inc)*18=72sc, 1ch turn
Row 11:72sc, 1ch turn
Row 12:(3sc,1inc)*18=90sc, 1ch turn
Row 13:(4sc,1inc)*18=108sc, 1ch turn
Row 14:108sc, 1ch turn
Continue with mustard yellow yarn;
Row 15:107hdc, 3hdc into the last chain, then make 13hdc back up the other side, done, cut the yarn.
Attach mustard yarn to the beginning of the collar on the other side.
Row 1:13hdc, done, cut the yarn.

Rest of the Cape
Attach the mustard-colored yarn between the first stitches of the neckline (see photo 1).
Row 1:18slst, done, cut the yarn.
Attach the yarn again at the beginning of the 3rd row of the neckline (see photo 4).
18slst, done, cut the yarn.
Attach the yarn to the 4th stitch of the slst worked between the stitches;
Row 1:16ch, skip 6ch (buttonhole), 10hdc, slst, done, cut the yarn.
Repeat the same process on the other side of the neckline.

Attach the white yarn to the beginning of the collar;
Row 1:18sc, 1ch turn
Row 2-3:(2 rows)=18sc, (6ch, slst — buttonhole), done, cut the yarn.
Sew the 7 mm red glass bead buttons onto the cape using the reference photos as a guide.
Wand
You’ll need the 30 cm and 10 cm lengths of electrical wire, mustard yellow yarn, red yarn, the 2 cm diameter crystal bead, and the 1.5 cm diameter glass bead.
Bend the 10 cm wire into a loop and wrap it tightly in mustard yellow yarn. Thread the 2 cm crystal bead onto the loop before closing it, then continue wrapping to secure the bead in place at the center of the loop.
Wrap the 30 cm wire (the staff shaft) in red yarn from end to end, then bind the wrapped loop-and-bead topper onto one end using more mustard yarn, finishing with the small 1.5 cm glass bead as an accent just below the crystal.

Tips for a Polished Finish
- This pattern doesn’t include its own abbreviations key, and a couple of shorthand marks (“w”, “1m”) aren’t formally defined — when in doubt, lean on the step photos rather than guessing, especially around the dress bodice and shoulder decreases.
- Keep the arms and legs wire-only where the pattern says so (no fiberfill in the arms) — over-stuffing a wired limb makes it much harder to pose the finished doll later.
- Wrap the wand’s wire ends carefully and consider a dab of glue at the finish — a small accessory like this gets handled the most and benefits from a secure finish.
- Pin the wig in place fully before sewing anything down. With this much hair to design (wig cap, ponytail pieces, bangs), it’s much easier to adjust with pins than with stitches.
Frequently Asked Questions
Is this an official licensed pattern?
No — this is an unofficial, fan-made design inspired by a character from a popular fantasy anime. It isn’t affiliated with, endorsed by, or licensed from the original rights holders; it’s simply a handmade homage, shared for personal, non-commercial crafting.
What do the “w” and “1m” marks in the dress and arm rows mean?
The original pattern doesn’t define these — each one simply counts as a single stitch in the row totals. Treat “w” as a regular sc while shaping the dress bodice, and “1m” as a sc worked at the marked point during the shoulder decreases, and check the step photos if you want to match the exact look shown.
Why does the pattern say not to stuff the arms with fiberfill?
The arms are wire-only by design so the doll can hold her staff and strike a pose. Fiberfill would bulk the arms up and make the wire much harder to bend into a natural position afterward.
Can I use a different eye color or yarn brand?
Absolutely — the aqua-green eyes and gray hair give this doll her signature look, but any 10mm safety eyes and any fine mercerized cotton (matched to a 2.00mm hook) will work. Just keep your tension tight so the wire armature doesn’t show through the stitches.
Conclusion
Between the braided pigtails, the layered cape and dress, and that tiny crystal-topped staff, this elf mage doll is a real project — but every fiddly accessory is what makes her feel like a character rather than just a doll. Take the wig and wand slowly, and she’ll reward the patience. If you make your own, I’d love to see her — share a photo or drop a comment below with how yours turned out!