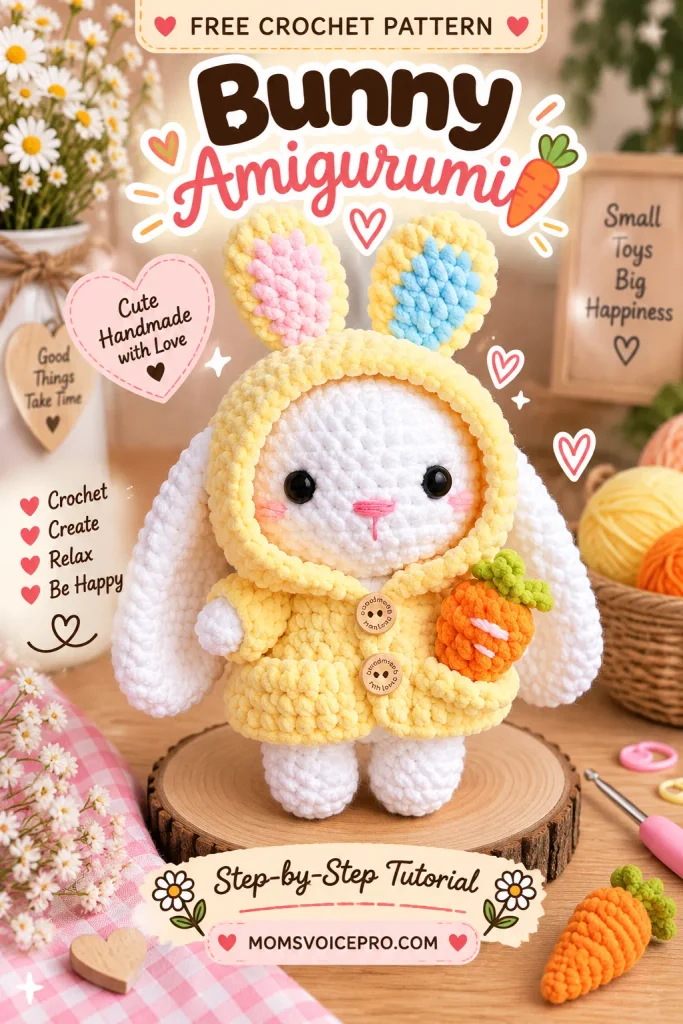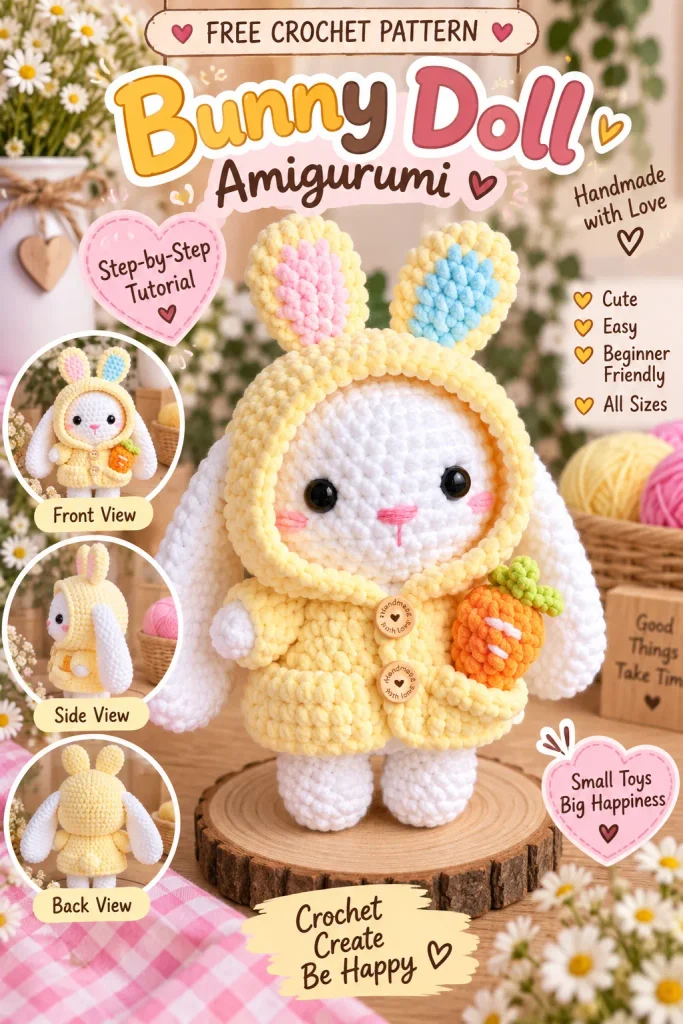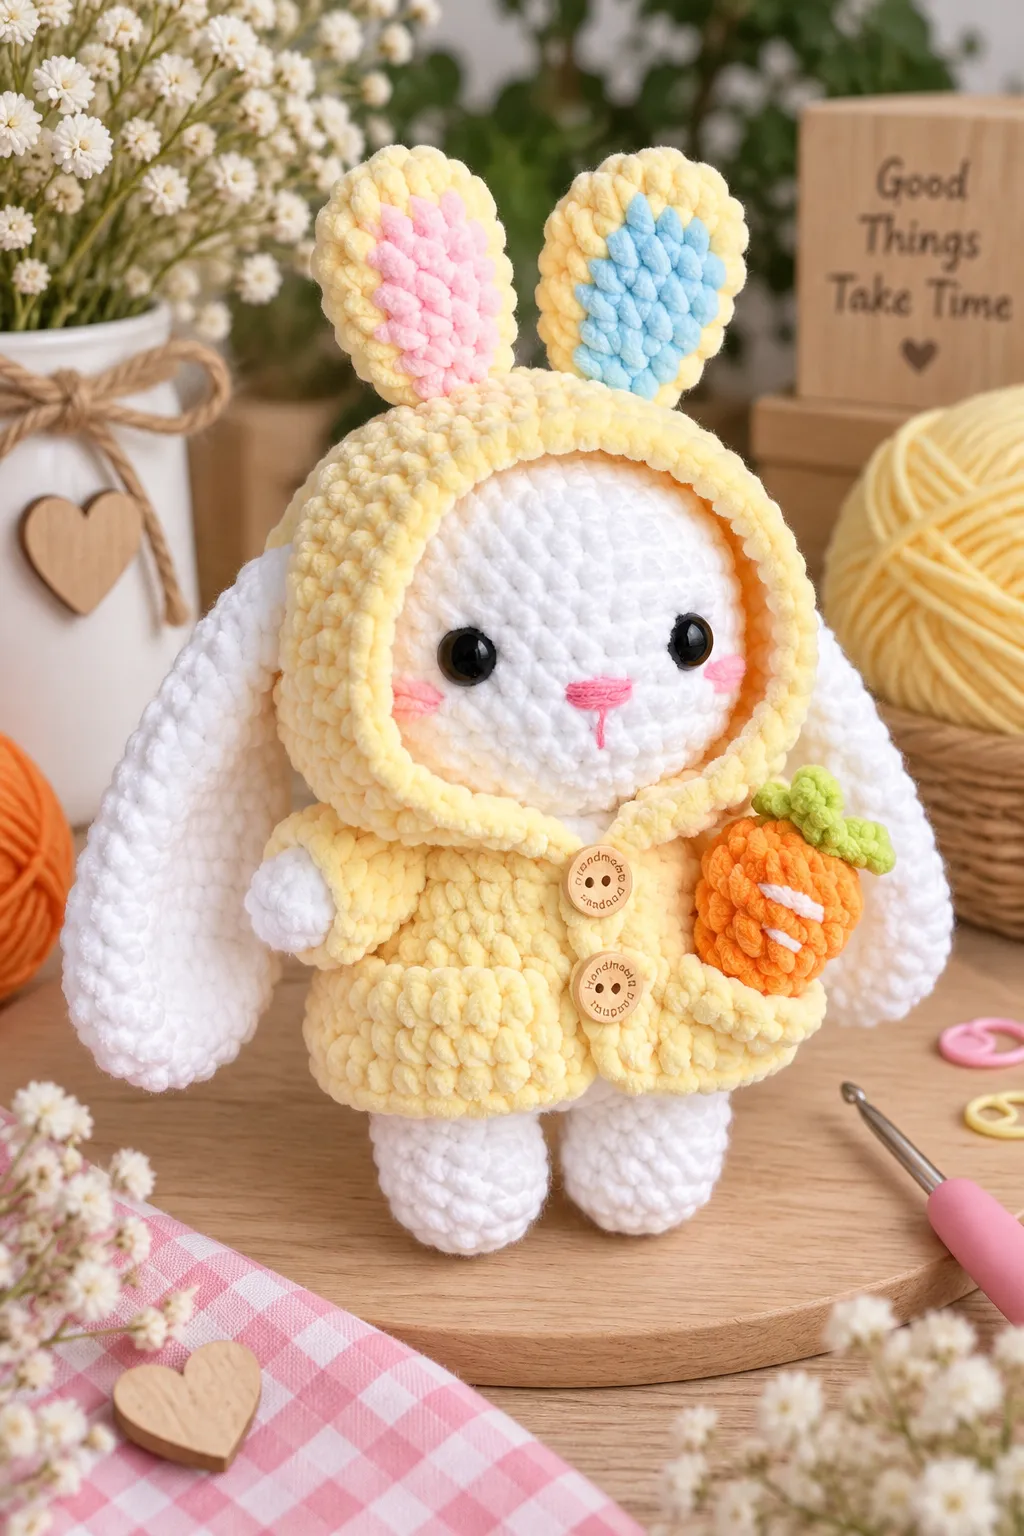
Meet Bunnitty, an adorable soft amigurumi wearing a cozy hooded outfit. The supplied pattern combines a white crocheted face and body with a colorful hoodie, cute buttons, hood ears and a tiny carrot accessory.
Table of Contents
AbbreviationsMaterialsHeadBunny EarsKitty Ears & ArmsBodyHoodie Part 1Kitty HoodieHoodie Part 2Hoodie EarsAccessory BagsMelody x ChickenChicken x EggFinishing & AssemblyTips for a Polished FinishFAQConclusionAbbreviations
- Mr – magic ring, or make ch 2 and sc into the first ch.
- Sc – single crochet.
- Inc – increase.
- Dec – invisible decrease.
- Slst – slip stitch.
- Ch – chain.
- Hdc – half double crochet.
- DC – double crochet.
- Trc – treble crochet.
- BLO – back loop only.
- FLO – front loop only.
- BB – bobble stitch.
- Color – change the color, e.g. black 2sc, white 3sc.
- (…)*n – repeat stitches in brackets n times.
Materials
- 4–5 mm crochet hook; the designer uses 5 mm.
- Himalaya Dolphin Baby yarn, less than one skein for each color.
- Yarn Art, Premier Parfait or other suitable brands may also be used depending on location.
- Stitch marker.
- Scissors.
- Glue.
- Fiberfill.
- Safety eyes or felt.
- Tapestry needle.
The pattern notes that a bigger yarn and hook make the character bigger, while smaller yarn and hook make him smaller.
Head
Use white yarn and stuff while crocheting.
- R1: Mr 8sc (8)
- R2: 8inc (16)
- R3: (sc, inc)*8 (24)
- R4: (3sc, inc)*6 (30)
- R5: 2sc, inc, (4sc, inc)*5, 2sc (36)
- R6: (5sc, inc)*6 (42)
- R7–12: 42sc (42)
- R13: (5sc, dec)*6 (36)
- R14: 2sc, dec, (4sc, dec)*5, 2sc (30)
- R15: (3sc, dec)*6 (24)
- R16: (2sc, dec)*6 (18)
- Stuff the head fully, fasten off and cut the yarn.
- Insert 14 mm plastic safety eyes between R10–11, 6 stitches apart.
Face Details
- For the kitty yellow nose, use yellow yarn and sew around 2 stitches in the middle of the two eyes on R11.
- For the kitty whiskers, use black embroidery thread and sew 3 lines on R10–12, one stitch beside the eye.
- For the bunny T-shaped nose, use pink embroidery thread in the middle of the two eyes on R11, following the photo.
- For pink cheeks, use pink thread/yarn and sew beside the eyes.

Bunny Ears ×2
Use white yarn. The ears do not need to be stuffed.
- R1: mr 8sc (8)
- R2: 8inc (16)
- R3: (sc, inc)*8 (24)
- R4–7: 24sc (24)
- R8: (4sc, dec)*4 (20)
- R9–11: 20sc (20)
- R12: (3sc, dec)*4 (16)
- R13–14: 16sc (16)
- R15: (2sc, dec)*4 (12)
- R16–17: 12sc (12)
- R18: (2sc, dec)*3 (9)
- R19: 9sc (9)
- R20: (sc, dec)*3 (6)
- Fasten off and leave a long yarn tail. Sew on R8–9, around 5 stitches from the eye.

Kitty Ears & Arms
Kitty Ears ×2
- Use white yarn.
- R1: Mr 4sc (4)
- R2: 4inc (8)
- R3: (Sc, inc)*4 (12)
- R4: (2sc, inc)*4 (16)
- R5: 16sc (16)
- Fasten off and leave a long tail. Sew on R3–7.
- Do not stuff the ears.
Arms ×2
- Use white yarn.
- R1: Mr 6sc (6)
- R2: (2sc, inc)*2 (8)
- R3–7: 8sc (8)
- Stuff the arms lightly.
- Fasten off and leave a long tail. Sew on R16.

Body

- First leg: R1 Mr 6sc (6); R2 6inc (12); R3–5 12sc (12). Fasten off.
- Second leg: repeat R1–5, then continue by making 2 chains.
- Join the first leg with a sc; this is the first sc of R6.
- R6: 12sc first leg + 2sc first side of chains + 12sc second leg + 2sc other side of chains (28)
- R7: 3sc, inc, (6sc, inc)*3, 3sc (32)
- R8–13: 32sc (32)
- R14: (14sc, dec)*2 (30)
- R15: 30sc (30)
- R16: (3sc, dec)*6 (24)
- R17: (2sc, dec)*6 (18)
- Fasten off and leave a long tail to sew with the head. Stuff the body chubby.
Hoodie Part 1 – Bunny Hoodie

The hoodie is made by sewing together Parts 1 and 2: the “hat” piece and the “shirt” piece. Use yellow yarn for the bunny hoodie.
- R1: Mr 8sc (8)
- R2: 8inc (16)
- R3: (sc, inc)*8 (24)
- R4: (2sc, inc)*8 (32)
- R5: (3sc, inc)*8 (40)
- R6: 2sc, (5sc, inc)*6, 2sc (46)
- R7: 6sc, 34hdc, ch 2, turn
- R8–9: 34hdc, ch 2, turn
- R10: 3hdc, ch 7, skip 6 stitches, 16hdc, ch 7, skip 6 stitches, 3hdc, ch 2, turn
- R11: 3hdc, 14sc, dec, 14sc, 3hdc, ch 2, turn
- R12: 35hdc, ch 2, turn
- R13–14: 3dc, 3hdc, 23sc, 3hdc, 3dc, ch 2, turn
- R15: 2dc, 2hdc, 27sc, 2hdc, 2dc
- Sc across the line from R15, 14, 13 and downward, increasing where needed to make 40 stitches.
Kitty Hoodie

Use pink yarn.
- R1: Mr 8sc (8)
- R2: 8inc (16)
- R3: (sc, inc)*8 (24)
- R4: (2sc, inc)*8 (32)
- R5: (3sc, inc)*8 (40)
- R6: 2sc, (5sc, inc)*6, 2sc (46)
- R7: 6sc, 34hdc, ch 2, turn
- R8–9: 34hdc, ch 2, turn
- R10: 6hdc, ch 9, skip 8 stitches, 6hdc, ch 9, skip 8 stitches, 6hdc, ch 2, turn
- R11: 3hdc, 14sc, dec, 14sc, 3hdc, ch 2, turn
- R12: 35hdc, ch 2, turn
- R13–14: 3dc, 3hdc, 23sc, 3hdc, 3dc, ch 2, turn
- R15: 2dc, 2hdc, 27sc, 2hdc, 2dc
- Follow the bunny hoodie instructions for the smooth finishing line and sewing.
Hoodie Part 2

- Use the suitable yarn color.
- R1: Make 41 chains; from the second chain: 5sc, ch 6, skip ch 6, 18sc, ch 6, skip ch 6, 5sc, ch 1, turn.
- R2–4: 40hdc, ch 1, turn.
- R5: 40hdc.
- Sc around the corners for a smoother top line.
- Cut and hide the yarn, or leave a tail to sew with the hat piece.
Sleeves
- Insert the hook on a chain in the R1 chain-6 gaps and sc around to create the sleeve.
- R1: 6sc + sc + 6sc + sc (14)
- R2–4: 14sc (14)
- Cut and hide the yarn.
The designer suggests stretching the pieces with your hands so the hoodie is softer and easier to put on. One or two cute buttons can be glued on one side, with larger button holes made on the other side.
Hoodie Ears

Bunny – Yellow Yarn
- R1: mr 7sc (7)
- R2: 7inc (14)
- R3: sc, pink 3sc, yellow 10sc (14)
- R4: sc, pink 4sc, yellow dec, 5sc, dec (12)
- R5–6: sc, pink 4sc, yellow 7sc (12)
- R7: sc, pink sc, dec, sc, yellow sc, dec, 2sc, dec (9)
- R8: sc, pink dec, sc, yellow, dec, sc, dec (6)
- Fasten off; sew on R11 of the hoodie, 1–2 stitches apart. Do not stuff.
Melody (Kitty) – Pink Yarn
- R1: mr 7sc (7)
- R2: 7inc (14)
- R3–4: 14sc (14)
- R5: (5sc, dec)*2 (12)
- R6: 12sc (12)
- R7: (2sc, dec)*3 (9)
- Stuff lightly; sew on R10–11 of the hoodie.
Frog – Green Yarn
- R1: mr 6sc (6)
- R2: 6inc (12)
- R3: 12sc (12)
- Fasten off and sew on R11. Do not stuff.
Accessory Bags

Carrot – Orange Yarn
- R1: mr 4sc (4)
- R2: 4inc (8)
- R3: 8sc (8)
- R4: (sc, inc)*4 (12)
- R5: 12sc (12)
- R6: (4sc, dec)*2 (10)
- R7: 5dec (5)
- Stuff and weave in the yarn.
- Use cream yarn to sew two lines on the carrot.
Leaf – Green Yarn
- Make 3 chains, then from the second chain crochet 2 slst. Repeat 2 more times. Leave a long tail and sew it on top of the carrot.
- An orange yarn strap can be added, or the carrot can be placed in the hoodie pocket.
Hoodie’s Pocket
- R1: 7 chains; from the second chain crochet 6sc, ch 1, turn.
- R2: 6sc, ch 1, turn.
- R3: 6sc.
- Leave a long tail and sew onto the shirt.
Melody x Chicken

Chicken – Yellow Yarn
- R1: mr 7sc (7)
- R2: 7inc (14)
- R3–6: 14sc (14)
- R7: 7dec (7)
- Stuff and weave in the yarn.
- Use black embroidery thread for the eyes on R4, 2 stitches apart, or use 6–8 mm safety eyes.
- Use orange yarn for the beak between the eyes.
Bunny Cover – Darker Pink
- R1: mr 8sc (8)
- R2: 8inc (16)
- R3: (3sc, inc)*4 (20)
- R4–7: 20sc (20)
- Fasten off and leave a long tail to sew around the chicken.
Bunny Ears ×2
- R1: Mr 6sc (6)
- R2–4: 6sc (6)
- Do not stuff. Sew onto the bunny cover; one ear standing and one ear laying.
- Add a long pink thread as the bag strap.
Chicken x Egg

Chicken x Egg – White Yarn
- R1: mr 6sc (6)
- R2: 6inc (12)
- R3: (white sc, yellow sc, white sc, yellow inc)*3 (15)
- R4: (4sc, inc)*3 (18)
- R5: 18sc (18)
- R6: (yellow 2sc, white sc)*6 (18)
- R7: 18sc (18)
- R8: 9dec (9)
- Stuff fully and weave in the yarn.
- Insert 9 mm safety eyes on R4–5, 3 stitches apart.
- For the wing, insert the hook on R5–6 beside the eyes, crochet 3sc, then cut and hide the yarn.
Bow – Darker Pink
- Make 4 chains and crochet into the first chain: 2dc, chains 3, slst, chains 3, 2dc, chains 3, slst.
- Leave a long tail, roll the middle to form the bow, then glue or sew it onto the hoodie.
Finishing & Assembly
- Sew the head securely to the body using the long tail left for sewing.
- Attach the arms at R16.
- Attach the selected hoodie ears according to their specified rounds.
- Sew Hoodie Part 1 and Part 2 together stitch-for-stitch along the prepared smooth edge.
- Put the hoodie on the finished character and use the buttons/holes to close the shirt.
- Add the hoodie pocket and carrot accessory.
- Choose the bunny, kitty or frog hoodie-ear variation.
- Add the optional Melody x Chicken or Chicken x Egg accessory.

Tips for a Polished Finish
- Stuff the head fully and shape it while crocheting.
- Do not stuff the bunny ears or kitty ears.
- Stuff the arms lightly.
- Stuff the body well so the finished character keeps a rounded shape.
- Stretch the hoodie pieces gently with your hands before putting them on.
- Keep the 40-stitch smooth edge on Hoodie Part 1 so it is easier to match with Part 2.
- Use the supplied photographs as the guide for face placement, ears, buttons and accessories.
FAQ
What yarn and hook size does Bunnitty use?
Can I change the finished size?
Which hoodie ears can I make?
Do I stuff the hoodie ears?
What accessories are included?
Conclusion
Bunnitty with Hoodie is a playful amigurumi project with lots of customization. Start with the head, ears, arms, legs, tail and body, then build the hoodie and choose the bunny, kitty or frog ear style. Finish with buttons, the pocket and one of the tiny accessories for a charming handmade character.